 Intermediate
The Ghostly Portrait of Galvanic Ink
Learn how to display old Victorian photos on Inky Impression, adding a subtle but spooky twist to your seasonal decor.
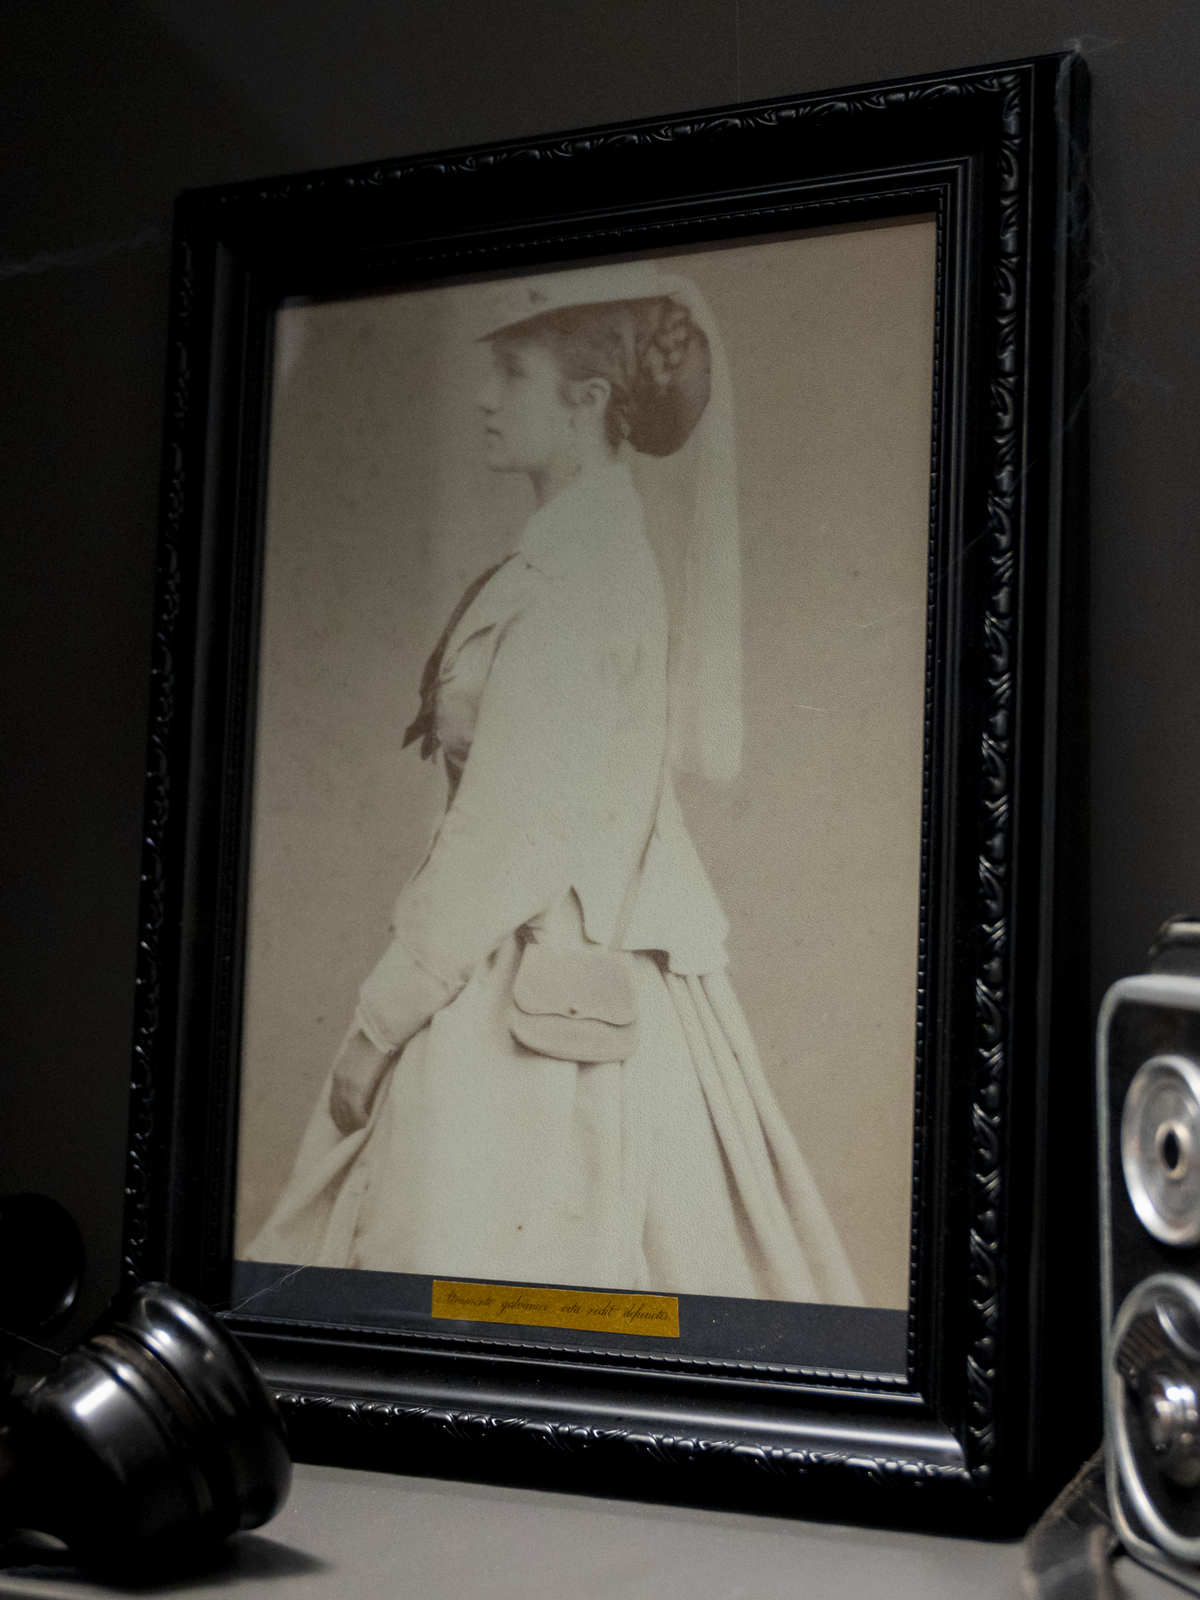
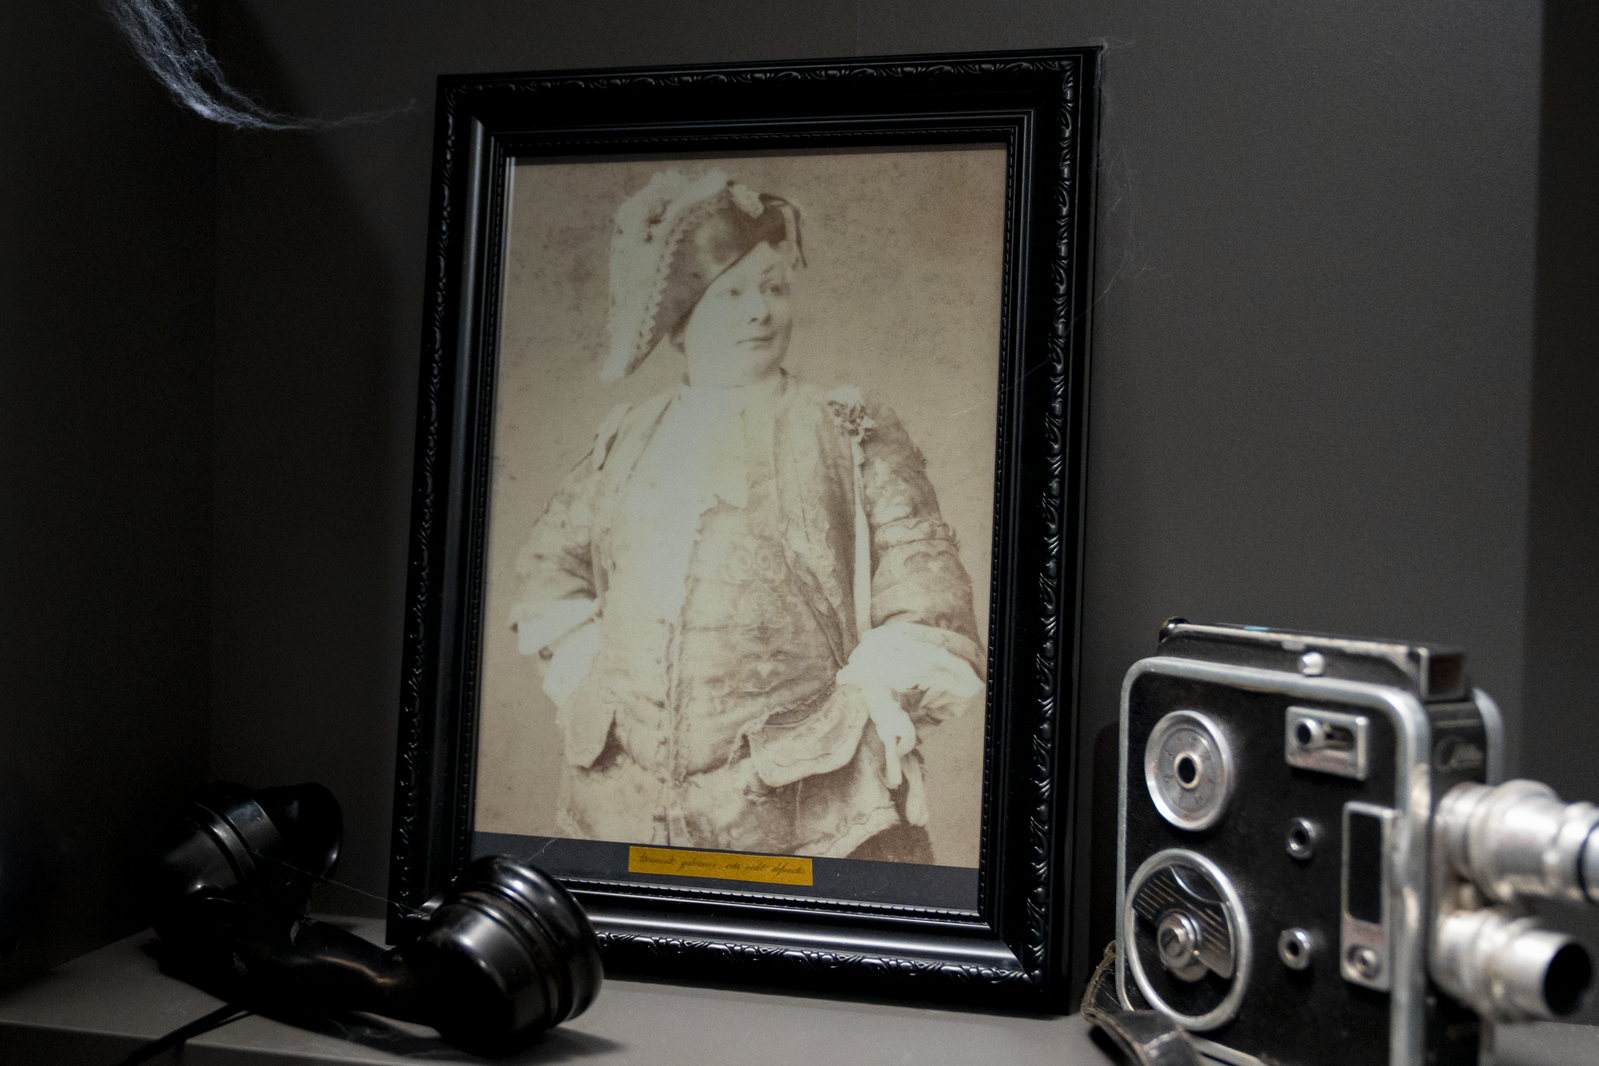
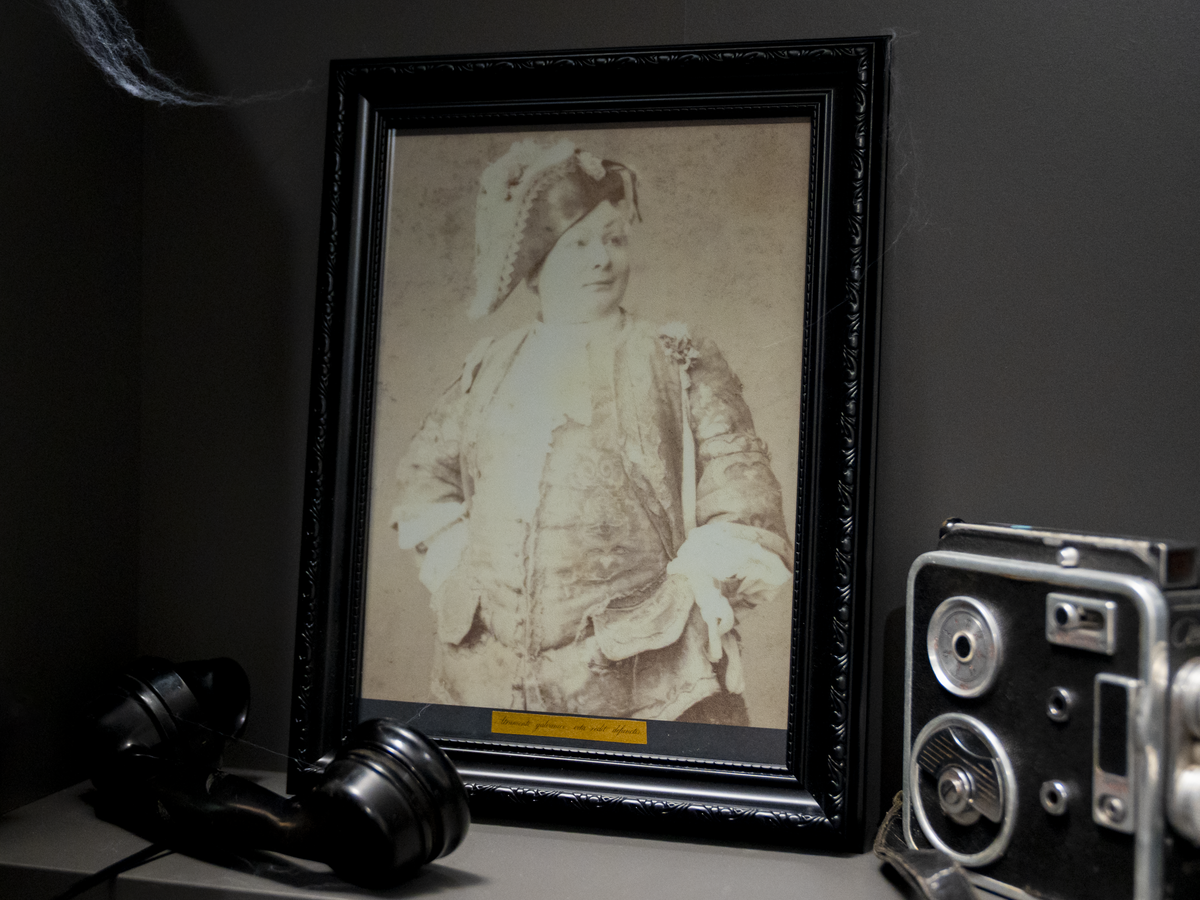
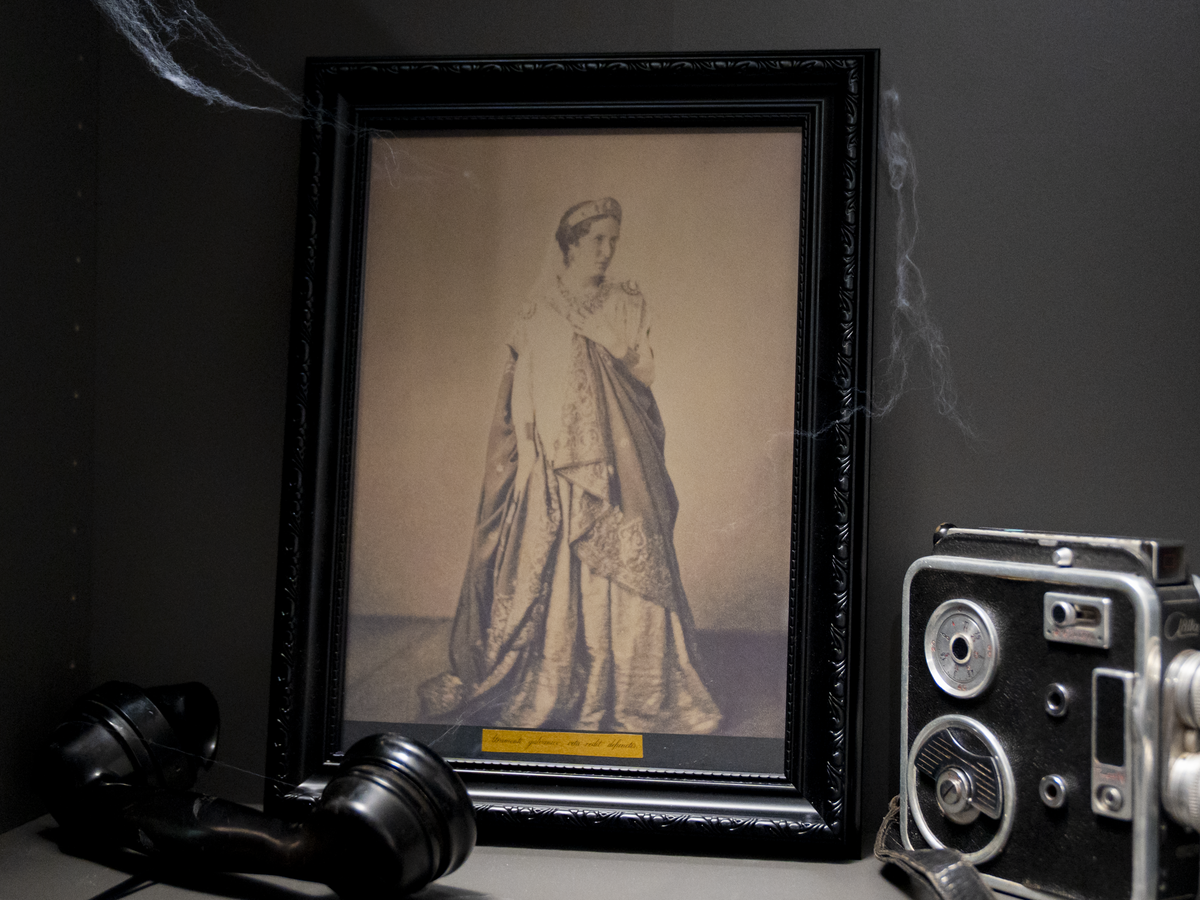
Early portrait photography, with its random over-exposure, faded colours and awkwardly formal poses, is kind of effortlessly creepy. Electronic paper that updates itself is also a pretty spooky concept, so let's combine both into a classy, subtle Halloween project to intrigue and unnerve your household.
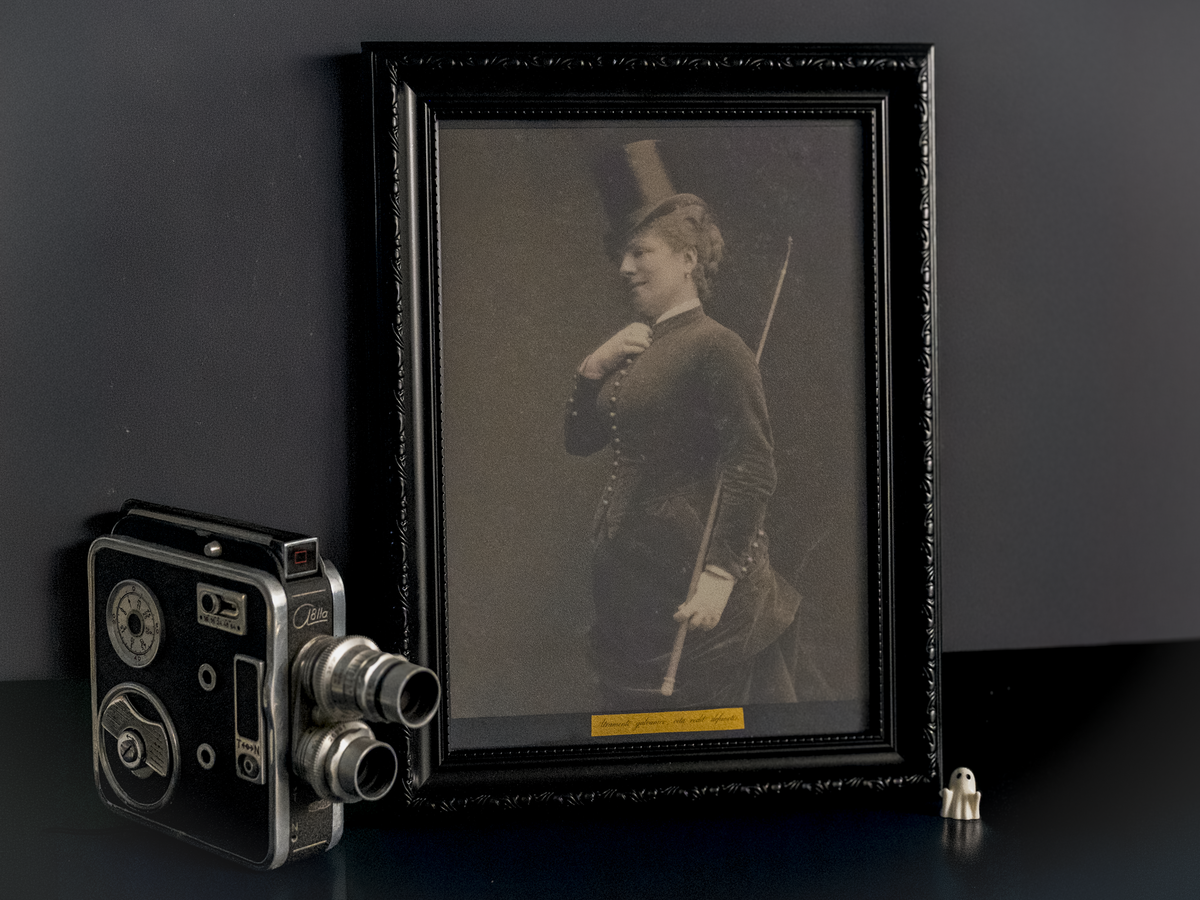
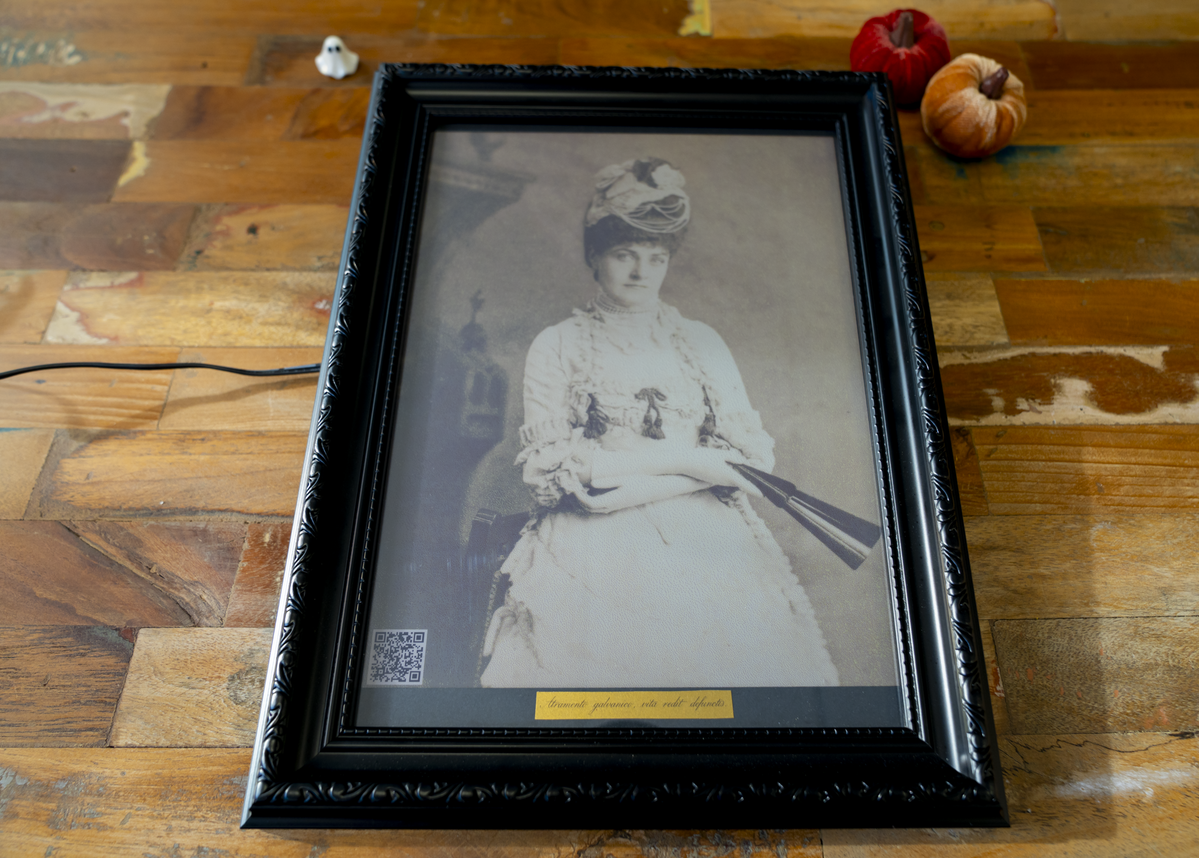
In this guide we'll be building Effigies Atramenti Galvanici, the Ghostly Portrait of Galvanic Ink. It's a cursed magic photo frame that displays old Victorian photos on an Inky Impression E-Ink display.
We'll start by downloading and displaying a random image, then we'll add some PIL (Python Imaging Library) functions to auto-crop the images to display nicely. We'll add a QR code that you can scan for more info about each portrait. And lastly we'll show you how we framed our Inky to make it look like an actual picture.
About the V&A
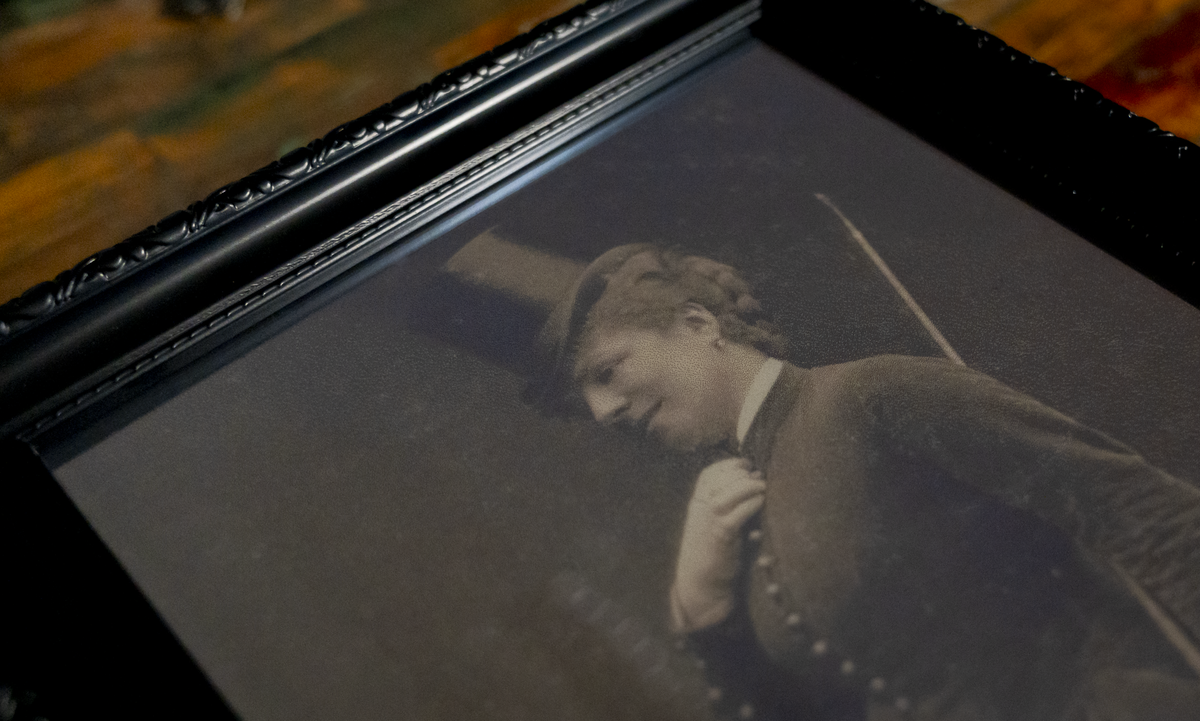
The Victoria & Albert Museum in London holds one of the world's largest collections of photographs, including thousands of Victorian-era portraits. Their Collections API lets anyone access historical images programmatically - providing a stream of interesting faces (and fabulous hats) for your display.
You can browse the collection yourself here:
The API is free for personal use and doesn't require authentication, making it ideal for projects like this.
Many museums have great APIs - we also found a lot of old portraits/photographs in the Metropolitan Museum of Art's collection. We particularly enjoyed the V&A one though as it contains lots of theatrical photographs, featuring amazing costumes.
What you'll need
- A Raspberry Pi - any model with a 40-pin header. We're using a Pi 3 A+.
- A microSD card and a suitable power supply for your Pi.
- An Inky Impression. We'll be using the 13.3" version, but the code should work on any of them.
You'll need to have connected Inky Impression to your Pi and installed the inky library before following the steps below. Instructions on how to do that can be found in our Getting Started guide:
We're connecting to our Pi 'headlessly' using SSH but you can plug in a keyboard, mouse and display if you prefer.
You don't need the latest, greatest Raspberry Pi 5 to drive Inky Impression - older versions will work perfectly well. We're using a Raspberry Pi 3 A+ in this project, which is affordable, available, and has less rigorous power requirements than newer versions.
Displaying a portrait
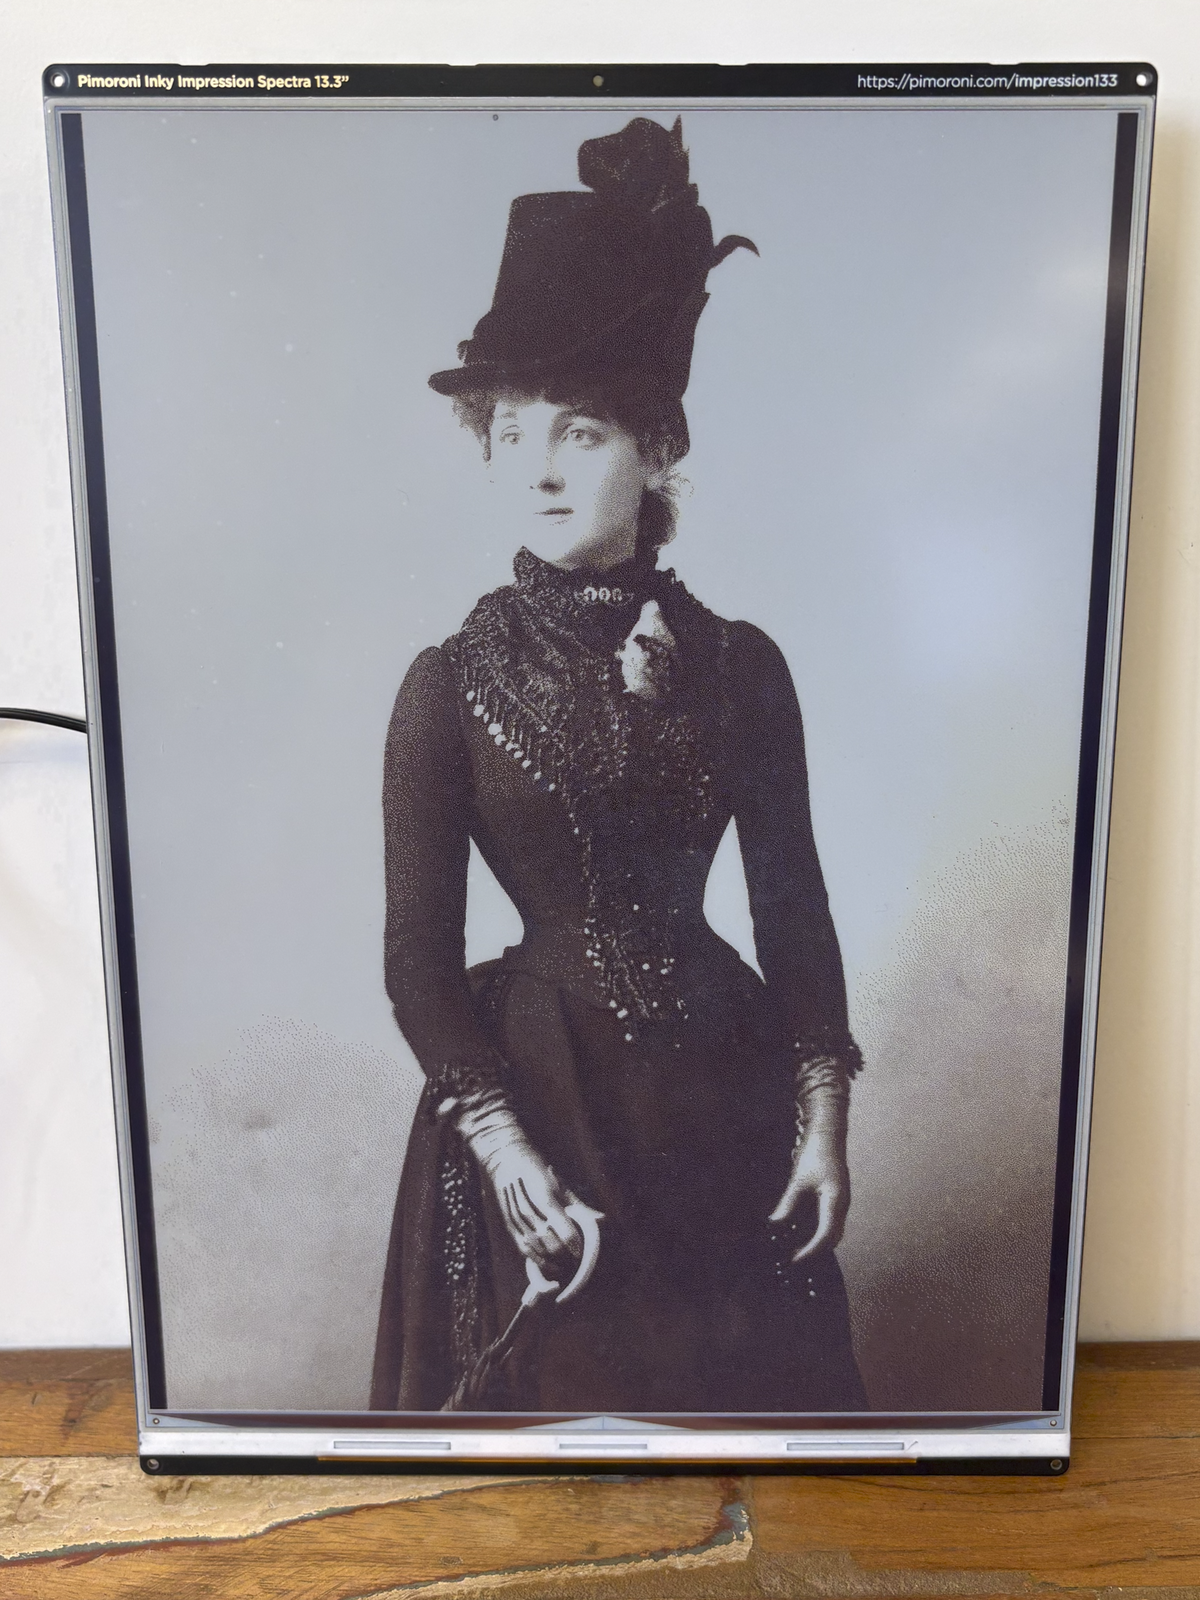
Let's start by downloading a random Victorian from the V&A API and showing them on Inky Impression.
If you don't see one already, open up a terminal prompt. First, you'll need to activate your virtual environment - if you're using the one set up by our Inky installer that looks like this:
source ~/.virtualenvs/pimoroni/bin/activate
Then open up a blank file with the nano text editor:
nano victorian-portrait-vam.py
Copy and paste the following code into the new file (it's 'Ctrl-X', 'Y' and then 'Enter' to save and exit the file when you're done).
"""Download a Victorian portrait from the V&A and display it on Inky."""

import io
import random

import requests
from PIL import Image, ImageOps

from inky.auto import auto

VAM_API = "https://api.vam.ac.uk/v2/objects/search"
SEARCH_TERM = "portrait"
DATE_BEGIN = 1837
DATE_END = 1901
PAGE_SIZE = 100
MAX_ATTEMPTS = 20
IIIF_IMAGE_SIZE = "!1600,1600"  # Requested image size for V&A IIIF server
ALLOWED_OBJECT_TYPES = {
    "photograph",
    "painting",
}

inky = auto()


def search_portraits(page):
    """Fetch portraits of selected object types made between DATE_BEGIN and DATE_END."""
    response = requests.get(
        VAM_API,
        params={
            "q": SEARCH_TERM,
            "kw_object_type": sorted(ALLOWED_OBJECT_TYPES),
            "year_made_from": DATE_BEGIN,
            "year_made_to": DATE_END,
            "images_exist": "true",
            "images": "true",
            "data_profile": "full",
            "page": page,
            "page_size": PAGE_SIZE,
        },
        timeout=20,
    )
    response.raise_for_status()
    return response.json()


def get_random_portrait():
    """Find and return a random portrait image URL and its V&A record."""
    print(f"Searching the V&A for {SEARCH_TERM!r}...")
    first_page = search_portraits(1)
    page_count = first_page["info"]["pages"]
    page = random.randint(1, page_count)

    # Pick a random page first, then a random portrait from that page.
    results = first_page if page == 1 else search_portraits(page)
    records = results.get("records", [])
    random.shuffle(records)

    for record in records[:MAX_ATTEMPTS]:
        image_base = record.get("_images", {}).get("_iiif_image_base_url")
        if not image_base:
            continue

        image_info = requests.get(f"{image_base}info.json", timeout=10)
        if not image_info.ok:
            continue
        dimensions = image_info.json()
        if dimensions["height"] > dimensions["width"]:
            return f"{image_base}full/{IIIF_IMAGE_SIZE}/0/default.jpg", record

    raise RuntimeError("No usable portrait images found")


image_url, record = get_random_portrait()
title = record.get("_primaryTitle", "Untitled")
print(f"Downloading {title!r}: {image_url}")

# Download and decode the selected image as RGB for consistent processing.
response = requests.get(image_url, timeout=20)
response.raise_for_status()

image = Image.open(io.BytesIO(response.content)).convert("RGB")
# Fill the portrait canvas, then rotate for the landscape panel.
width, height = inky.resolution
image = ImageOps.fit(image, (height, width), method=Image.LANCZOS)
image = image.rotate(90, expand=True)

# Send the finished image to the display.
inky.set_image(image)
inky.show()
This script does three things:
- Search the V&A API for images
- Pick a random portrait that's taller than it is wide (so it fits nicely)
- Display it on Inky rotated for the landscape panel
The V&A API search works by sending filter parameters. The search_portraits() function requests objects that match:
q: The search term ("portrait")kw_object_type: Only photographs and paintingsyear_made_fromandyear_made_to: Only items from our selected time period (1837-1901)images_existandimages: Must have images available to downloaddata_profile: Request full metadata so we get everything about each itempage_size: Break results into pages (100 per page) so we can pick a random one
This search returns over 25,000 results across the V&A's collection. Randomly sampling from different pages means you should get a varied selection of portraits displayed.
Now we can run the script with:
python victorian-portrait-vam.py
Each time the script is run you'll get a different Victorian.
Cropping the borders
After you've run this a few times, you might find that you come across photos with black and white backgrounds from when they were scanned in. We found these to be a bit distracting, so we added some new functions to detect when a photo has unwanted borders and crop them out.
As backgrounds tend to be one solid (or mostly solid) colour, it's possible to do this programmatically. The actual photograph has all sorts of interesting variation - eyes, mouths, fabric textures and so on. So if we scan inwards from each edge we can look for the change from uniform border to actual content and crop the photo there.
Open the example using the nano text editor again:
nano victorian-portrait-vam.py
You'll need to add the two new functions below, alongside the other functions:
def crop_borders(image):
    """Remove uniform borders from all edges of the image."""
    width, height = image.size
    pixels = image.load()

    # Scan from top down: find the first row that's not uniform
    top = height
    for y in range(height):
        if not is_mostly_uniform(pixels, width, y, "row"):
            top = y
            break

    # Scan from bottom up: find the last row that's not uniform
    bottom = -1
    for y in range(height - 1, -1, -1):
        if not is_mostly_uniform(pixels, width, y, "row"):
            bottom = y
            break

    # Scan from left: find the first column that's not uniform
    left = width
    for x in range(width):
        if not is_mostly_uniform(pixels, height, x, "col"):
            left = x
            break

    # Scan from right: find the last column that's not uniform
    right = -1
    for x in range(width - 1, -1, -1):
        if not is_mostly_uniform(pixels, height, x, "col"):
            right = x
            break

    # Crop to the content area if we found all four edges
    if top <= bottom and left <= right:
        return image.crop((left, top, right + 1, bottom + 1))
    return image


def is_mostly_uniform(pixels, size, index, direction, threshold=10):
    """Check if a row or column is mostly one color (uniform = likely a border)."""
    if direction == "row":
        uniform = sum(1 for x in range(size) if max(pixels[x, index]) - min(pixels[x, index]) <= threshold)
    else:  # column
        uniform = sum(1 for y in range(size) if max(pixels[index, y]) - min(pixels[index, y]) <= threshold)

    UNIFORM_THRESHOLD = 0.98  # 98%: if 98%+ of row/col is one color, it's a border
    return uniform > size * UNIFORM_THRESHOLD
Then at the bottom, add this line after downloading the image:
image = crop_borders(image) # Remove borders before fitting to canvas
Then save the file and run it again.
This uniformity method is a fairly crude method of figuring out where the borders start and end and doesn't allow for the variance in composition of all historical images. We still saw the occasional bit of border, but these additions seem to do a decent job of cropping out large areas of artificial looking white or black.
The 98% uniformity threshold is quite conservative, if you want to try cropping more of the image you could try reducing this number.
Adding a QR code
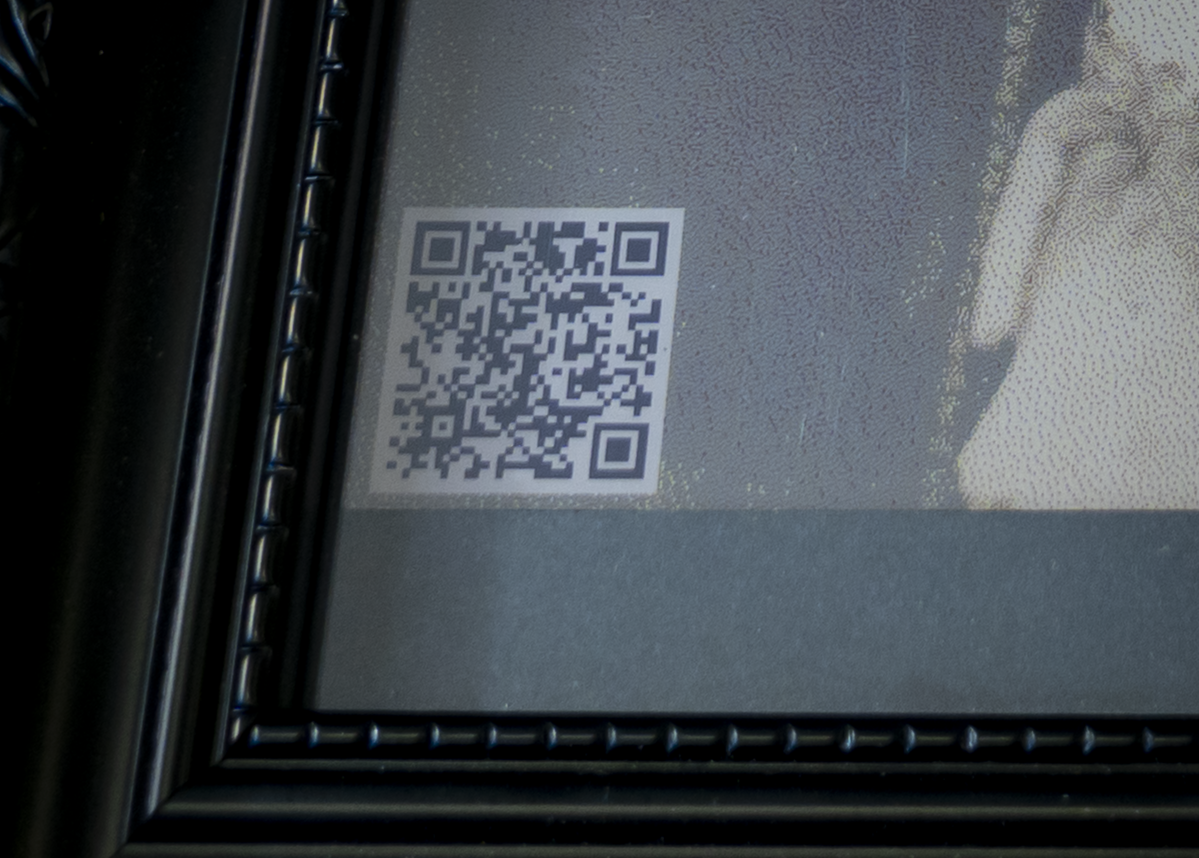
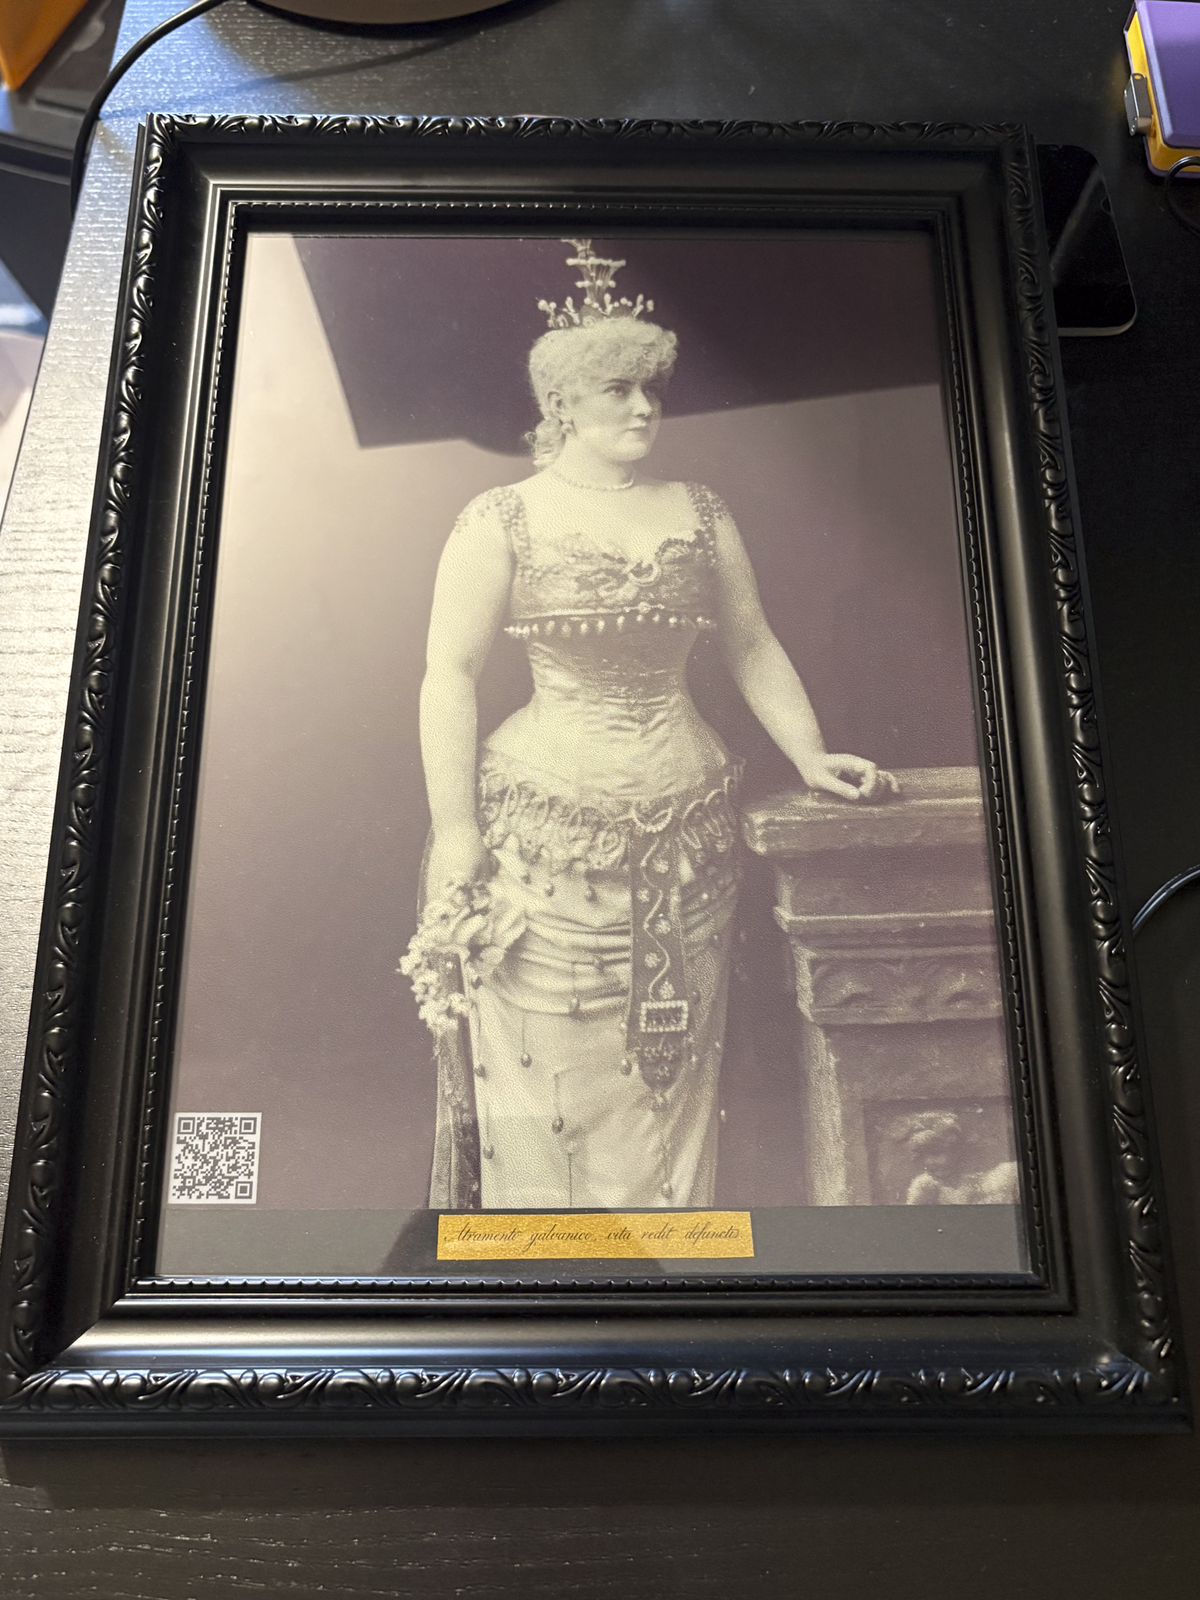
But who are these spooky faces in their incredible hats? If we add a scannable QR code in the corner linking to each portrait's page on the V&A Collections website, guests can discover who they are, when it was taken, what it's made from, and all the good stuff.
This version requires the qrcode library, so before you run the example you'll need to install it:
source ~/.virtualenvs/pimoroni/bin/activate
pip install qrcode[pil]
Open up the example in nano again. At the top of the code, we need to import the new qrcode library.
import qrcode
We'll need to add two new functions. get_va_url() deduces the website URL from the item number that our API call served up earlier, and add_qr_code() generates and draws the QR code.
def get_va_url(record):
    """Extract the V&A Collections URL from a record using the systemNumber."""
    system_number = record.get("systemNumber")
    if system_number:
        return f"https://collections.vam.ac.uk/item/{system_number}/"
    return None


def add_qr_code(image, url, size=120):
    """Generate a QR code and overlay it in the bottom-right corner."""
    if not url:
        return image

    # Generate QR code
    qr = qrcode.QRCode(version=1, box_size=2, border=2)
    qr.add_data(url)
    qr.make(fit=True)
    qr_img = qr.make_image(fill_color="black", back_color="white")

    # Resize QR code to fit nicely on the image
    qr_img = qr_img.resize((size, size))

    # Paste in bottom-right corner
    x_offset = image.width - size - 30
    y_offset = image.height - size - 20
    image.paste(qr_img, (x_offset, y_offset))

    return image
At the top of the file, add a toggle to enable/disable the QR code:
SHOW_QR_CODE = True # Set to False to disable QR code
Then at the bottom, before you send the image to the display:
if SHOW_QR_CODE:
    va_url = get_va_url(record)
    if va_url:
        image = add_qr_code(image, va_url)
        print(f"View more info: {va_url}")
Set SHOW_QR_CODE = False if you want to turn off the QR codes and enjoy the portraits without such modern contrivances.
Speed boost!
Breaking news - we've just figured out a way to make Inky refresh faster! You'll need to use the most recent release of the Inky software - if you're running an older version you can do this to upgrade to the latest:
cd ~/inky
git pull
./install.sh --unstable
After that, you can add the following line of code, after the inky = auto() line:
inky.speed = inky.MEDIUM
The refresh speeds you can use are NORMAL (the default), MEDIUM and FAST. On our display, MEDIUM refreshed in around 15 seconds, whilst FAST refreshed in a zippy 10 seconds.
There are trade-offs in exchange for speedy ghosts! Some of the colours (especially green) are weaker which can skew the colour balance of your photos - we found shadows to be less saturated with the faster update speeds, and the photos tended to trend more towards yellow.
Try it and see what you think - the images looking slightly more 'antique' might be a benefit for this project :)
Here's what a NORMAL update looks like:
And here's what a FAST update looks like:
Complete code listing
Here's our final code with all the additions mentioned above.
"""Download a Victorian portrait from the V&A and display it on Inky.

This version automatically crops away uniform borders and includes a QR code
linking to the artifact's page on the V&A Collections website.

Run hourly with cron: 0 * * * * /home/USER/.virtualenvs/pimoroni/bin/python /path/to/victorian-portrait-vam.py
"""
import io
import random

import qrcode
import requests
from PIL import Image, ImageOps

from inky.auto import auto

VAM_API = "https://api.vam.ac.uk/v2/objects/search"
SEARCH_TERM = "portrait"
DATE_BEGIN = 1837
DATE_END = 1901
PAGE_SIZE = 100
MAX_ATTEMPTS = 20
SHOW_QR_CODE = True  # Set to False to disable QR code
IIIF_IMAGE_SIZE = "!1600,1600"  # Requested image size for V&A IIIF server
ALLOWED_OBJECT_TYPES = {
    "photograph",
    "painting",
}

inky = auto()
inky.speed = inky.MEDIUM  # Refresh speed - NORMAL (default), MEDIUM or FAST.


def crop_borders(image):
    """Remove uniform borders from all edges of the image."""
    width, height = image.size
    pixels = image.load()

    # Scan from top down: find the first row that's not uniform
    top = height
    for y in range(height):
        if not is_mostly_uniform(pixels, width, y, "row"):
            top = y
            break

    # Scan from bottom up: find the last row that's not uniform
    bottom = -1
    for y in range(height - 1, -1, -1):
        if not is_mostly_uniform(pixels, width, y, "row"):
            bottom = y
            break

    # Scan from left: find the first column that's not uniform
    left = width
    for x in range(width):
        if not is_mostly_uniform(pixels, height, x, "col"):
            left = x
            break

    # Scan from right: find the last column that's not uniform
    right = -1
    for x in range(width - 1, -1, -1):
        if not is_mostly_uniform(pixels, height, x, "col"):
            right = x
            break

    # Crop to the content area if we found all four edges
    if top <= bottom and left <= right:
        return image.crop((left, top, right + 1, bottom + 1))
    return image


def is_mostly_uniform(pixels, size, index, direction, threshold=10):
    """Check if a row or column is mostly one color."""
    if direction == "row":
        uniform = sum(1 for x in range(size) if max(pixels[x, index]) - min(pixels[x, index]) <= threshold)
    else:  # column
        uniform = sum(1 for y in range(size) if max(pixels[index, y]) - min(pixels[index, y]) <= threshold)

    UNIFORM_THRESHOLD = 0.98  # 98%: if 98%+ of row/col is one color, it's a border
    return uniform > size * UNIFORM_THRESHOLD


def search_portraits(page):
    """Fetch portraits from the V&A API for a given page."""
    response = requests.get(
        VAM_API,
        params={
            "q": SEARCH_TERM,
            "kw_object_type": sorted(ALLOWED_OBJECT_TYPES),
            "year_made_from": DATE_BEGIN,
            "year_made_to": DATE_END,
            "images_exist": "true",
            "images": "true",
            "data_profile": "full",
            "page": page,
            "page_size": PAGE_SIZE,
        },
        timeout=20,
    )
    response.raise_for_status()
    return response.json()


def get_random_portrait():
    """Find and return a random portrait image URL and its V&A record."""
    print(f"Searching the V&A for {SEARCH_TERM!r}...")
    first_page = search_portraits(1)
    page_count = first_page["info"]["pages"]
    page = random.randint(1, page_count)

    # Pick a random page first, then a random portrait from that page.
    results = first_page if page == 1 else search_portraits(page)
    records = results.get("records", [])
    random.shuffle(records)

    for record in records[:MAX_ATTEMPTS]:
        image_base = record.get("_images", {}).get("_iiif_image_base_url")
        if not image_base:
            continue

        image_info = requests.get(f"{image_base}info.json", timeout=10)
        if not image_info.ok:
            continue
        dimensions = image_info.json()
        if dimensions["height"] > dimensions["width"]:
            return f"{image_base}full/{IIIF_IMAGE_SIZE}/0/default.jpg", record

    raise RuntimeError("No usable portrait images found")


def get_va_url(record):
    """Extract the V&A Collections URL from a record using the systemNumber."""
    system_number = record.get("systemNumber")
    if system_number:
        return f"https://collections.vam.ac.uk/item/{system_number}/"
    return None


def add_qr_code(image, url, size=120):
    """Generate a QR code and overlay it in the bottom-right corner."""
    if not url:
        return image

    # Generate QR code
    qr = qrcode.QRCode(version=1, box_size=2, border=2)
    qr.add_data(url)
    qr.make(fit=True)
    qr_img = qr.make_image(fill_color="black", back_color="white")

    # Resize QR code to fit nicely on the image
    qr_img = qr_img.resize((size, size))

    # Paste in bottom-right corner
    x_offset = image.width - size - 30
    y_offset = image.height - size - 20
    image.paste(qr_img, (x_offset, y_offset))

    return image


image_url, record = get_random_portrait()
title = record.get("_primaryTitle", "Untitled")
print(f"Downloading {title!r}: {image_url}")

# Download and decode the selected image as RGB for consistent processing.
response = requests.get(image_url, timeout=20)
response.raise_for_status()

image = Image.open(io.BytesIO(response.content)).convert("RGB")
# Crop uniform borders (frames, mats, backgrounds)
image = crop_borders(image)
# Fill the portrait canvas, then rotate for the landscape panel.
width, height = inky.resolution
image = ImageOps.fit(image, (height, width), method=Image.LANCZOS)
image = image.rotate(90, expand=True)

# Add QR code linking to the V&A Collections page (after rotation)
if SHOW_QR_CODE:
    va_url = get_va_url(record)
    if va_url:
        image = add_qr_code(image, va_url)
        print(f"View more info: {va_url}")

# Send the finished image to the display.
inky.set_image(image)
inky.show()
Running the example using cron
To have a new portrait appear at regular intervals, use cron to run the script automatically.
Edit your crontab:
crontab -e
You'll need to press 1 to select Nano if it's your first time editing the file.
Add a line to run the script every hour, changing the username and path to match your setup:
0 * * * * /home/USER/.virtualenvs/pimoroni/bin/python /path/to/victorian-portrait-vam.py
Other useful intervals:
- Every 30 minutes:
*/30 * * * * /home/USER/.virtualenvs/pimoroni/bin/python /path/to/victorian-portrait-vam.py - Every 6 hours:
0 */6 * * * /home/USER/.virtualenvs/pimoroni/bin/python /path/to/victorian-portrait-vam.py - Every day at 8 AM:
0 8 * * * /home/USER/.virtualenvs/pimoroni/bin/python /path/to/victorian-portrait-vam.py
Putting everything in a frame
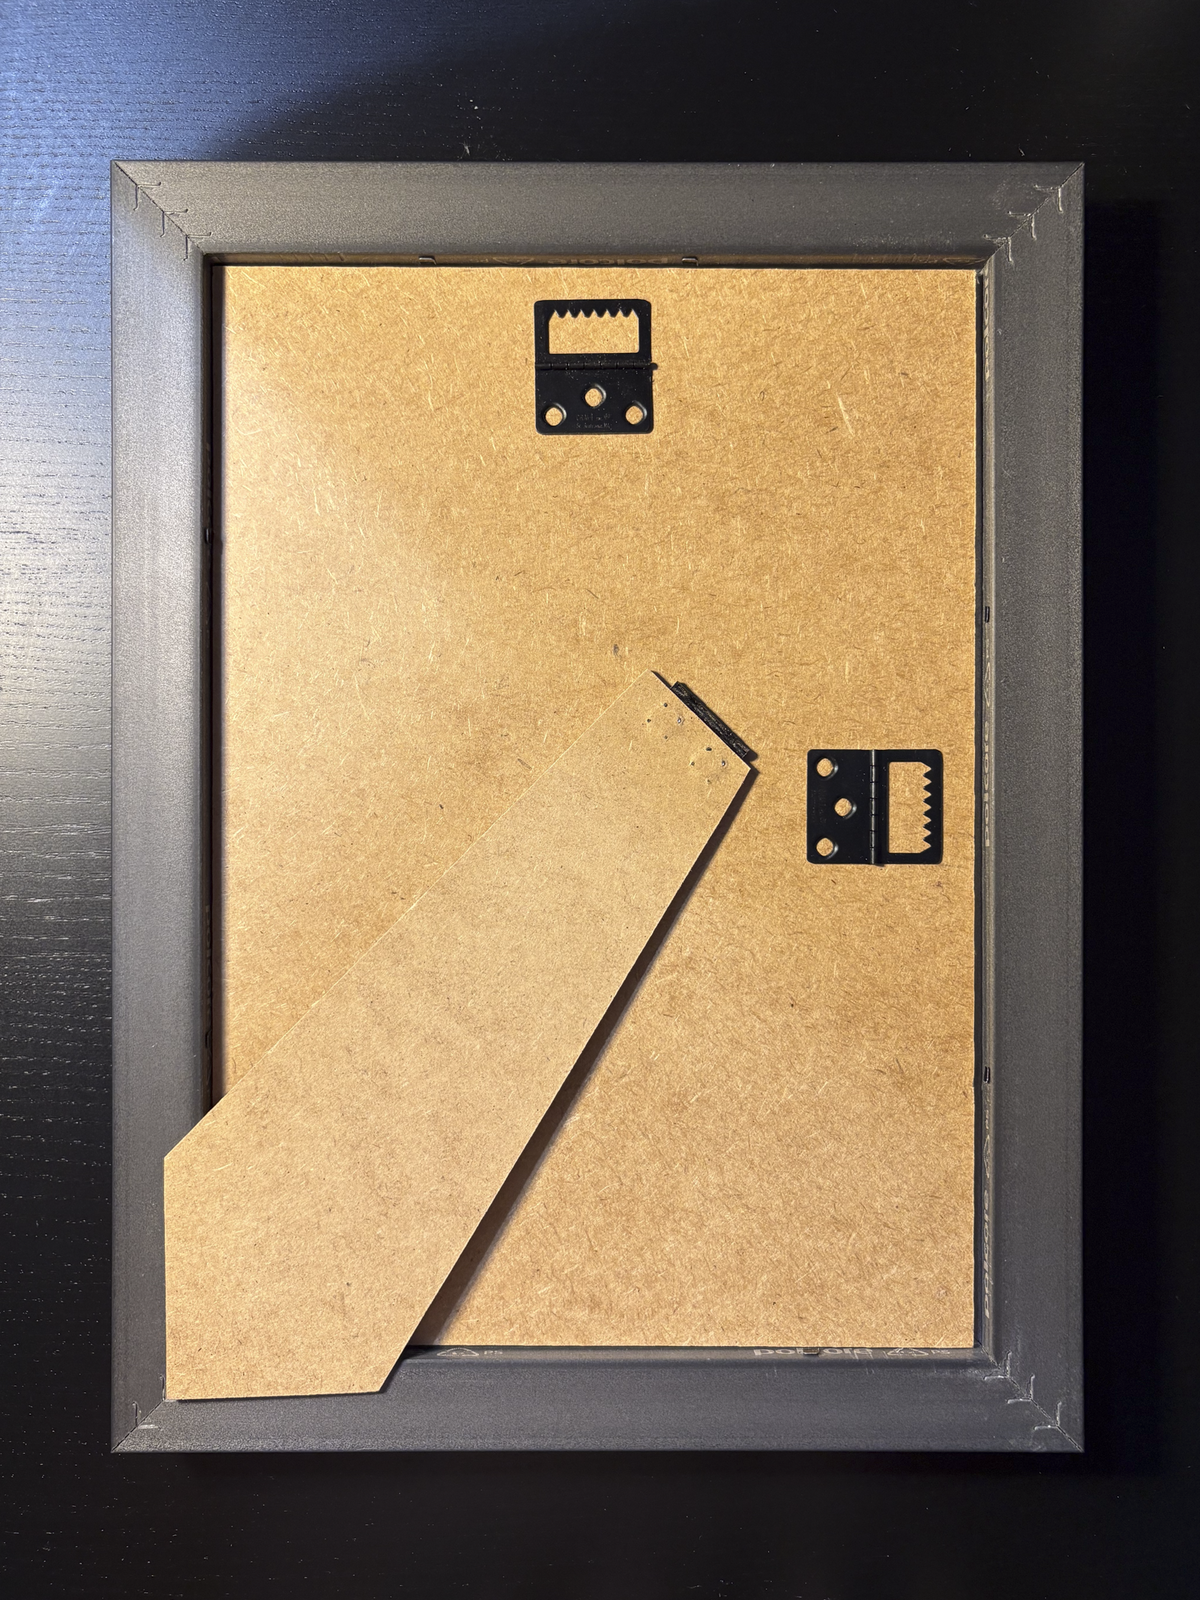
Now all that's left to do is to make it gallery ready! We used this A4 frame.
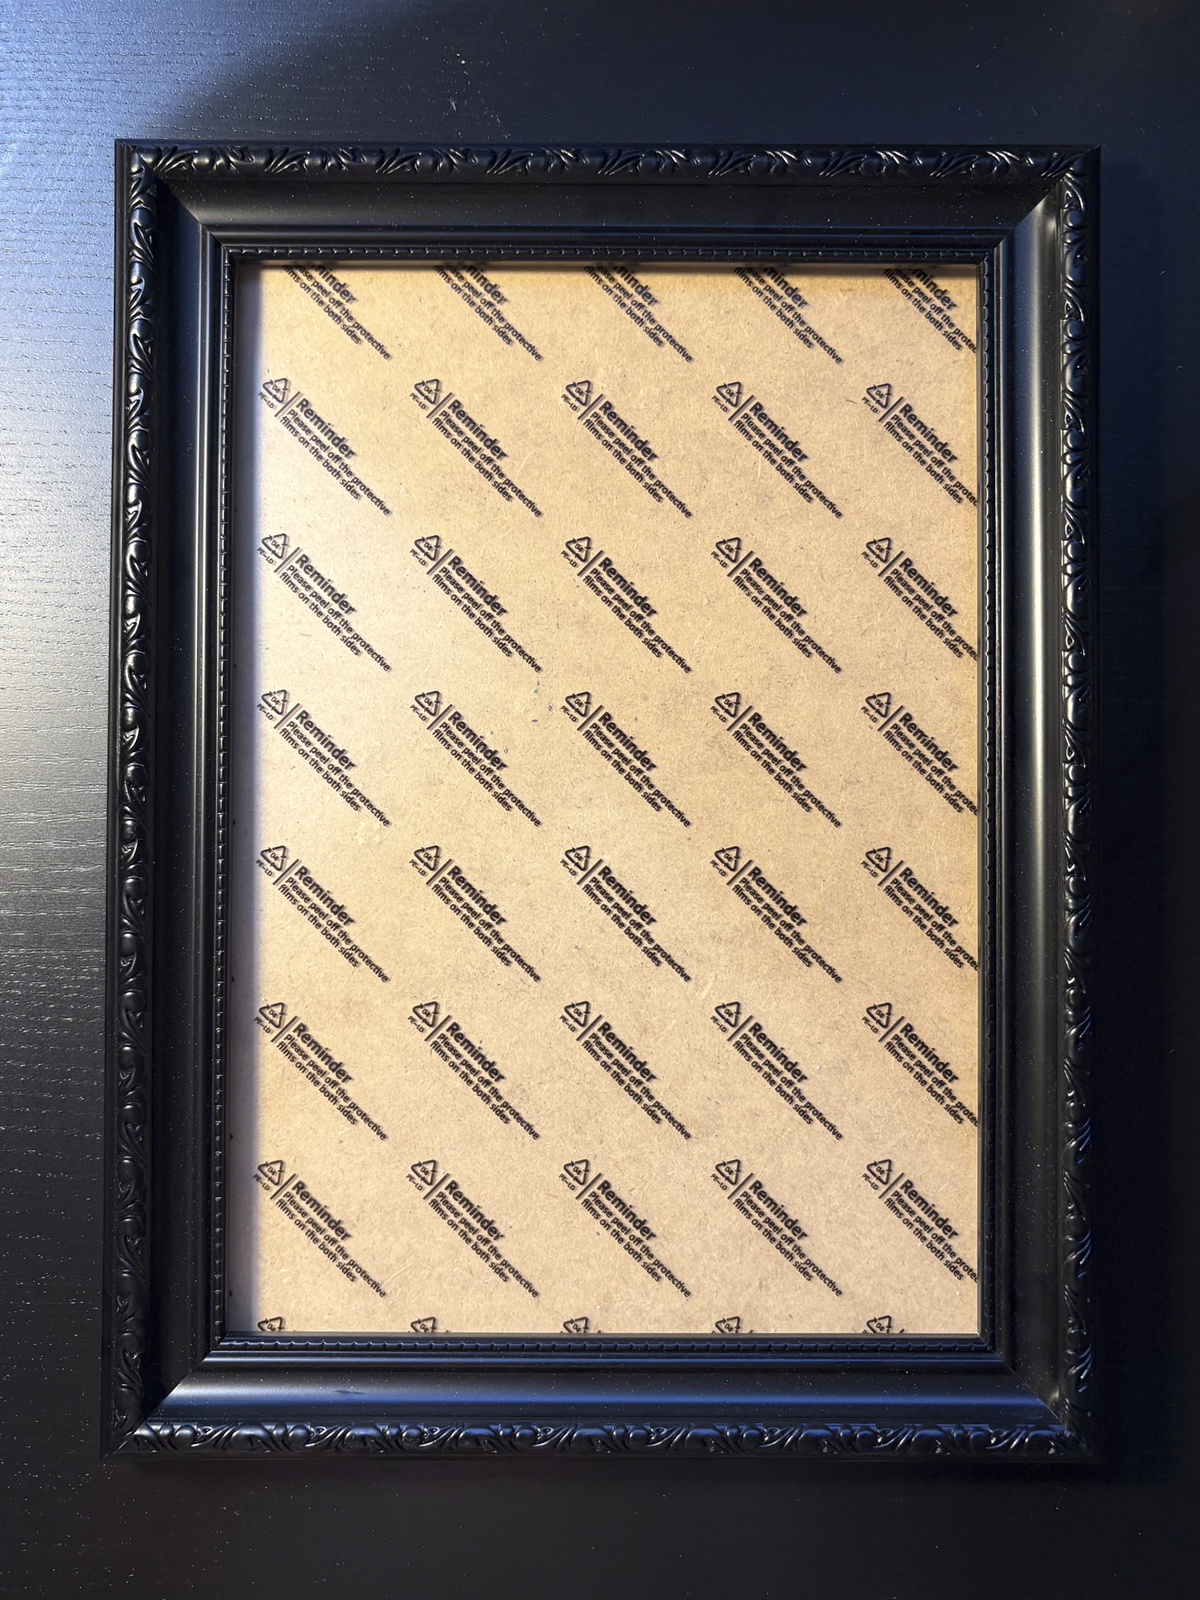
It came with an acrylic front and a wooden back. We didn't end up using the back for this project.
The Impression fit inside the frame nicely without us having to make any modifications.
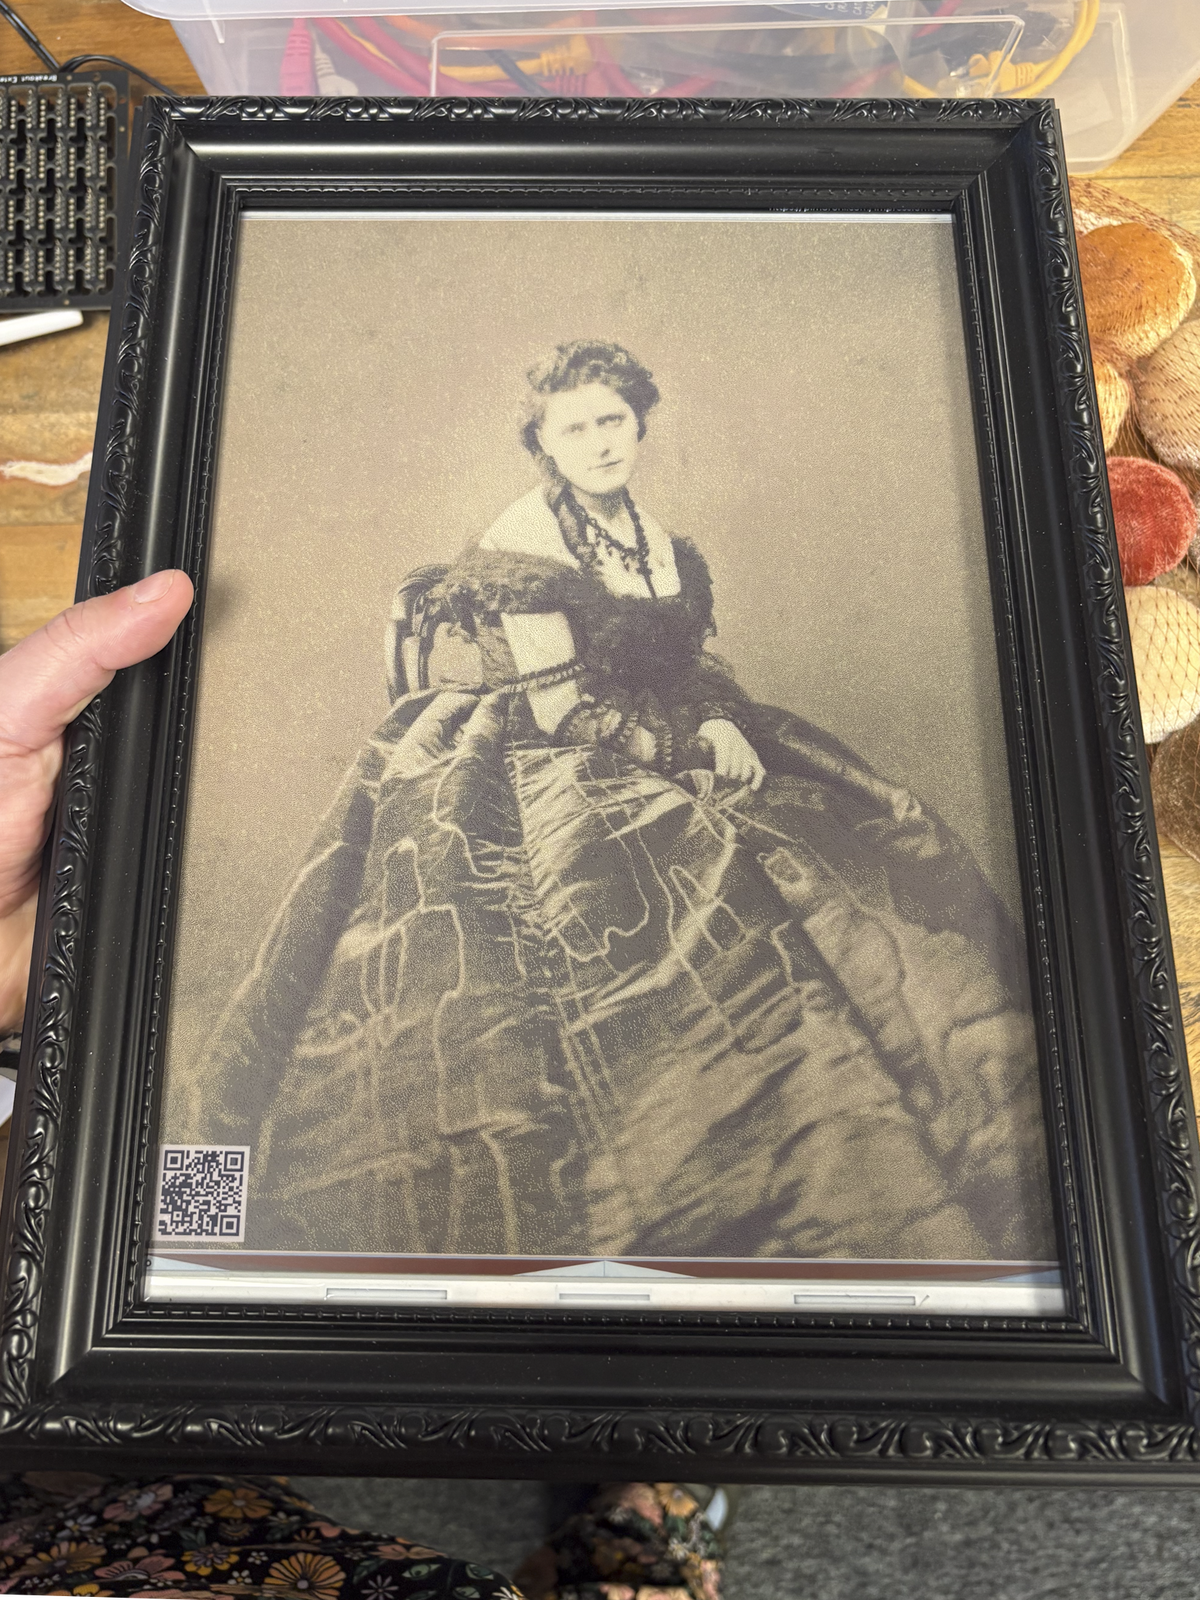
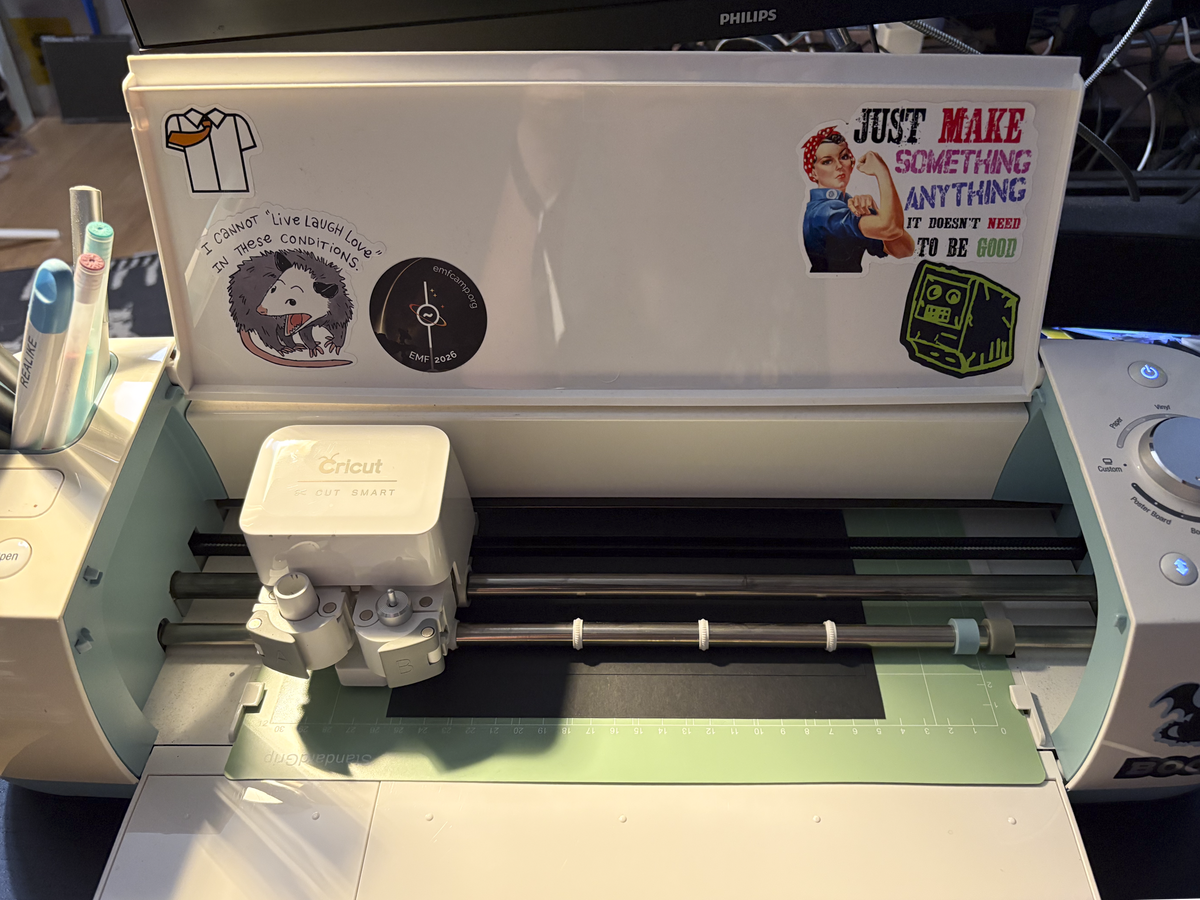
The edges of the E-Paper screen showing at the top and bottom give the game away that it's an electronic frame though, so we got out the Cricut and cut a bezel out of thin black card (you could easily do this with scissors or a craft knife).
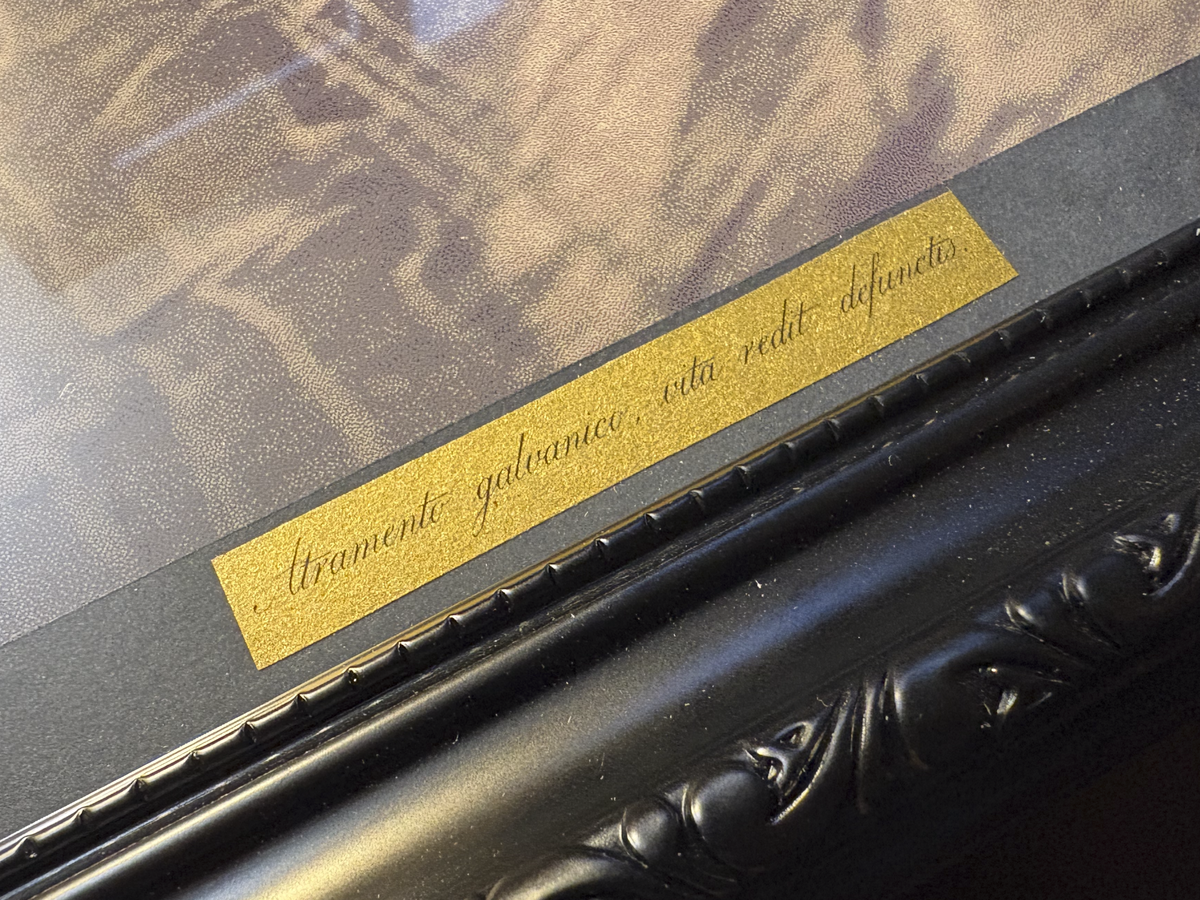
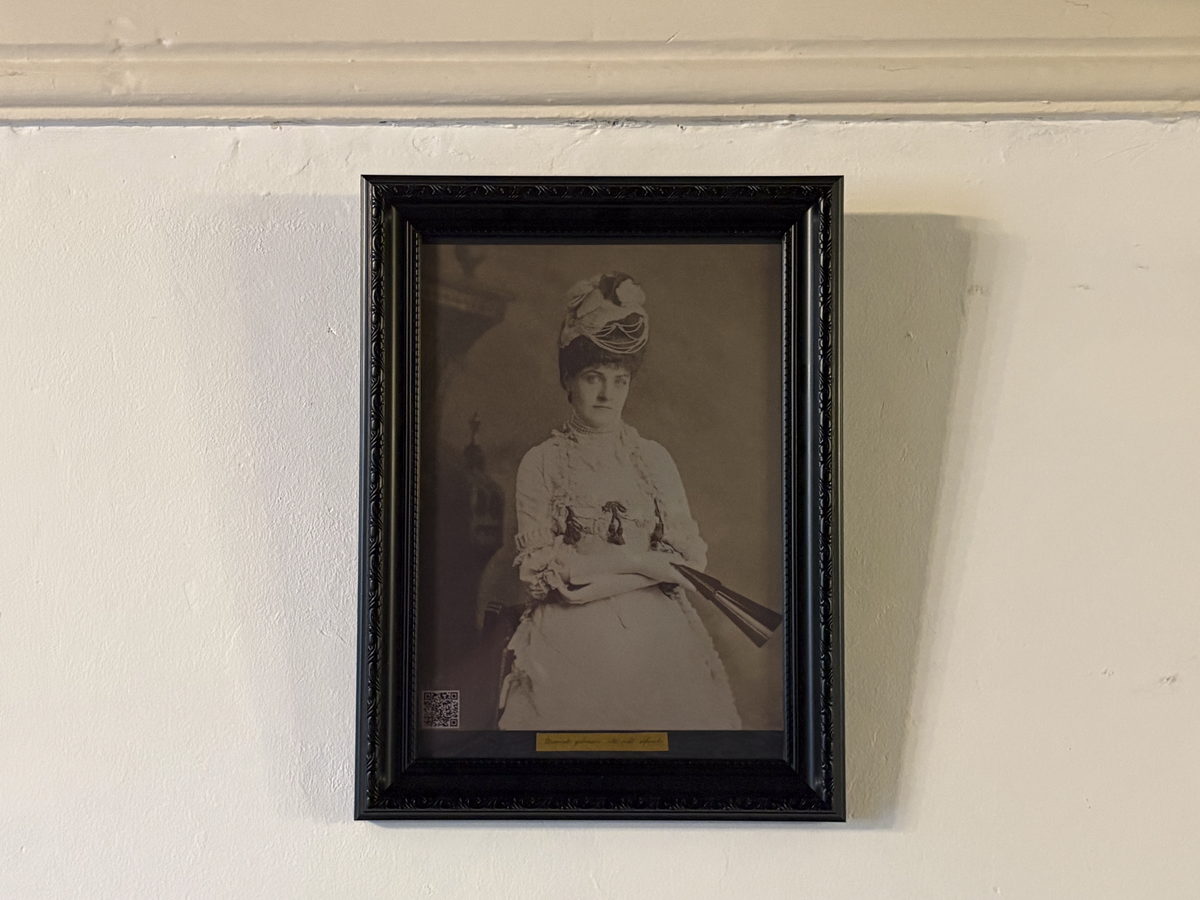
We also got a bit carried away and made a 'brass plaque' by laser printing on gold paper using a suitable font. The motto reads Atramento galvanico, vita redit defunctis - "by galvanic ink, life returns to the deceased".
With the bezel in place, our frame is looking good!
Next we need to find a way of making sure the Inky stays securely anchored into the frame. To do this, we just bent back the metal tabs on the frame intended to hold the back in place. To stop them from damaging the Inky PCB, we stuck little squares of electrical tape to the board under each tab.
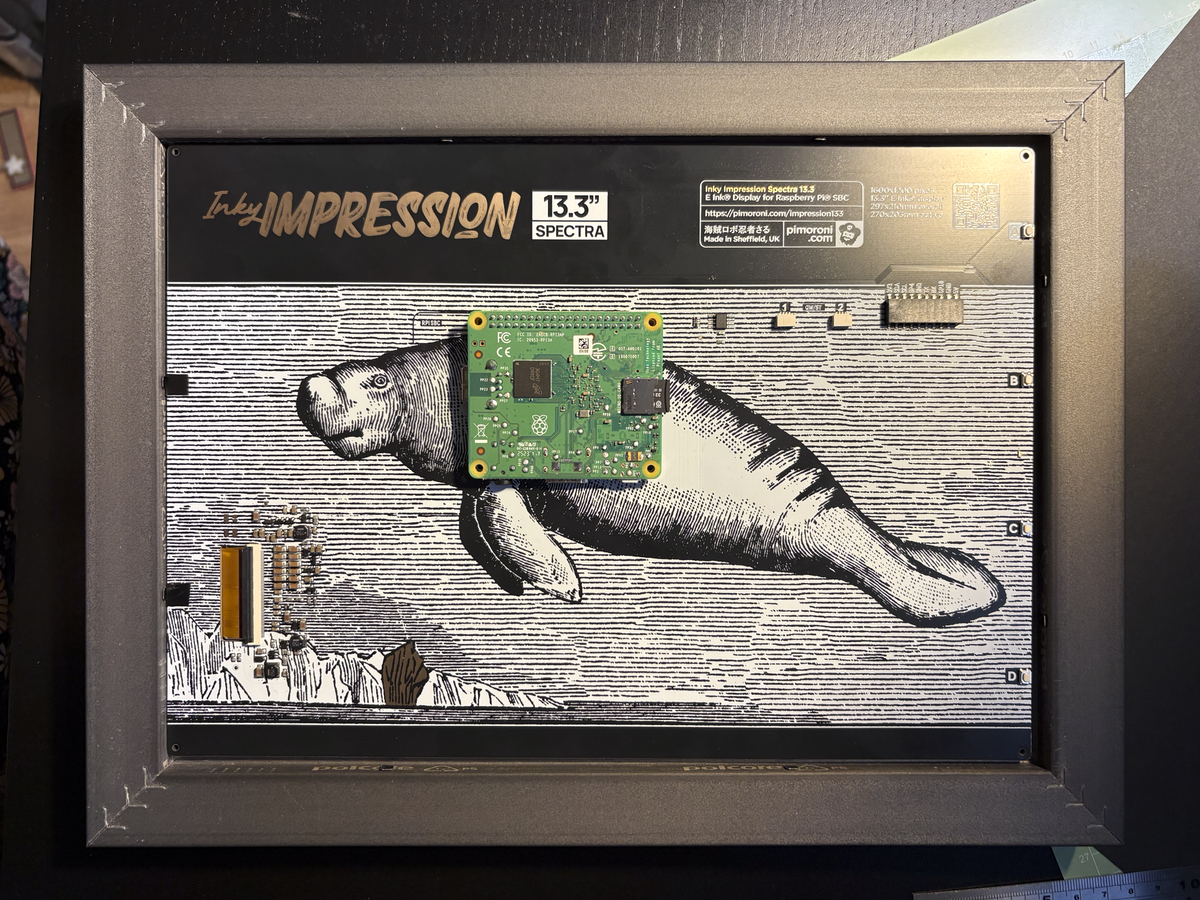
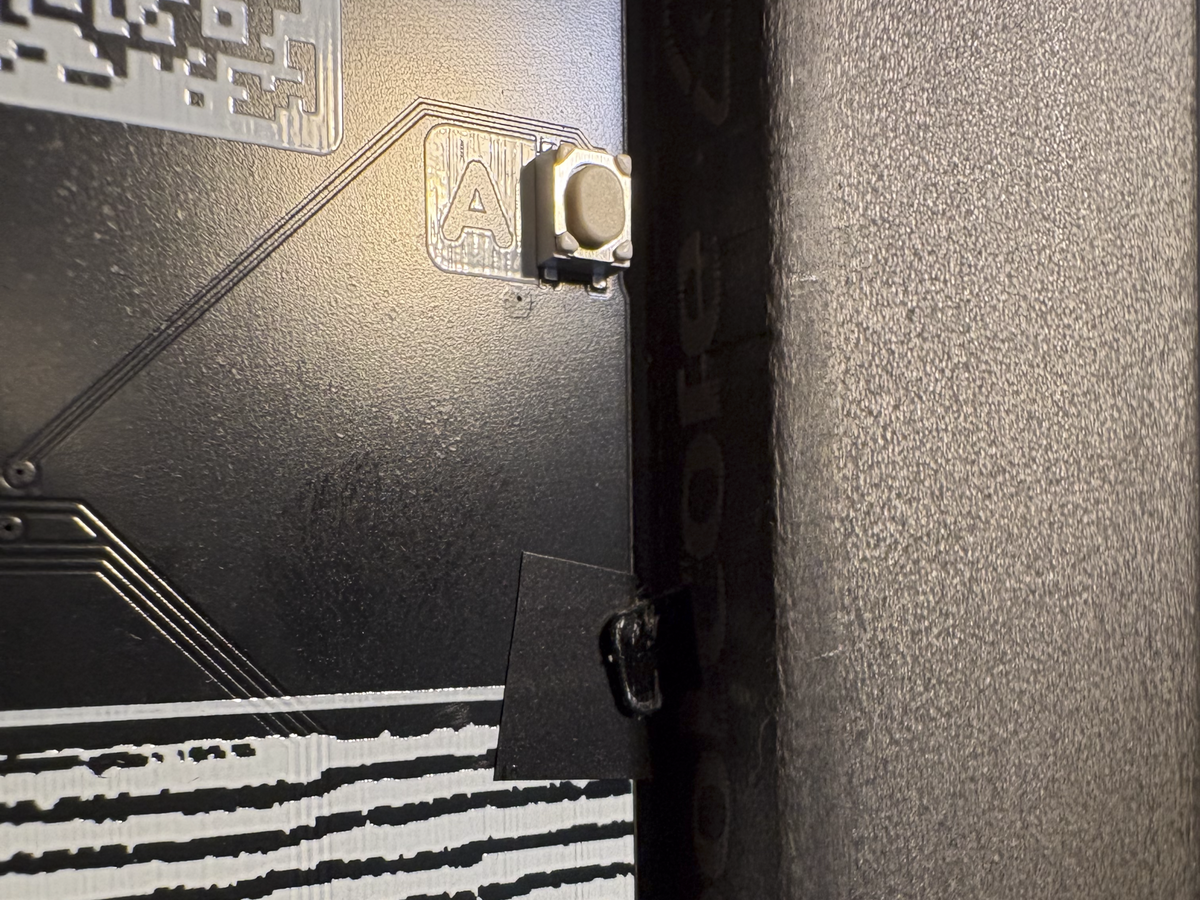
With the tabs folded back, everything is held in place nicely.
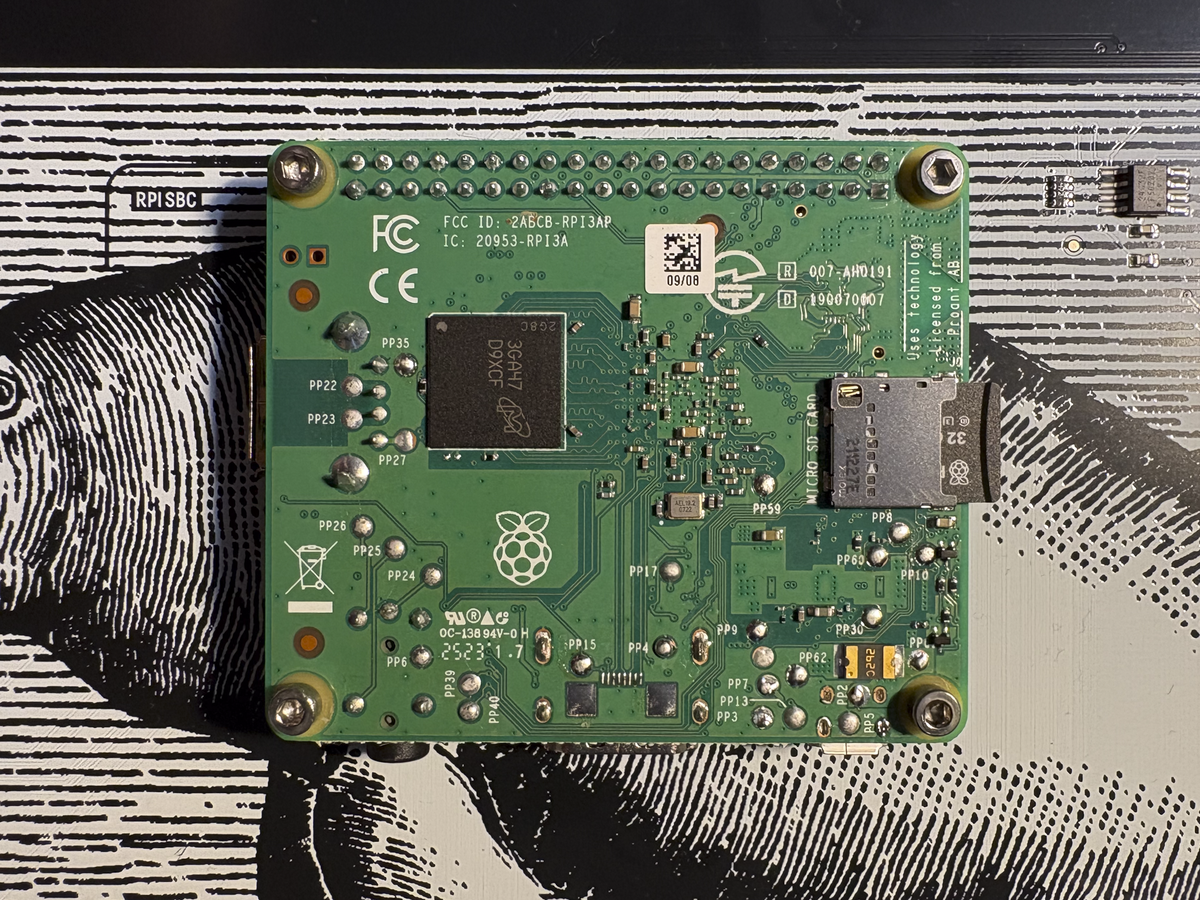
Plugging the Pi directly into the Inky display keeps things low profile, but that does mean that you can't use the standoffs, screws and booster header that come with the display. We instead used some M2.5 10mm hex screws to fix it in place, and some M2.5 nuts to work as spacers on the bottom edge.
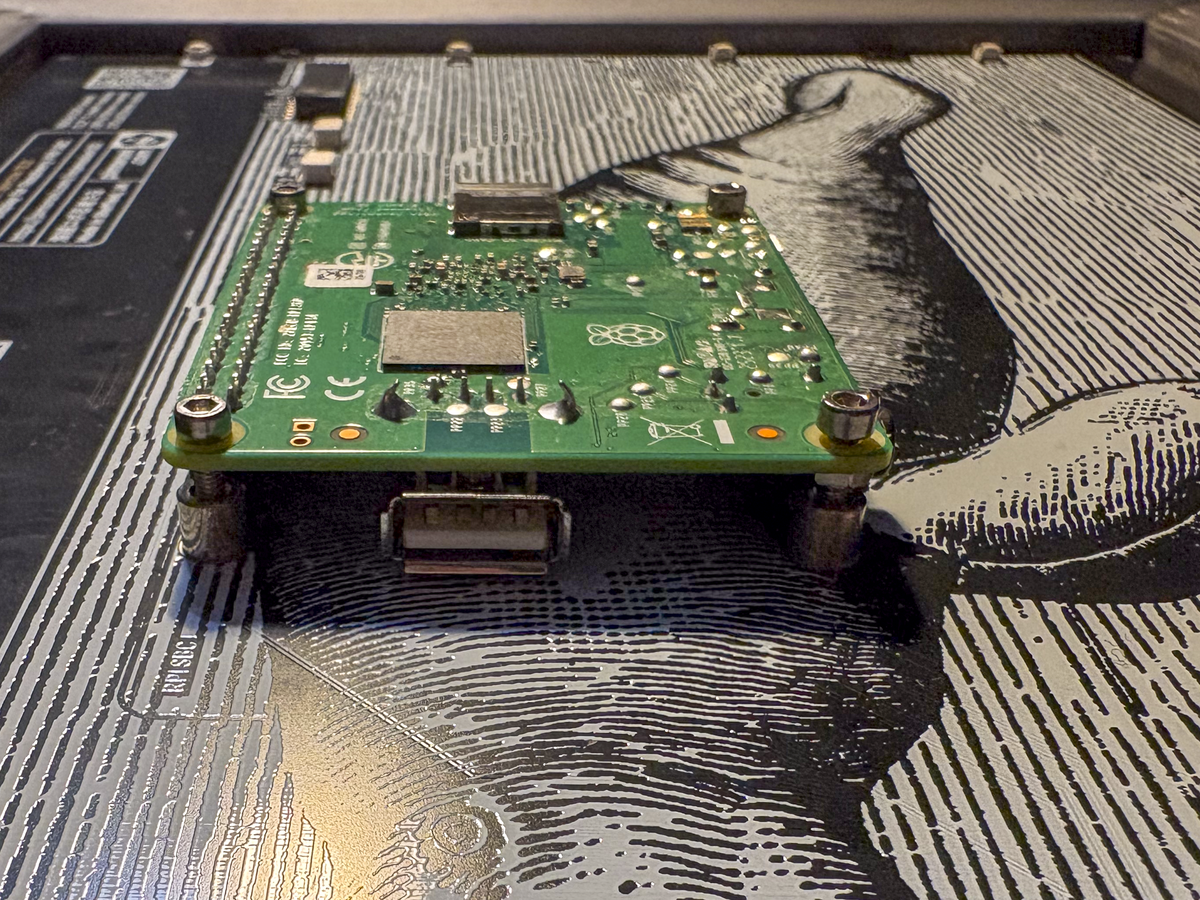
Not having a back on the frame means that the Pi is somewhat exposed, and we were concerned about the edge of the Pi (and the edge of the delicate SD card) being the part that comes into contact with the wall once it's hung up. To mitigate this we screwed 30mm ring hooks into the back of the frame - these should protrude far enough to be the point of contact against the wall, rather than the Pi or SD card.
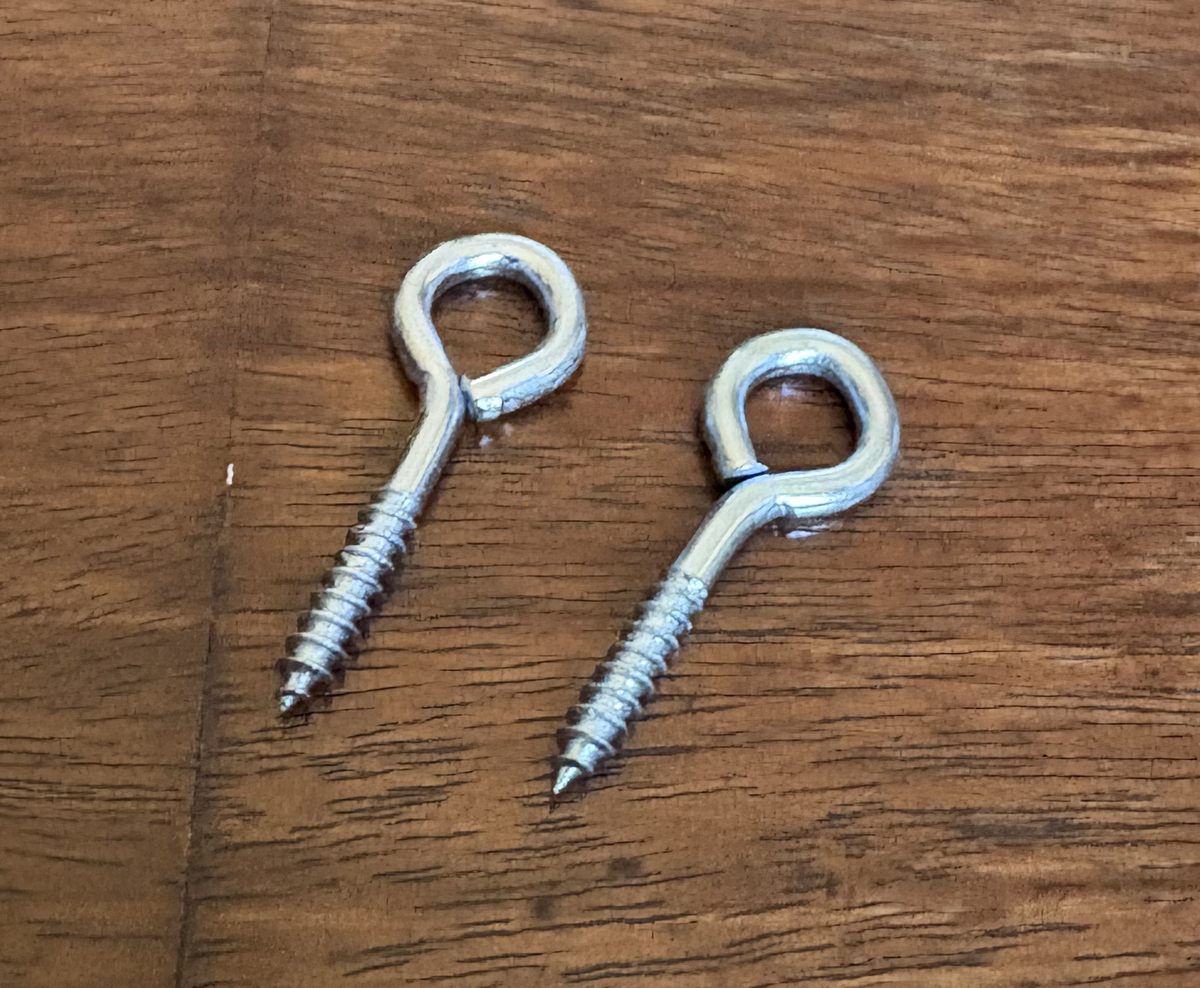
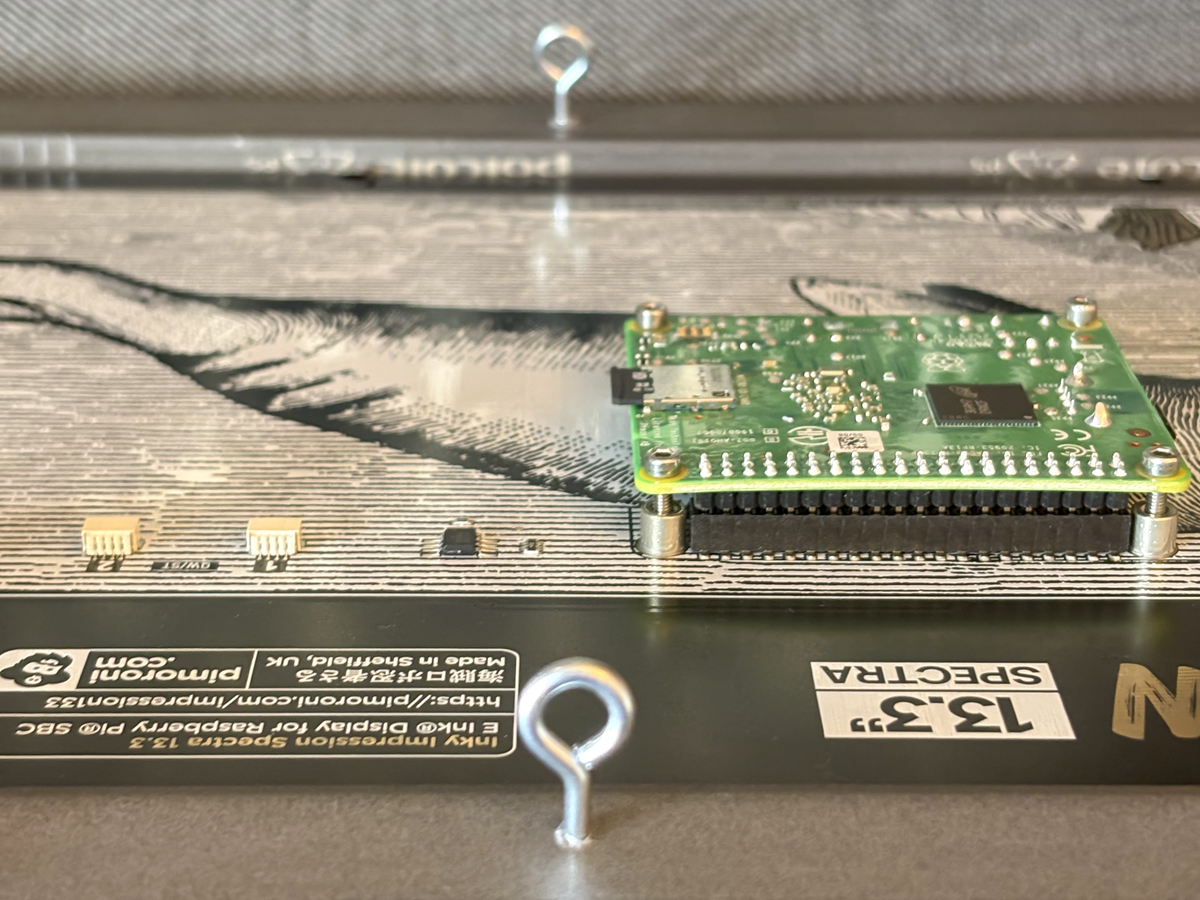
If you wanted to give the back of the Pi some extra protection, you could tape a bit of cardboard or similar to it.
Finally we just need to attach a wire to the hooks, and we're ready to hang it up in our spooky house!
Next steps
Hopefully we've given you an idea of how you can write your own examples that pull data from an online API and manipulate image data, and given you some tips for how you can add a frame to your Impression.
If you try out this project yourself drop us a message on Bluesky or the forums and show us your favourite Victorian!