Getting Started with Inky Impression
Inky Impression is our range of glorious colour E Ink® / ePaper displays for use with Raspberry Pi computers. This beginner friendly guide will show you how to attach Inky Impression to your Pi, install the Inky Python library, and then walk through its functionality.
The library (and these instructions) will work with all sizes of Inky Impression and all screen variants - the original 7 colour E Ink Gallery Palette® panels and the shiny new 6 colour E Ink Spectra 6® panels.
What you'll need
- An Inky Impression, of any size: 4", 5.7", 7.3" or 13.3"
- A Raspberry Pi. You can use any Pi that has a 40 pin header attached but we think a Zero 2 W is a great match for Inky due to its small size and modest power consumption. Note that Zero boards come without header pins as standard, so make sure to pick up the headered version if you want to avoid soldering.
- An appropriate power supply - we're using the official Micro USB one for our Zero 2 W. If you're using a Pi 4 or Pi 5 you'll need a USB-C one.
- A microSD card and an SD card reader or some other means of flashing it from your computer.
We'll be connecting to our Raspberry Pi 'headlessly' using SSH, but you could plug in a keyboard, mouse and display if you prefer.
Attaching Inky Impression to your Pi
You'll see that your Inky Impression already has an image on it, straight out of the box! This is because e-paper displays can be updated with an image and the image will persist even once you've cut the power supply (i.e. switched off your Pi, or even removed the HAT altogether).
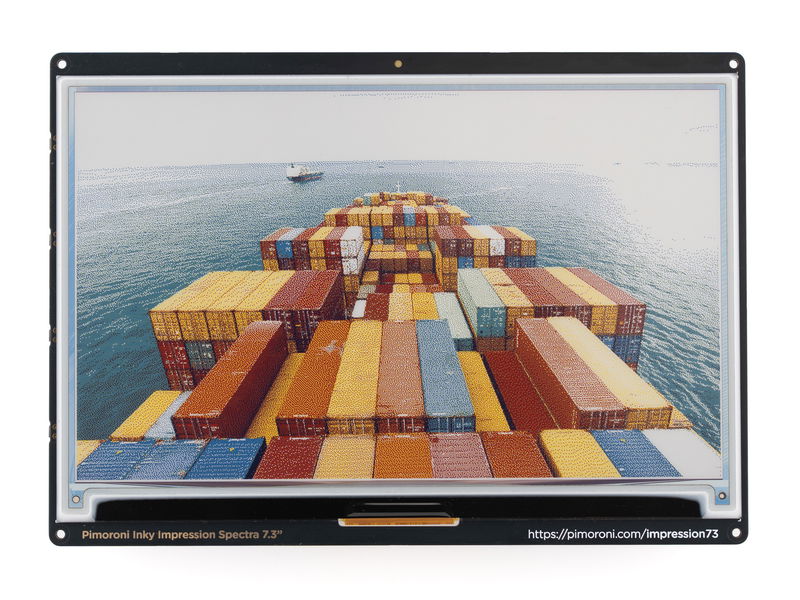
⚠ Note that your Pi should be powered off and unplugged whilst attaching or removing Inky Impression. Also note that the E Ink panel is delicate (it's made of a super thin sheet of glass) so you should make sure not to put any pressure on the screen when fitting it. Holding Inky Impression by the PCB edges or placing it screen down on a soft, flat surface and wiggling the Pi header gently into place are our preferred methods.
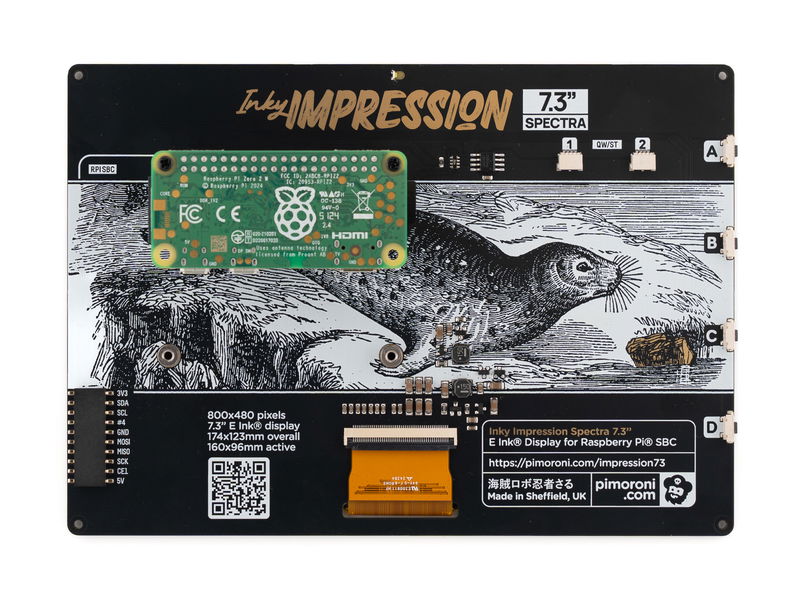
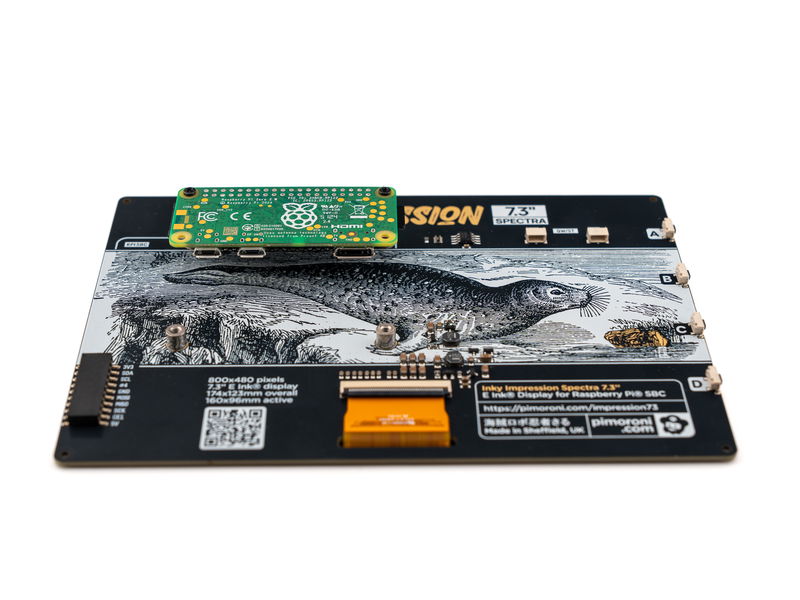
If you're using a Zero-sized Pi (with a 40 pin header attached), you can plug it straight into the socket header on the back of Inky Impression without the need for any additional mounting hardware. The Pi's USB ports should be facing downwards and the text on both the Inky Impression and the Pi should be the same way up.
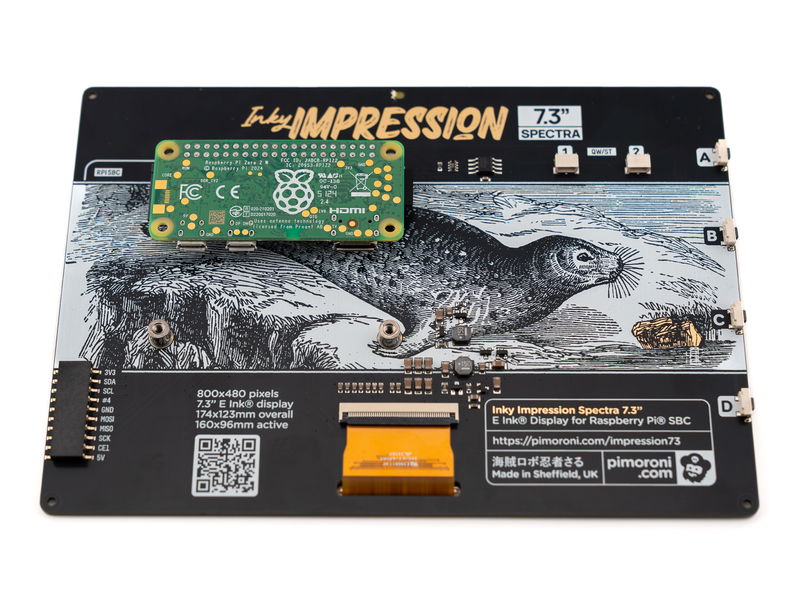
If you're using a full-sized Pi you will need to use the threaded standoffs and the booster header that come with Inky Impression. These let you plug it in without your Pi's USB ports getting in the way.
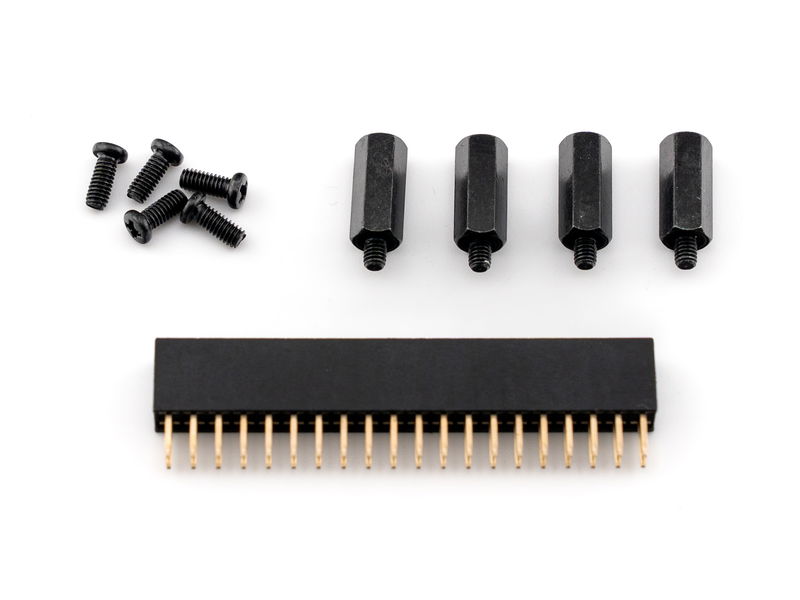
Find the four threaded mounting points on the back of the Inky Impression board. These are protected by a self-adhesive brown film during manufacture, you will need to remove this (with a fingernail or other convenient scraping tool) to expose the screw thread. Once you've done that, screw the threaded posts on the standoffs into the four mounting holes, and push the booster header into the 40 pin socket header on the back of Inky Impression.
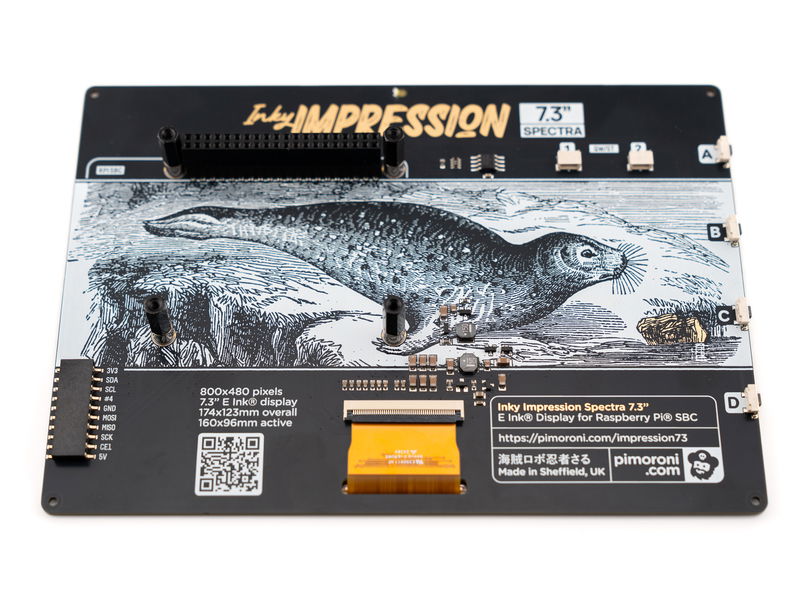
Whilst taking care not to put too much pressure on the screen, plug your Pi into the booster header - there's an outline on the back of Impression that will show you the correct orientation. Then fix it in place with the screws.
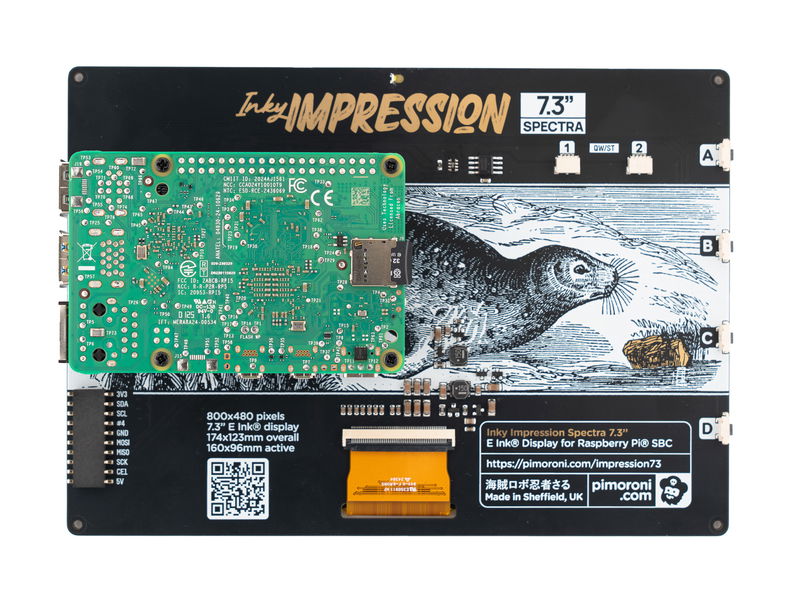
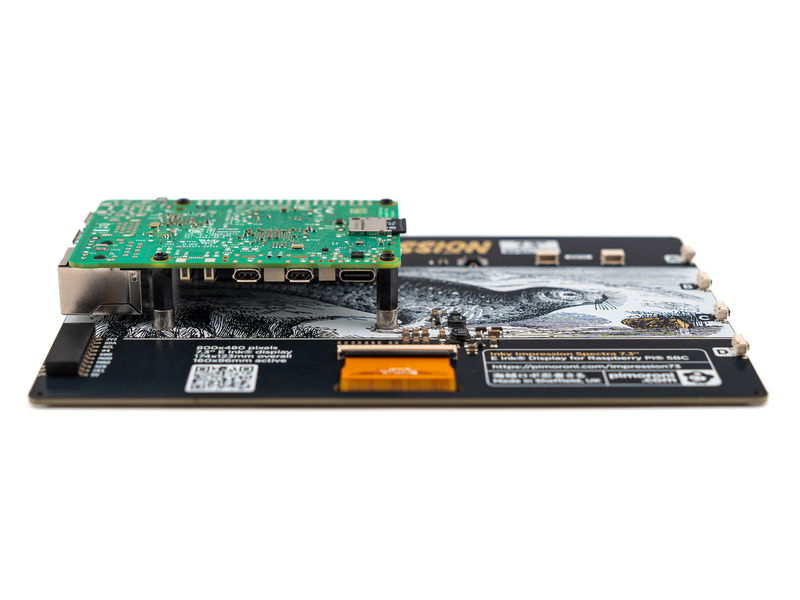
It's also possible to use the booster header and (two of the) threaded standoffs to mount a Zero sized Pi if you want to make sure it won't go anywhere, though it makes for a slightly thicker sandwich than if you just plug the Zero directly into the board.
Installing Raspberry Pi OS
We recommend starting with a fresh image of the latest Raspberry Pi OS - you'll need to be using Bookworm or later. Our SD cards do come with Pi OS pre-installed, but flashing a new image using Raspberry Pi Imager is a convenient way of setting up the SSH and wireless connection without having to plug it into a display.
You can download Raspberry Pi Imager from this page - it's available for Windows, MacOS or Ubuntu.
Once it's downloaded, start up Raspberry Pi Imager. First, in the 'Raspberry Pi Device' box, you'll need to select what kind of Pi you have:
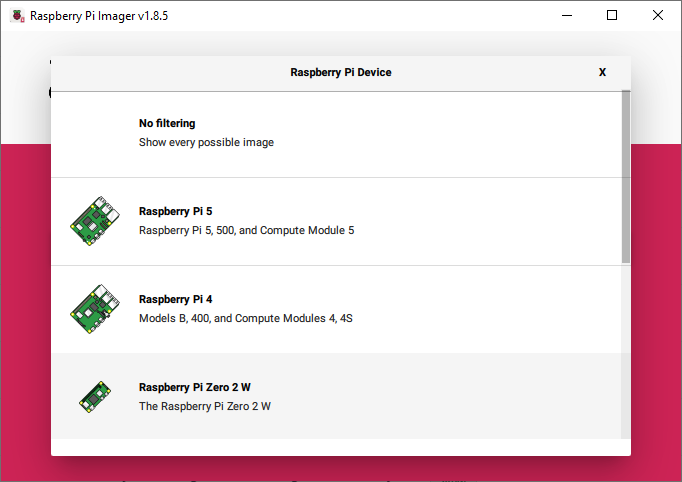
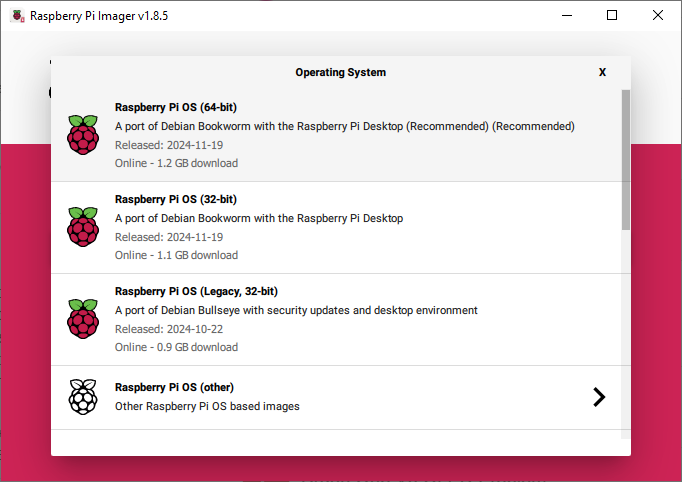
Then, under 'Operating System', we're selecting the recommended version of the Pi OS for our board. We'd suggest using the 'with desktop' version as this includes several of the software dependencies that you'll need to run our installer and will save you some steps later on.
In the third box, select your SD card. Then click 'Next'.
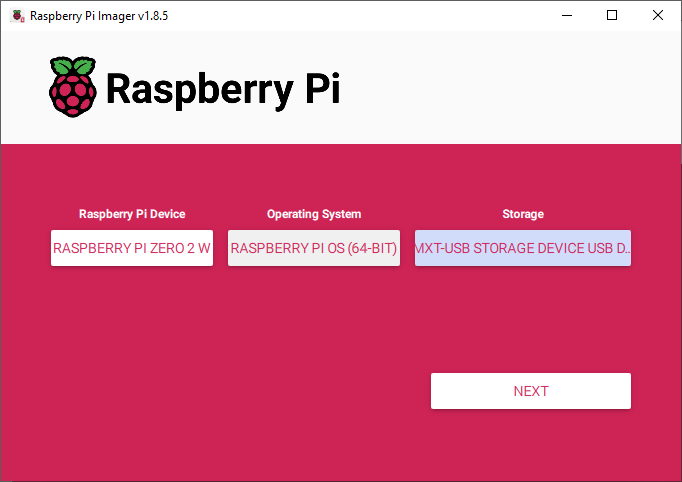
You'll now get asked if you want to apply OS customisation settings. Yes we do!
Here we've supplied the following information to set up our Pi:
- A hostname - we've used
inkyimpression. This makes it easy to connect to over a local network, without having to remember the Pi's IP address. - The username and password that we'll use to log into our Pi.
- The SSID and password to connect to WiFi.
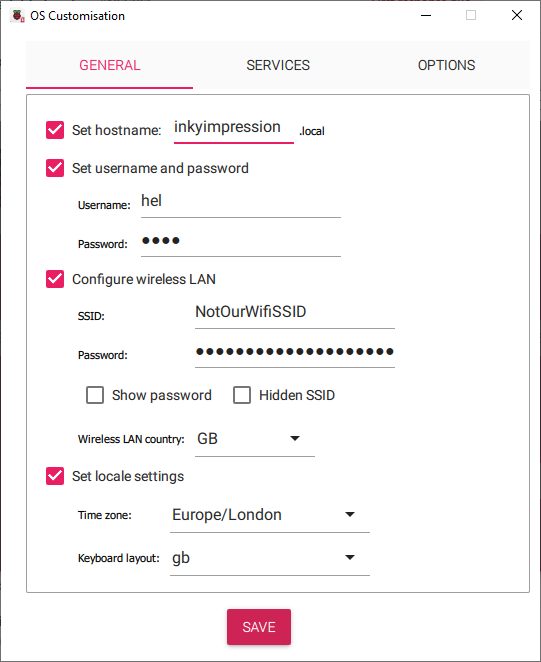
Under the 'Services' tab, select the option to enable SSH.
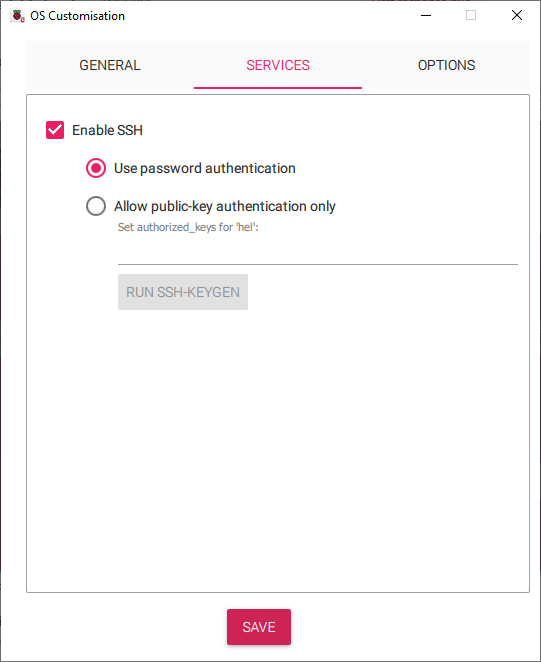
Once that's done, click the save button and confirm and Imager will start writing your SD card.
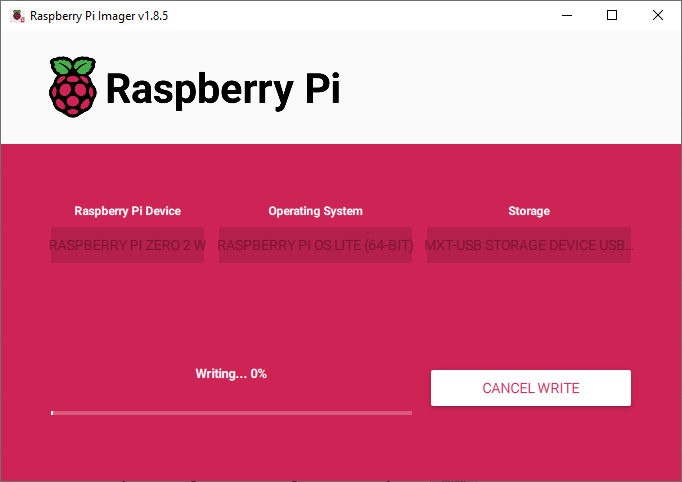
When it's finished writing, remove the SD card and pop it into your Pi, and power it up. Give it a few minutes to boot up and sort out its network interfaces. The first boot from a freshly flashed SD card can take a little while.
Connecting via SSH
You'll need an SSH client installed on your computer to connect to your Pi over the network. We're using Putty for Windows but there are many other options available.
First we're supplying our hostname - 'inkyimpression.local'.
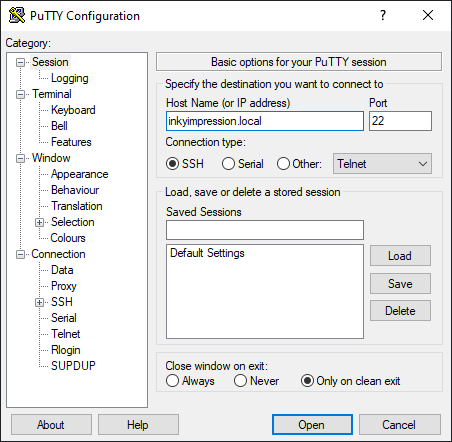
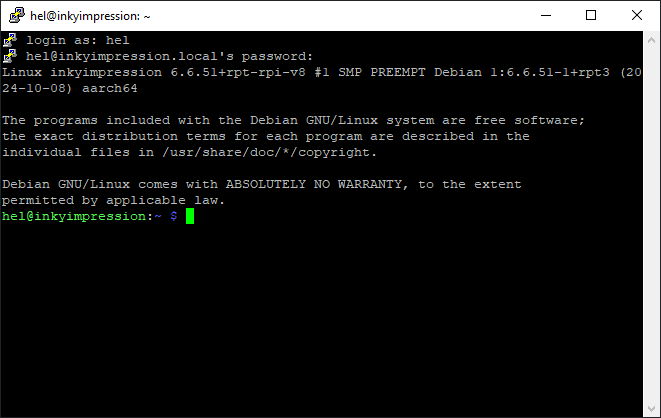
Then we'll need to give it the username and password that we set up in the last step. If everything's connected successfully, you should have a terminal prompt.
Installing the software
If you've got your Pi plugged into a monitor and are using the graphical interface, press control-alt-t to open up a terminal prompt (or find it in the Pi OS menus).
First of all you'll want to make sure that the software on your Pi is up to date by running the following command in the terminal:
sudo apt update && sudo apt upgrade
Next, to install the Inky library, run the following commands:
git clone https://github.com/pimoroni/inky
cd inky
./install.sh

You'll get presented with an array of options during the installation process, which you'll probably want to say yes to. First of all, the installer will offer to set up a virtual environment - you'll need one of these to be able to install and use Python packages in recent versions of Pi OS. If you'd like to read more about virtual environments check out the Raspberry Pi documentation or our overview.
Secondly, it will ask if you want to copy the examples into their own directory under ~/Pimoroni/inky/examples. This helps keep things tidy and makes the examples a bit easier to navigate to (we'll be assuming that this is the location of the examples going forward).
Next, you'll be asked if you want to install example dependencies. This is additional software that some of our examples need to run.
Finally you'll be asked if you want to generate documentation. If you say yes, this will be created in ~/Pimoroni/inky/docs
Once that's all done, type sudo reboot to reboot your Pi and apply the changes to the Pi's interfaces.
❓ Help! I'm using Raspberry Pi OS Lite
If you're using the Lite version of Raspberry Pi OS, you may need to sudo apt install git before running the commands above.
Running the built-in examples
Before you run any examples, you'll first need to switch to your virtual environment. To do this, type this command in the terminal:
source ~/.virtualenvs/pimoroni/bin/activate
The Inky Python library includes some simple examples to get you started. If your Inky Impression has 'Spectra' printed on it somewhere then you have a six colour Inky and you should use the examples in the ~/Pimoroni/inky/examples/spectra6 directory. If not, you'll need to use the examples in ~/Pimoroni/inky/examples/7color. Assuming you have a Spectra Inky, type the following to navigate to the examples folder:
cd ~/Pimoroni/inky/examples/spectra6
You can view the examples that are stored in this folder using the ls command.
![]()
Stripes example
This is a simple example that draws six stripes showing the available colours on Inky screen (or 7 stripes if you have a 7 colour Impression). It's a good place to start as it doesn't require any arguments or dependencies.
In the terminal, type the following and press enter:
python stripes.py
The Inky library will try and autodetect the type of screen that you have, by reading the information stored in the EEPROM (that's a tiny flash memory chip on the Inky Impression board that we program during the manufacturing process). Here it returns the details of our 7.3" Spectra Inky:

There will then be a few seconds pause whilst the Pi waits for a 'ready' signal from the display, and sends data to the screen. After that, the screen will start flashing whilst the refresh happens. E-paper displays work by pulling coloured particles up and down using different voltages, so that's what all the pulsing of the display is about (and why the image persists).
❗ Failed to detect an Inky board. Trying --type/--colour arguments instead...
If the example throws an error that looks like this, it means it's failed to read the information that's stored in the EEPROM. This is usually because the I2C protocol is not enabled. To enable I2C manually, fire up the Raspberry Pi Configuration utility with sudo raspi-config. The option to enable I2C is under 'Interfacing Options', and it's a good idea to enable SPI at the same time, as Inky needs this protocol also.
You might also get this error if your Inky doesn't have a solid electrical connection to your Pi, so double check the pin header on your Pi is fully pressed down onto Inky's socket header (and that it's plugged in the correct way round!)
Buttons example
This example doesn't do anything with Inky's display but it shows you how can read the inputs from the buttons on the side of Inky Impression, very useful for switching between modes or screens.
❗ Help! I have a 13.3" Inky and button C isn't working!
Button C is connected up to a different pin on the 13.3" Inky, so you will need to edit the example to change the pin from GPIO 16 to 25. You can do this with sudo nano buttons.py - it's 'Ctrl-X', then 'Y', then 'Enter' to save your changes when you're done editing.
LED example
LED.py shows how you can light up the shinethrough LED on the back of Inky - note that you will only have one of these if you have a Spectra Inky. You could program this to light up or flash when your script is receiving data, or when the display is updating, or in case of an error.
Image example
image.py displays a jpg image on Inky Impression, as you might expect.
First you'll need to find an image file to display. If you don't have one handy, the images that Inky ships with are included with the examples, in the 'images' folder.
If you have a 7.3" Spectra Inky like us, you can run the example like this. You'll need to supply a --file argument with path to the image you want to display:
python image.py --file images/shipping-picture-inky7.jpg
or if you're lucky enough to have a 13.3" Inky:
python image.py --file images/vincent-van-gogh-inky13.jpg
You can also specify the full path to the image, like this:
python image.py --file ~/Pimoroni/inky/examples/spectra6/images/shipping-picture-inky7.jpg
Inky Impression has 6 (or 7) primary colours, and our software will apply dithering to shades that are in-between these colours. Unlike a traditional liquid crystal display, it doesn't have a backlight which means images might look a little different when displayed on Inky than they do when viewed on your monitor.
We've found that boosting the contrast and saturation of images helps compensate for this effect somewhat. Some images still are much better suited for displaying on E Ink than others though - ones that make use of a limited palette of bright colours (like Van Gogh would use, or a determined child with a paint box!) work best.
Building your own code
Let's take a look now at how to build your own code with Inky Impression. Because of the way that the universal Inky library works, there's some boilerplate (yadda yadda code!) that we need at the top of any code we're going to run. This will look the same no matter what version of Inky you have.
In the terminal, type python to open a Python prompt.
Here's the boilerplate. Type it in line by line.
from inky.auto import auto
inky_display = auto()
This code imports the auto class from the inky.auto library and creates an instance of the class called inky_display (so we can refer to it in our code by a friendlier name).
Now we're ready to start displaying things on Inky Impression!
❗ ModuleNotFoundError: No module named 'inky'
Double check that you have your virtual environment active - there should be a (pimoroni) before your terminal prompt.
You can activate it with:
source ~/.virtualenvs/pimoroni/bin/activate
Displaying text on Inky Impression using PIL
A common task that you might want to do is to display text on Inky Impression. You can use the Python Image Library (PIL) to display text, using regular TrueType fonts. In fact, we'll be using PIL to display images and graphics on Inky Impression too.
We've made a Python fonts library to make it easy to use Open Font License (OFL) fonts with our products that have displays. The ones that the Inky library examples use will have be installed as part of the Inky library install.
You can also use fonts the regular way by downloading or transferring them to your Pi and then using the path to the file.
We're going to display a simple Hello, World! on Inky Impression using the
Fredoka One font.
The Python Image Library (PIL) will also have been installed when you ran the installer. Our boilerplate code above has already set up what we need to write to the Inky Impression display itself, but we'll need to import and set up PIL now.
Type the following:
from PIL import Image, ImageFont, ImageDraw

img = Image.new("P", (inky_display.width, inky_display.height), inky_display.WHITE)
draw = ImageDraw.Draw(img)
This imports three classes from PIL that we'll need, creates a new image, img,
that is the width and height of the Inky display, and then creates a
drawing canvas, draw, to which we can draw text and graphics. We're also specifying that the background of the drawing canvas should be white, using one of the colour constants that's built into the library (the available colours are BLACK, WHITE, YELLOW, RED, BLUE and GREEN).
Next, let's import the font we need, and create a variable called font that we
can use when we're writing text to the canvas.
from font_fredoka_one import FredokaOne

font = ImageFont.truetype(FredokaOne, 48)
As we saw above, when we created the new image, there are handy
inky_display.width and inky_display.height constants that tell us the width
and height of the display, and we can get PIL to tell us the width
and height of our Hello, World! text, so that we can perfectly centre the
text on the display with a little bit of maths!
message = "Hello, World!"
_, _, w, h = font.getbbox(message)
x = (inky_display.width / 2) - (w / 2)
y = (inky_display.height / 2) - (h / 2)
The x and y variables will tell the draw.text() function where to
place the top left corner of our text. We'll also have to tell the function
what colour we want the text, and pass it our
font variable. Last of all, we'll set the image with
inky_display.set_image(img) and call the inky_display.show() function to
tell Inky Impression to refresh the display with our text.
draw.text((x, y), message, inky_display.BLACK, font)
inky_display.set_image(img)
inky_display.show()
Try experimenting with different text colours, fonts, and sizes! It's also possible to draw shapes using PIL - try the commands below:
draw.rectangle((50, 50, 200, 200), fill=inky_display.YELLOW)
draw.ellipse((150, 150, 300, 300), fill=inky_display.RED)
draw.line((0, 0, 400, 400), fill=inky_display.BLUE, width=10)
Displaying images on Inky Impression using PIL
It's also simple to draw images on Inky Impression using Python commands.
In the terminal, type the following, remembering that you'll have to type the boilerplate for the Inky library and PIL again if you left the Python prompt, and replacing the filename (and path) with the name of your own image file if it's different to ours:
img = Image.open("images/shipping-picture-inky7.jpg")
inky_display.set_image(img)
inky_display.show()
Next steps
There's a bunch more drawing tools in the Python Image Library, that you can use to draw on Inky Impression with code. Check out the function reference at the link below:
We made a display showing 1950s comic covers with our Inky Impression (our code and write up of that project is coming soon!) but we'd love to see what you do with yours. Ping us on Bluesky or drop a post on our forums if you'd like to show off what you've been working on.
Search above to find more great tutorials and guides.