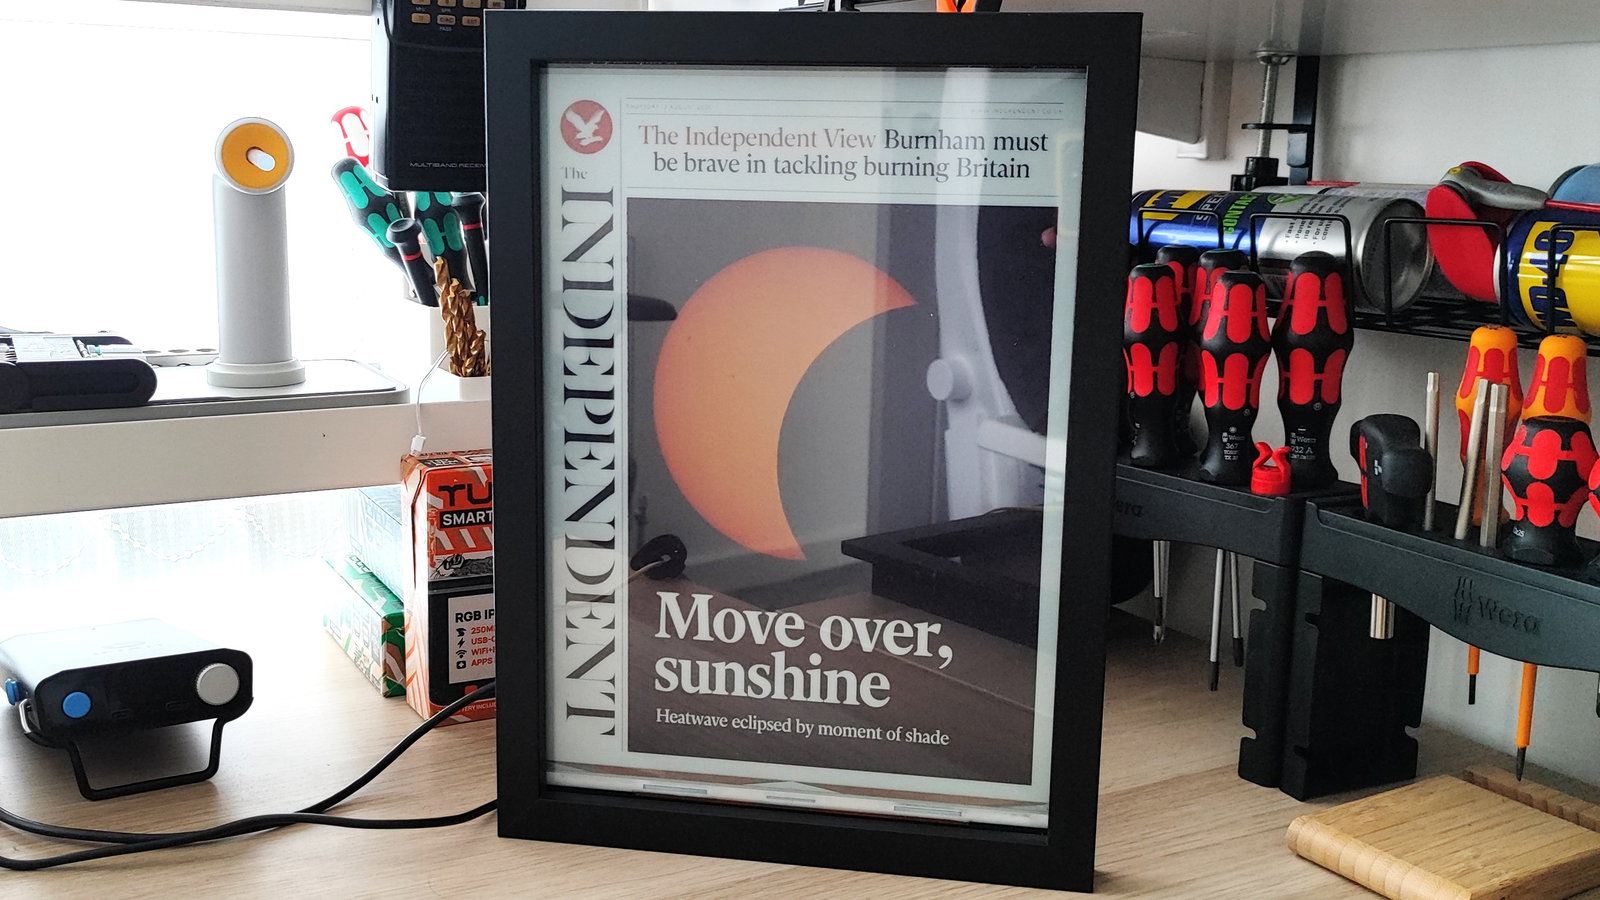
 Intermediate
Displaying Daily Newspapers on Inky Impression
Learn how to download and display newspaper front pages on Inky Impression.
Newspapers are an interest of mine. In the past they provided a daily digest of "yesterdays news" but they also personified the "zeitgeist", a snapshot of the moods, attitudes and beliefs for that period. These days, newspapers are falling foul of online news sites and the relentless onslaught of 24 hour TV news coverage. But the papers still capture the public zeitgeist of the day.
I have wanted to build this project for many years, but there wasn't a suitable multi-colour E-Paper display for my needs. I toyed with the idea of using just a black and white display, but I wanted to capture the garish vibrancy of tabloid front pages, along with the more formal clarity of broadsheets. I need full-colour and in a large format. This is where Inky Impression 13.3" really came into its own. It has a Spectra 6 display, capable of mixing six colours at once across its large 13.3 inch (1600 x 1200 resolution) display.
Newsworks: The Source Of the Images
Newsworks is the marketing body for the UK's national newspapers. Its goal is to champion free press and collaboration across the industry. They provide a daily update page that shows many of the UK's newspaper's front pages and you can see them all here. They are free to use in personal projects. Many thanks to Newsworks for this great resource.
How We Will Approach The Project
The project is broken down into four key areas.
- Code that will download the newspaper images.
- Code that will display the newspaper images on Inky Impression.
- Automatically run the code to download the newspaper images at a certain time.
- Automatically run the display code when the Raspberry Pi is powered up or rebooted.
So lets get started.
What You'll Need
- Inky Impression 13.3".
- A Raspberry Pi 3A+ or better.
- The latest Raspberry Pi OS.
- Keyboard, mouse, screen and power for your Raspberry Pi.
- An Internet connection.
Installing Inky Impression
We've got a full guide covering how to get started with Inky Impression. If you are using a Raspberry Pi with Ethernet, ensure that you follow the guidance and use a header extension. Otherwise the Ethernet and USB ports prevent the GPIO from connecting. The Raspberry Pi Zero range and 3A+ do not have this issue.
We're going to assume that you have attached Inky Impression to your Raspberry Pi and that the inky software is installed and up to date.
Writing The Python Code
There are two python files that we need to create. The first is a script that will run once per day and it will download the images directly to the Raspberry Pi. The second will display the newspaper images on Inky Impression.
We will start with the Python code to download the images.
Getting The Images
The newspaper images are located on the Newsworks website and our goal here is to automate the download of the images, then convert the long filenames into something simpler.
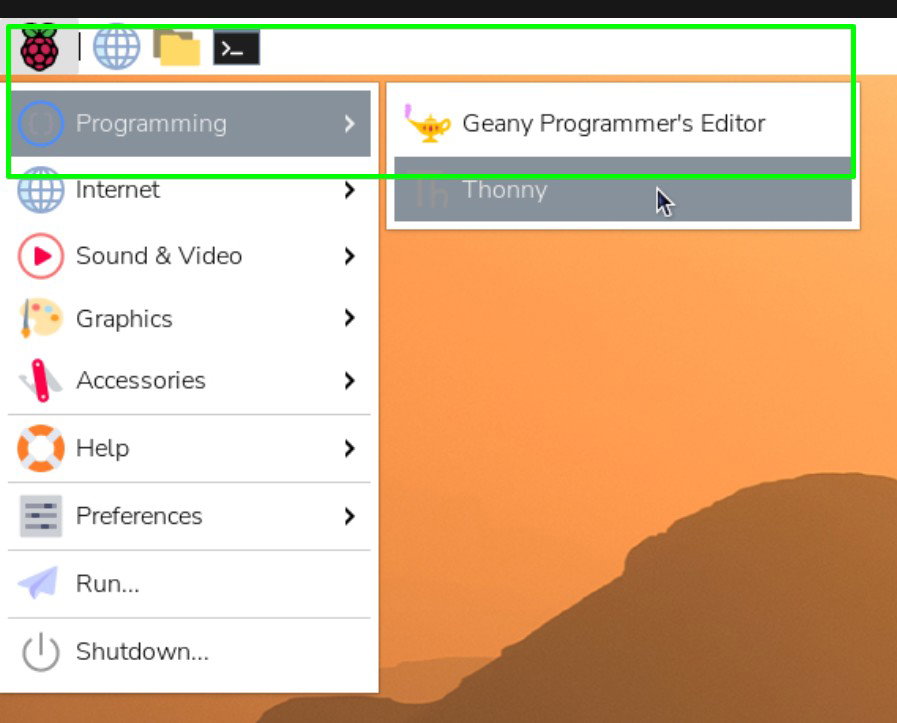
On the Raspberry Pi, in the main menu under Programming, open Thonny the Python editor.
In a new, blank file, import a series of modules (libraries of pre-written code) that we will use in our project.
- requests: Used to send HTTP requests over the Internet. Essentially we can use it to download the images.
- datetime: Used to get accurate dates and times. We will use this to get the newspaper images for the current day.
import requests
from datetime import datetime
Create two variables,
url_todayandfile_todayto store the current date and time.url_today = datetime.now() file_today = datetime.now()Format
url_todayso that it only shows the year and month, separated by a forward slash. We need to do this as it will form part of the download URL.datetime.nowreturns an object formatted like this(2026, 8, 14, 9, 35, 1, 259593)which has the correct date and time, but not in a format that we can use, hence we need to convert it.formatted_url = url_today.strftime("%Y/%m")Format
file_todayso that the year, month and day are one, long string. The returned format is YYYYMMDD. For example 20260807.formatted_file = file_today.strftime("%Y%m%d")Create a list
papers[]that contains the reference name used for each newspaper. We will use the list to insert the newspaper reference into the download URL. The/in the reference,"/IND"for example forms part of the standard URL format.- DML: Daily Mail
- DMR: Daily Mirror
- DST: Daily Star
- DTL: Daily Telegraph
- DXP: Daily Express
- GDN: The Guardian
- III: I Newspaper
- IND: The Independent
- MTR: Metro
- SUN: The Sun
- TIM: The Times
papers = ["/DML_","/DMR_","/DST_","/DTL_","/DXP_","/GDN_","/III_","/IND_","/MTR_","/SUN_","/TIM_"]Using a variable,
url_startcreate the first part of the download URL. This part of the URL is always the same, no matter which image is downloaded.url_start = "https://newsworks.org.uk/wp-content/uploads/"Set the end part of the URL. This is always the same, and it forms part of the filename for each newspaper.
url_end = "_null_null_01_1-page1.jpg"Create a variable,
iand use it so store the integer value of zero. Later we will useito create numbered filenames for the images.i = 0Use a
for loopto iterate over all of the newspapers in thepapers()list. Thefor loopwill perform a series of actions for each entry in the list.for paper in papers:Set the
urlvariable so that it downloads a newspaper front page. The URL is made up of theurl_start, theformatted_url(2026/08 for example), the reference name of eachpaperin the listpapers, theformatted_file(20260807 for example) and theurl_end. So an example URL would behttps://newsworks.org.uk/wp-content/uploads/2026/08/III_20260807_null_null_01_1-page1-346x458.jpgurl = url_start+formatted_url+paper+formatted_file+url_endPrint the URL. In day to day use we will never see this, but for debug and testing it is handy to see the URL as it is used to download the image.
print(url)Create an object
responseand use it to download (get) the image from the server. Usingrequestswegetthe image and store the response in the object. It will keep trying for up to 30 seconds before the request times out and fails. In normal use the download will be done instantly.response = requests.get(url, timeout=30)Create the
filenameobject to store the name of the file to which our downloaded newspaper front page will be saved. Change USERNAME to match your username. This uses the value stored inias the filename. The first is0.jpgthen as the for loop iterates and downloads each front page, the number increases by 1.filename = f"/home/USERNAME/Pimoroni/inky/examples/spectra6/images/{i}.jpg"Open the file using its filename and write the downloaded image to the file. Using
open()we prepare a named filefilenameand set it so that we can write raw byteswbto the file. This will overwrite any existing files with the same names.with open(filename, "wb") as f: f.write(response.content)Increment the value stored in
iby one. This is a shorter way of writingi = i + 1.i += 1Print that the image has been downloaded and saved to the file.
print(f"Downloaded and saved {filename}")Check that your code matches this.
import requests from datetime import datetime url_today = datetime.now() file_today = datetime.now() formatted_url = url_today.strftime("%Y/%m") formatted_file = file_today.strftime("%Y%m%d") papers = ["/DML_","/DMR_","/DST_","/DTL_","/DXP_","/GDN_","/III_","/IND_","/MTR_","/SUN_","/TIM_"] url_start = "https://newsworks.org.uk/wp-content/uploads/" url_end = "_null_null_01_1-page1.jpg" i = 0 for paper in papers: url = url_start+formatted_url+paper+formatted_file+url_end print(url) response = requests.get(url, timeout=30) filename = f"/home/USERNAME/Pimoroni/inky/examples/spectra6/images/{i}.jpg" with open(filename, "wb") as f: f.write(response.content) i += 1 print(f"Downloaded and saved {filename}")Save the code to
/home/USERNAME/Pimoroni/inky/examples/spectra6asget_news.py. Change USERNAME to match your username on the Raspberry Pi. This could bepior your chosen name.Click on the green
RUNbutton to start the code. This will test that our code works correctly, the output, the URLs and their filename, are printed to the Python Shell as the loop iterates.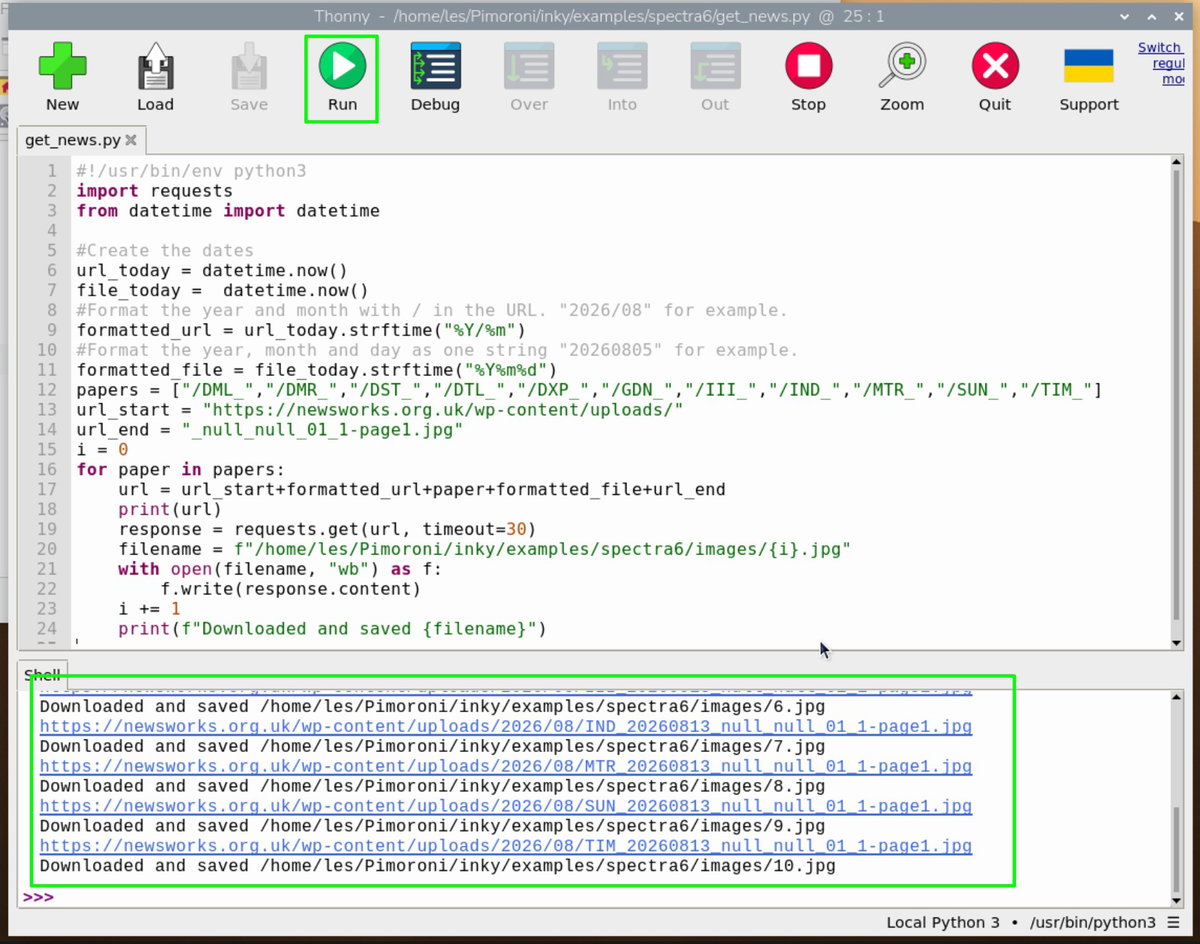
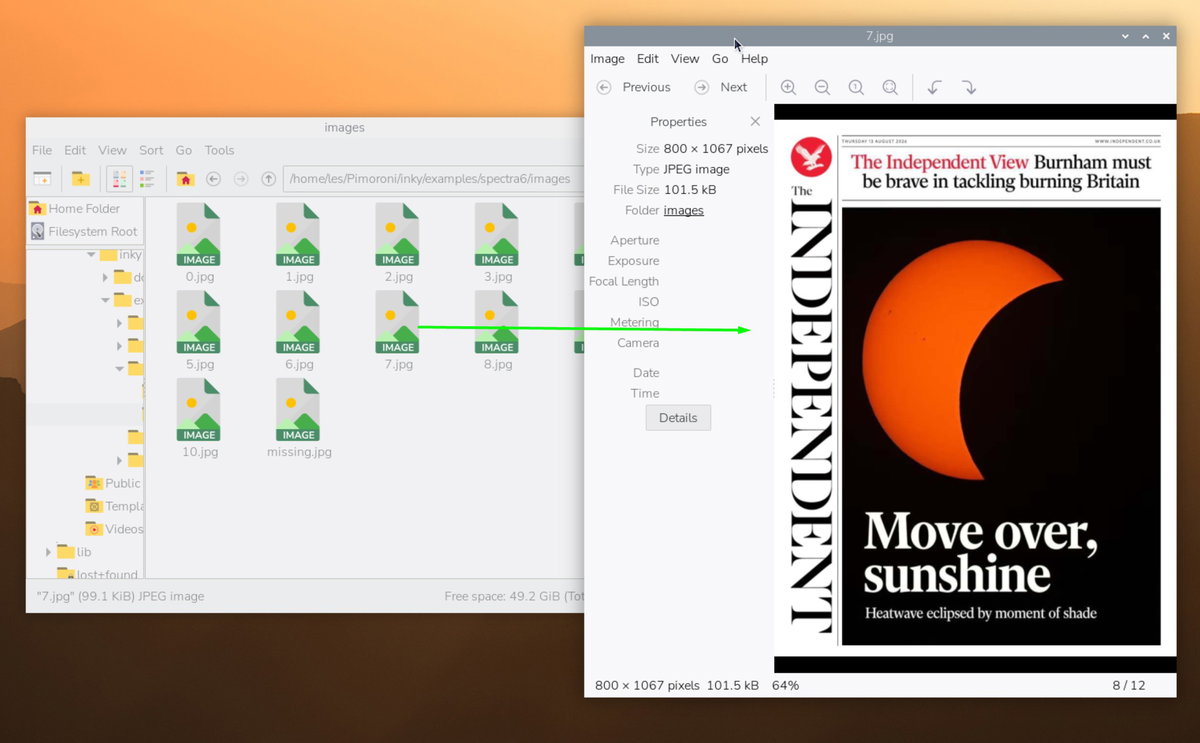
From the main Raspberry Pi menu, open the file manager and navigate to
/home/USERNAME/Pimoroni/inky/examples/spectra6/images. Remember to changeUSERNAMEto your username.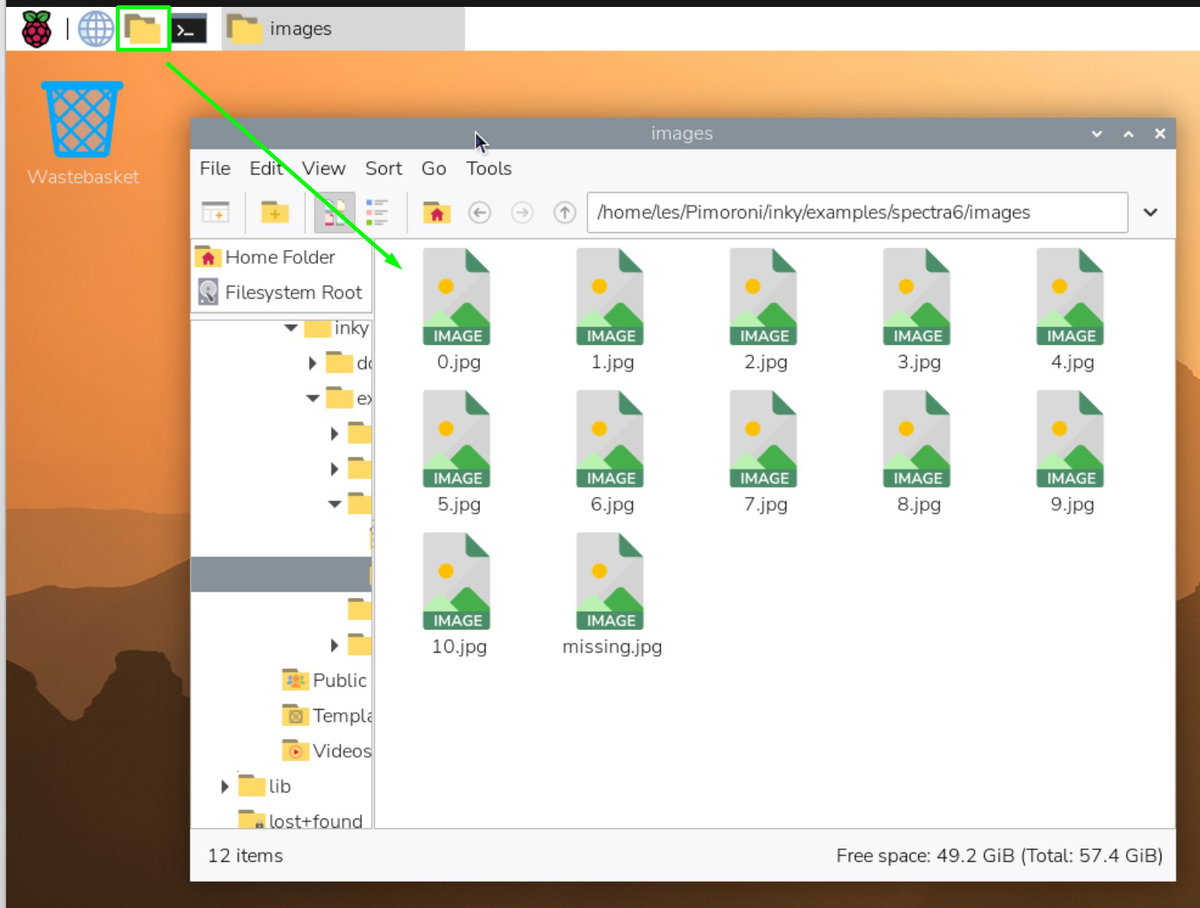
Click on any of the images, and you will see the newspaper front page for that day.
We've got the means to get the images, now we need to write the code that will show the images on Inky Impression.
Viewing The News
To view the news on Inky Impression's E-Paper display we'll write a short Python script that will cycle through the newspaper images stored in /home/USERNAME/Pimoroni/inky/examples/spectra6/images.
For testing, we will set the newspaper image to refresh every minute, but for general use something longer, say five to ten minutes, would be less distracting.
Please note: From step 13 onward we are working in the Terminal as we are using a Python virtual environment which
- On the Raspberry Pi, in the main menu under Programming, open Thonny the Python editor.
- CLick on
switch to regular modeand then close Thonny. Re-open Thonny and the user interface will be slightly different. By default, the Raspberry Pi version of Thonny has a simpler user interface, by switching to regular mode, we unlock extra features that will be needed later.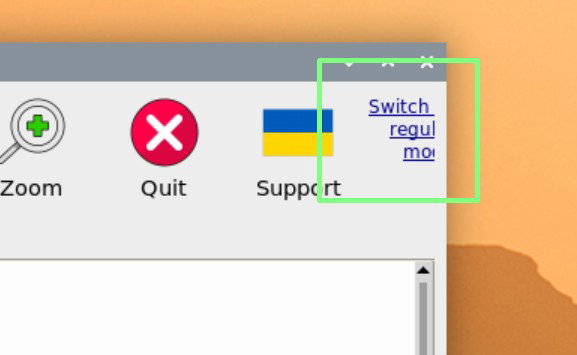
- In a new, blank file, import a series of modules (libraries of pre-written code) that we will use in our project.
- time: This is used to control the delay between each change of the newspaper.
- PIL: The Python Imaging Library which is used to tweak the image.
- Inky: A module to enable the newspaper front page images to be displayed on Inky Impression.
import time from PIL import Image from inky.auto import auto - Use Inky's helper function to automatically detect and configure your Inky Impression. This line instructs the code to read a chip on Inky Impression and determine the type and resolution of your Inky Impression display.
inky = auto() - Inside a
trystatement, create awhile Trueloop. These lines will try and run the code within, in this case a loop that will continuously run. If the code cannot be run, then a laterfinallystatement is run which will ensure that the code exits cleanly.try: while True: - Use a for loop to iterate over all eleven images in the folder. Remember to change USERNAME to your username The variable
img_pathis updated each time the loop iterates. This changes the value ofiby one each time. So we go from 0 to 1, 2, 3 etc. This value is inserted into the file path for the image that we want to use.for i in range(11): img_path = f"/home/USERNAME/Pimoroni/inky/examples/spectra6/images/{i}.jpg" - Setup another
Trystatement and inside of it, use a variable,imageto open the currently selected image using theimg_path. Then rotate the image 90 degrees so that it is displayed in portrait. We are loading the image usings its full file path that updates every time the for loop is run. By default, Inky Impression will expect to be in landscape orientation, but as newspapers are in portrait, we rotate the image.try: image = Image.open(img_path) image = image.rotate(90, expand=True) - Resize the image to match Inky Impression's resolution. Then set the image ready for display. The saturation value is the intensity of the colour. We're using
0.5as it offers the best overall colour reproduction. You can tweak this value between 0.0 and 1.0 to get the best colour reproduction for your project.inky.set_image(resizedimage, saturation=0.5) - Show the image on Inky Impression and then wait for 60 seconds. The image has been rotated, resized and set for use with Inky Impression, and the
showcommand puts the images on the screen. The 60 second delay is great for debug, but a little distracting for general use. Change this to 300 seconds (five minutes) or longer when deploying for use in your home.inky.show() time.sleep(60) - Create an exception to handle any missing files. If there are any missing newspaper front page images, this exception will gracefully handle their omission. It will simply load a custom image and then wait for one minute before moving on to the next image. We're reusing the code to load an image file and then display it on Inky Impression. Remember to change USERNAME to your username. This is the missing image file.
except FileNotFoundError: print(f"Image {i}.jpg not found. Retrying in 1 minute...") image = Image.open("/home/USERNAME/Pimoroni/inky/examples/spectra6/images/missing.jpg") image = image.rotate(90, expand=True) resizedimage = image.resize(inky.resolution) inky.set_image(resizedimage, saturation=0.5) inky.show() time.sleep(60) - Use a
finallystatement to close off the earliertryand to cleanly shutdown the code.finally: print("EXIT") - Check that your code looks like this. Remember to change USERNAME to your username.
import time from PIL import Image from inky.auto import auto inky = auto() try: while True: for i in range(11): img_path = f"/home/USERNAME/Pimoroni/inky/examples/spectra6/images/{i}.jpg" try: image = Image.open(img_path) image = image.rotate(90, expand=True) resizedimage = image.resize(inky.resolution) inky.set_image(resizedimage, saturation=0.5) inky.show() time.sleep(60) except FileNotFoundError: print(f"Image {i}.jpg not found. Retrying in 1 minute...") image = Image.open("/home/USERNAME/Pimoroni/inky/examples/spectra6/images/missing.jpg") image = image.rotate(90, expand=True) resizedimage = image.resize(inky.resolution) inky.set_image(resizedimage, saturation=0.5) inky.show() time.sleep(60) finally: print("EXIT") - Save the code as
papers.pyto/home/USERNAME/Pimoroni/inky/examples/spectra6/. Remember to change USERNAME to your username. - Click on the bottom right of the Thonny window, where it says
Local Python 3 /usr/bin/python3and selectConfigure Interpreter. To run the code, we need to tell Thonny where the special Python virtual environment is located. This was created in our getting started guide. Changes as to how Python packages are installed to the operating system means that we need to use a virtual environment to prevent any chance of damaging the operating system's version of Python. The other packages we use in this example are ones that are built into Raspberry Pi OS.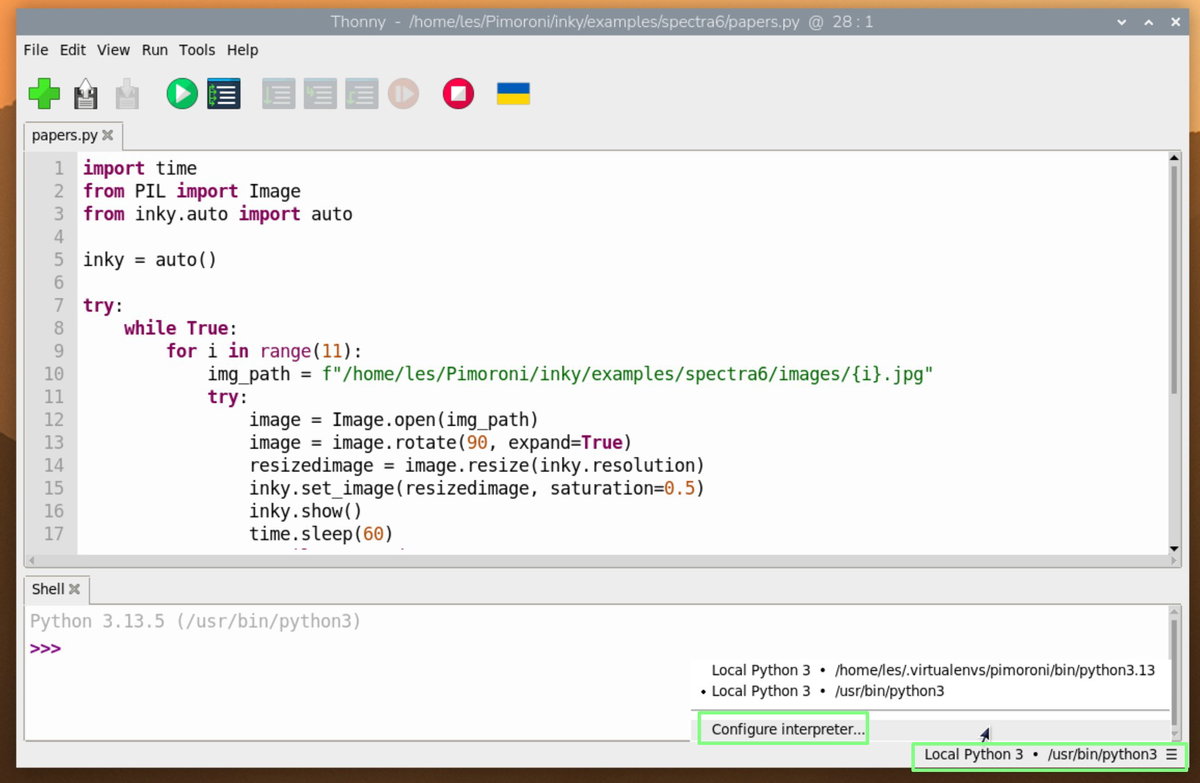
- Click on the three dots to open a new window.
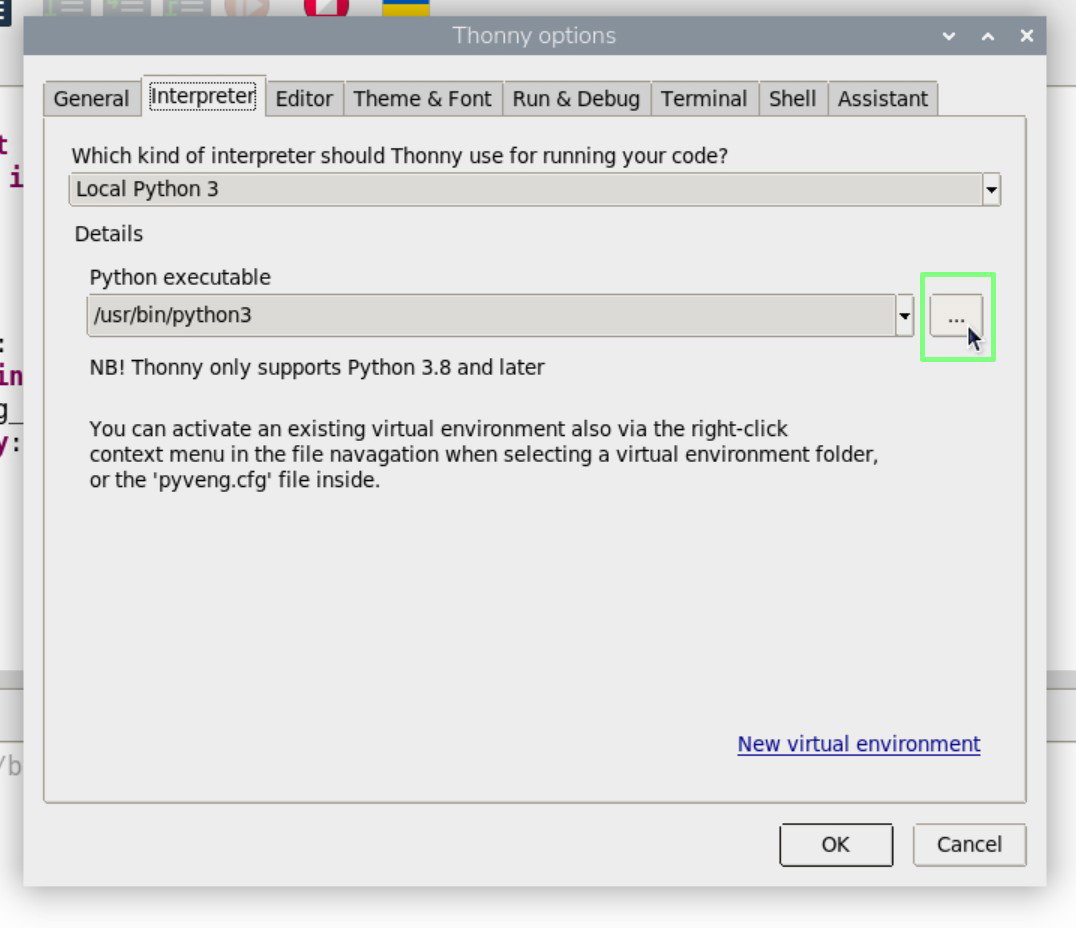
- Navigate to the location of the Python virtual environment which is hidden in your
Homedirectory. To see this hidden directory, we need to right click and selectShow Hidden Filesthen navigate to/home/USERNAME/.virtualenvs/pimoroni/binand then clickOK. The Python interpreter will now use the virtual environment. If you prefer to use the terminal, the Python virtual environment can be set by running the commandsource ~/.virtualenvs/pimoroni/bin/activateRemember to change USERNAME to your username.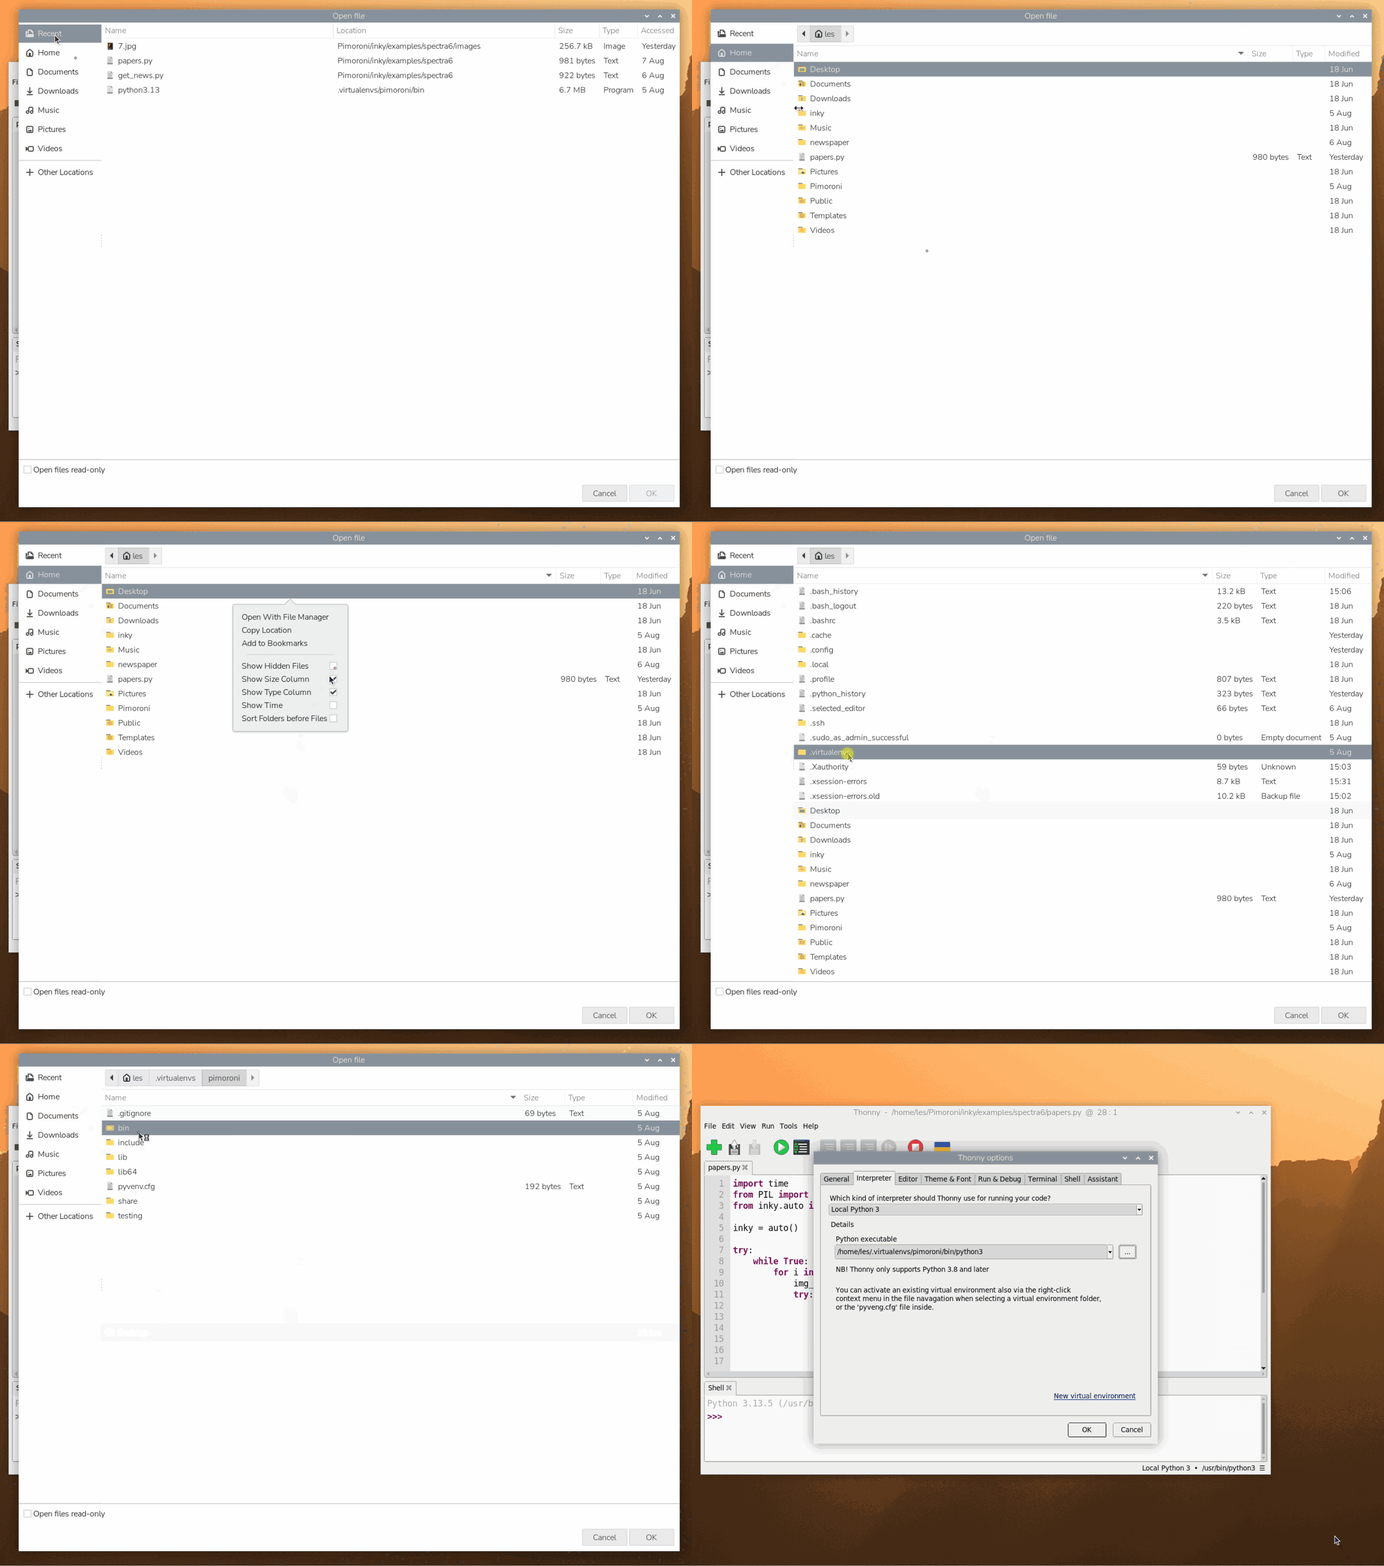
- Click on the green
RUNbutton to start the code. This will test that our code works correctly, the output, the URLs and their filename, are printed to the Python Shell as the loop iterates. Terminal users, run this commandpython /home/USERNAME/Pimoroni/inky/examples/spectra6/papers.pyRemember to change USERNAME to your username. - Check Inky Impression for the latest news.
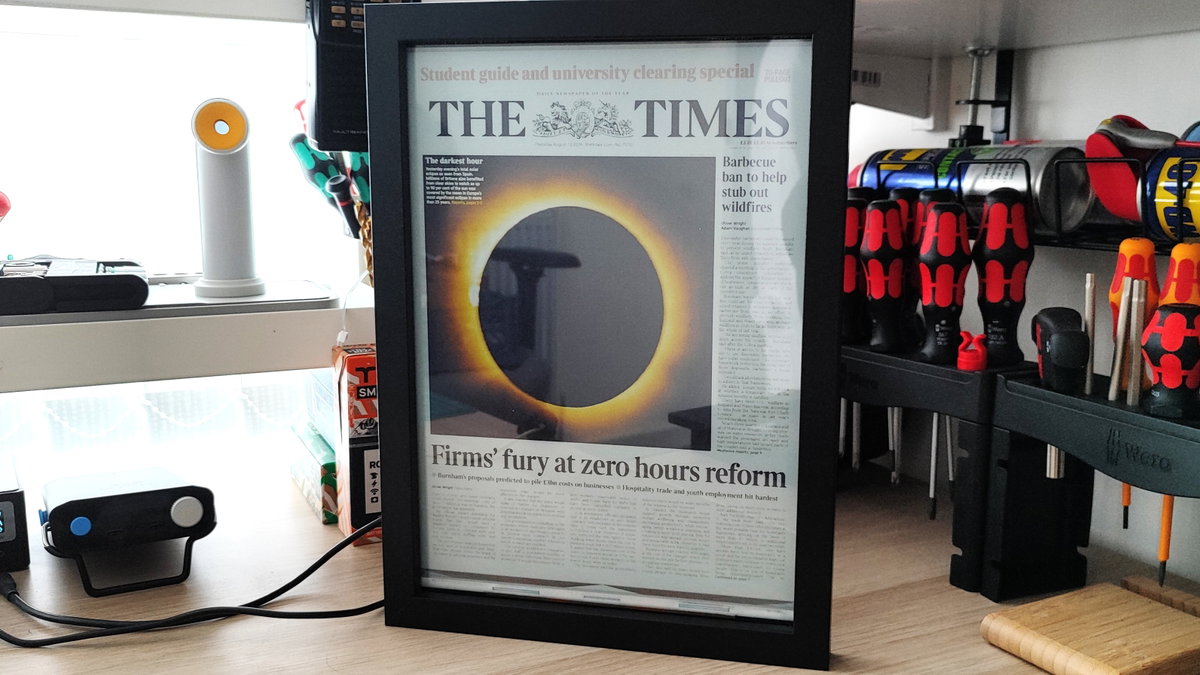

We've built the two Python files that make up this project, now we need to automate downloading the images, and starting playback.
Creating A Cron Job
Linux uses cron to schedule commands / tasks to run at certain times or events. We're going to use it to schedule downloading the images at 10am each day. We will also use a reboot event to trigger starting playback of the images.
- Open a terminal and open
crontab, the editor for cron. We're openingcrontabas our standard user, not as sudo. Our code doesn't need to elevate its privileges to work.crontab -e - If prompted to select an editor, select
1. /bin/nanoand press ENTER.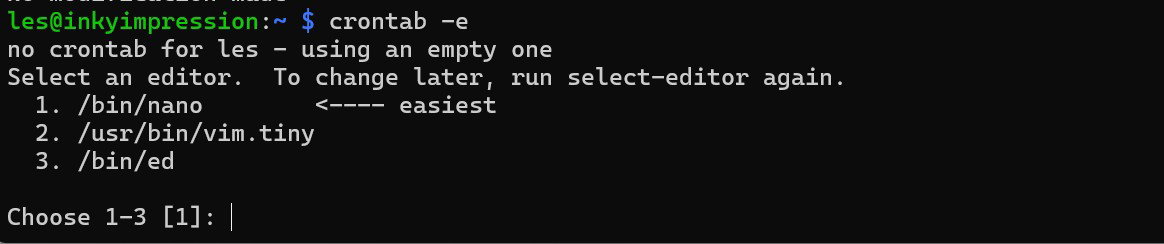
- Using the cursor keys, scroll to the bottom of the file and first exactly enter this text. Remember to change USERNAME to your username.
- The first value
0is minutes. - The second
10is 10am in the 24 hour clock. - The three
*refer to day of the month, month, day of the week. The*means that it will run the code everyday of the month. - We then tell cron which Python interpreter we want to run the code with. In this case
/usr/bin/python3. - Then we tell cron to run the
get_news.pycode to download the newspaper images. We use the full path to the file to prevent any issues.
0 10 * * * /usr/bin/python3 /home/USERNAME/Pimoroni/inky/examples/spectra6/get_news.py - The first value
- Make a new line and enter this line to run this line when the Raspberry Pi is powered up or rebooted.
- The code will pause for 30 seconds, giving the operating system time to settle after booting up. The
&&will run the next command in the chain if the previous worked correctly. - We then tell cron which Python interpreter we want to run the code with. In this case
/home/USERNAME/.virtualenvs/pimoroni/bin/python3which is the Python virtual environment that is setup when installing Inky Impression. - We then tell cron to run the
papers.pycode to display the news on Inky Impression.
- The code will pause for 30 seconds, giving the operating system time to settle after booting up. The
- Press
CTRL + O, thenEnterand finallyCTRL + Xto save and exit from the editor. - Reboot the Raspberry Pi and watch Inky Impression. After a short while it will start showing the latest news front pages.
- Remove the keyboard, mouse, screen from your setup. You now have a dedicated newspaper display ready for your living room.
Framing The Project
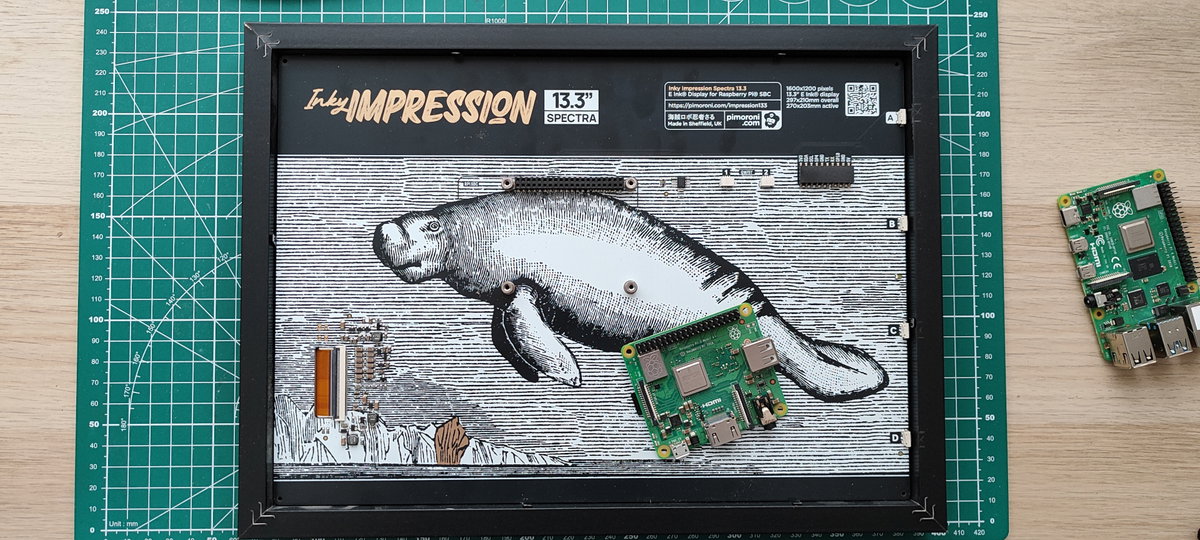
Inky Impression 13.3" board dimensions are the same as a piece of A4 paper (297 x 210mm), so you can use many A4 frames to house the project.
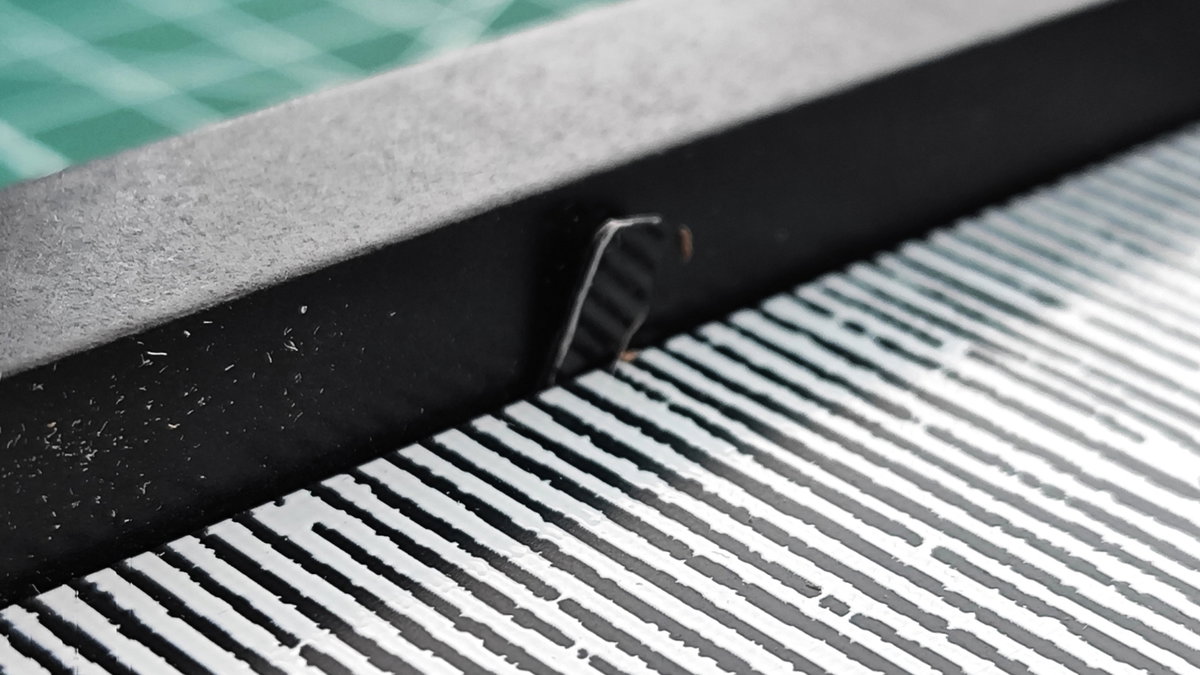 Be aware that the screen is glass, and that inserting Inky Impression should be done carefully and that all of the frame's metal tabs should be clear of the screen.
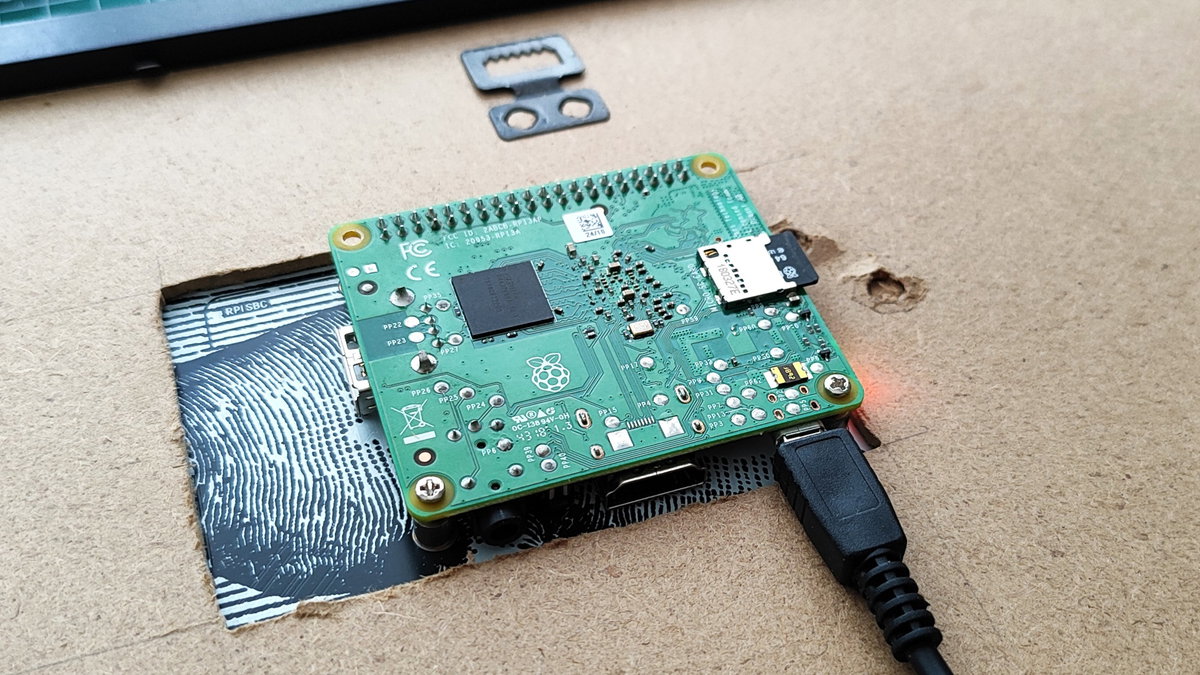 Putting the back on your frame may prove tricky as the Raspberry Pi will undoubtedly be in the way. For our frame we had to cut a hole for the Raspberry Pi to fit through.
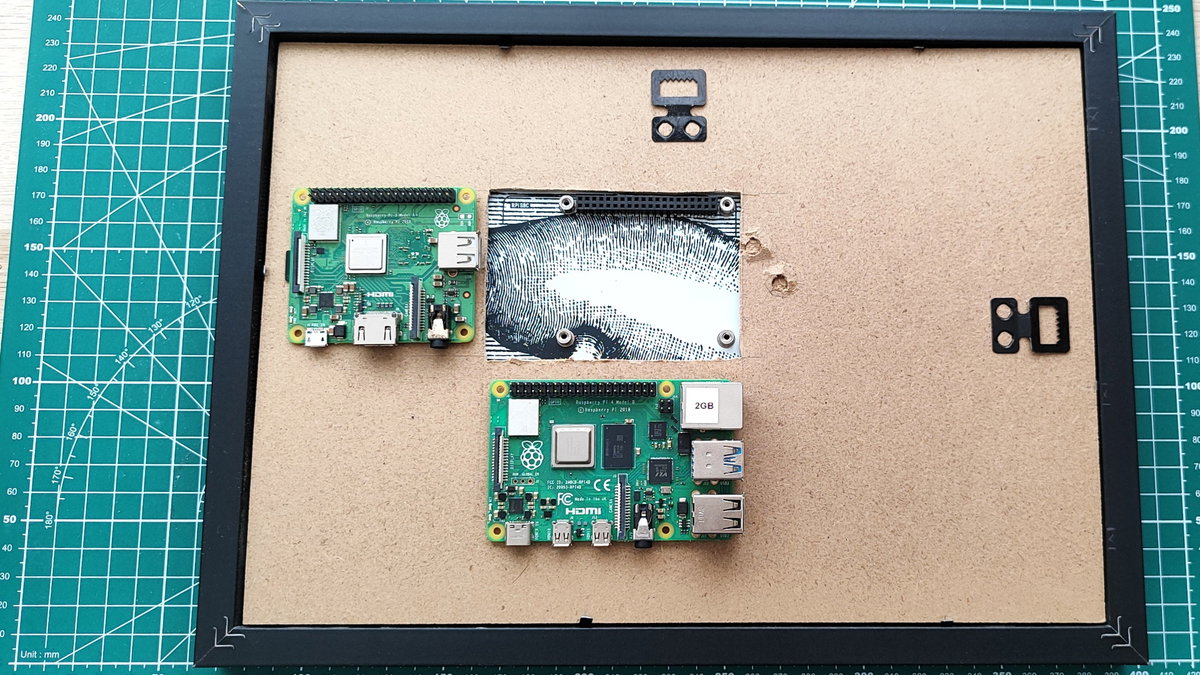 We cut the hole so that it would fit a full size Raspberry Pi with space for access to all of the ports.
While the frame stands up on its own, it would benefit from either hanging on a wall (using its own hooks) or 3D printed "feet" to keep its balance. So we did just that.
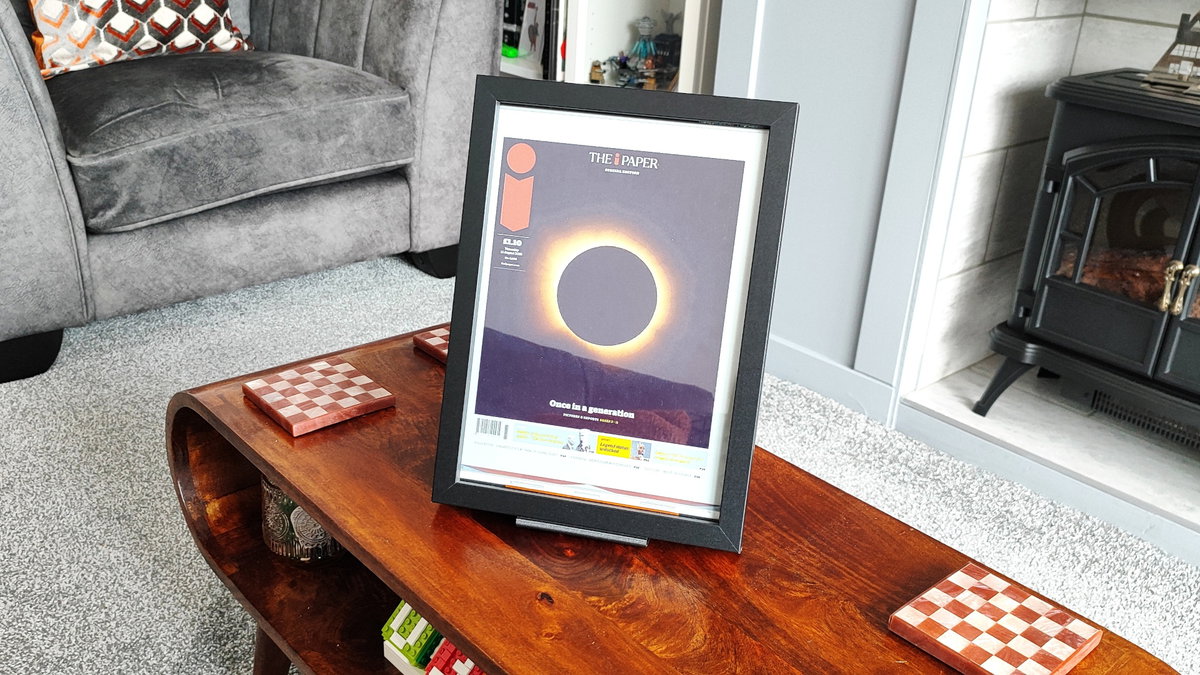 Basing our stand on Joseph Breihan's excellent simple picture frame stand we needed to make a small adjustment for our frame. Breihan's stand has a lip for a 20mm frame, our frame is 23mm. We split the STL into two pieces and then added an extra 5mm to the lip using Tinkercad for quickness. We then loaded the print into PrusaSlicer and sent it over to our CORE One+ for printing. A couple of hours later and we were ready to place this in the living room.
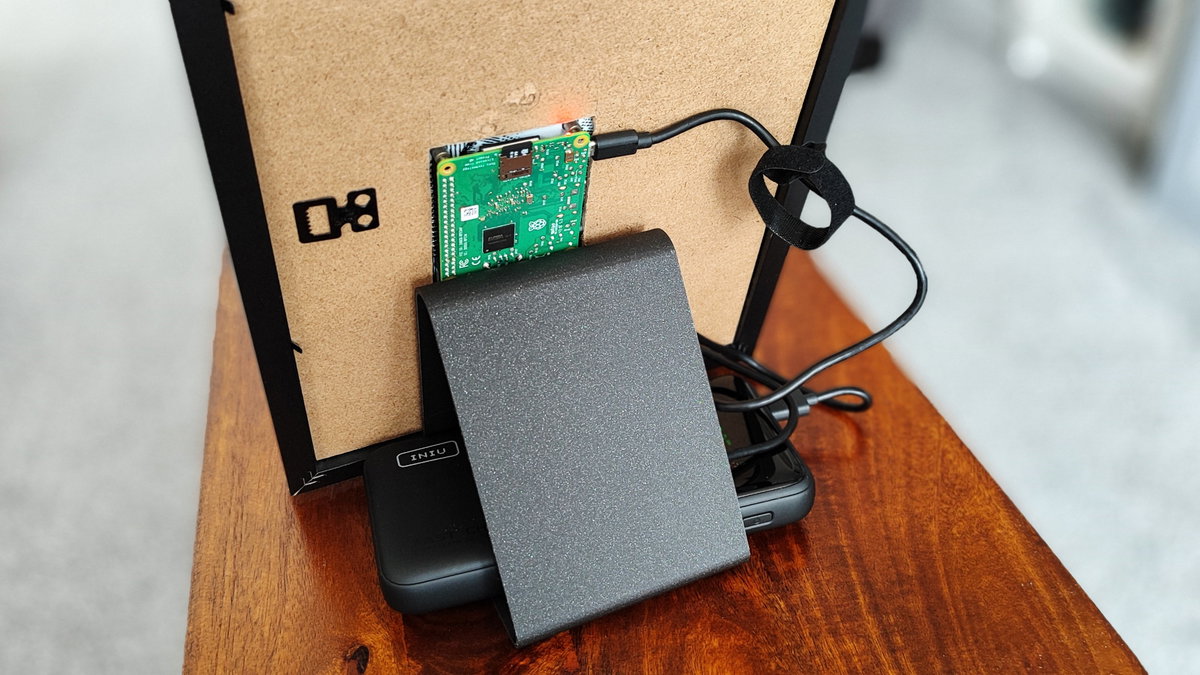 There was even space under the stand to fit a large USB battery so our display isn't limited to being tied to an outlet.
What Have We Learnt?
- How to get images from the Internet using
requests. - How convert
datetimefor use in URLs and filenames. - How to display images on Inky Impression.
- How to automate tasks using
cron.
Complete Code Listing
Code To Get The News Images: get_news.py
import requests
from datetime import datetime
#Create the dates
url_today = datetime.now()
file_today =  datetime.now()
#Format the year and month with / in the URL. "2026/08" for example.
formatted_url = url_today.strftime("%Y/%m")
#Format the year, month and day as one string "20260805" for example.
formatted_file = file_today.strftime("%Y%m%d")
papers = ["/DML_","/DMR_","/DST_","/DTL_","/DXP_","/GDN_","/III_","/IND_","/MTR_","/SUN_","/TIM_"]
url_start = "https://newsworks.org.uk/wp-content/uploads/"
url_end = "_null_null_01_1-page1.jpg"
i = 0
for paper in papers:
url = url_start+formatted_url+paper+formatted_file+url_end
print(url)
response = requests.get(url, timeout=30)
filename = f"/home/USERNAME/Pimoroni/inky/examples/spectra6/images/{i}.jpg"
    with open(filename, "wb") as f:
        f.write(response.content)
i += 1
print(f"Downloaded and saved {filename}")
Code To Show The Images on Inky Impression: papers.py
import time
from PIL import Image
from inky.auto import auto
inky = auto()
try:
    while True:
         for i in range(11):
             img_path = f"/home/USERNAME/Pimoroni/inky/examples/spectra6/images/{i}.jpg"
         try:
             image = Image.open(img_path)
             image = image.rotate(90, expand=True)
resizedimage = image.resize(inky.resolution)
inky.set_image(resizedimage, saturation=0.5)
         inky.show()
         time.sleep(60)
except FileNotFoundError:
print(f"Image {i}.jpg not found. Retrying in 1 minute...")
image = Image.open(f"/home/USERNAME/Pimoroni/inky/examples/spectra6/images/missing.jpg")
image = image.rotate(90, expand=True)
resizedimage = image.resize(inky.resolution)
inky.set_image(resizedimage, saturation=0.5)
inky.show()
time.sleep(60)
finally:
    print("EXIT")
Crontab To Automate Getting And Showing The Images
30 10 * * * /usr/bin/python3 /home/USERNAME/Pimoroni/inky/examples/spectra6/get_news.py
@reboot sleep 30 && /home/USERNAME/.virtualenvs/pimoroni/bin/python3 /home/USERNAME/Pimoroni/inky/examples/spectra6/papers.py