 Easy
Easy
Getting Started With Tiny FX
Get to grips with Tiny FX and bring your LEGO®-compatible projects to life.
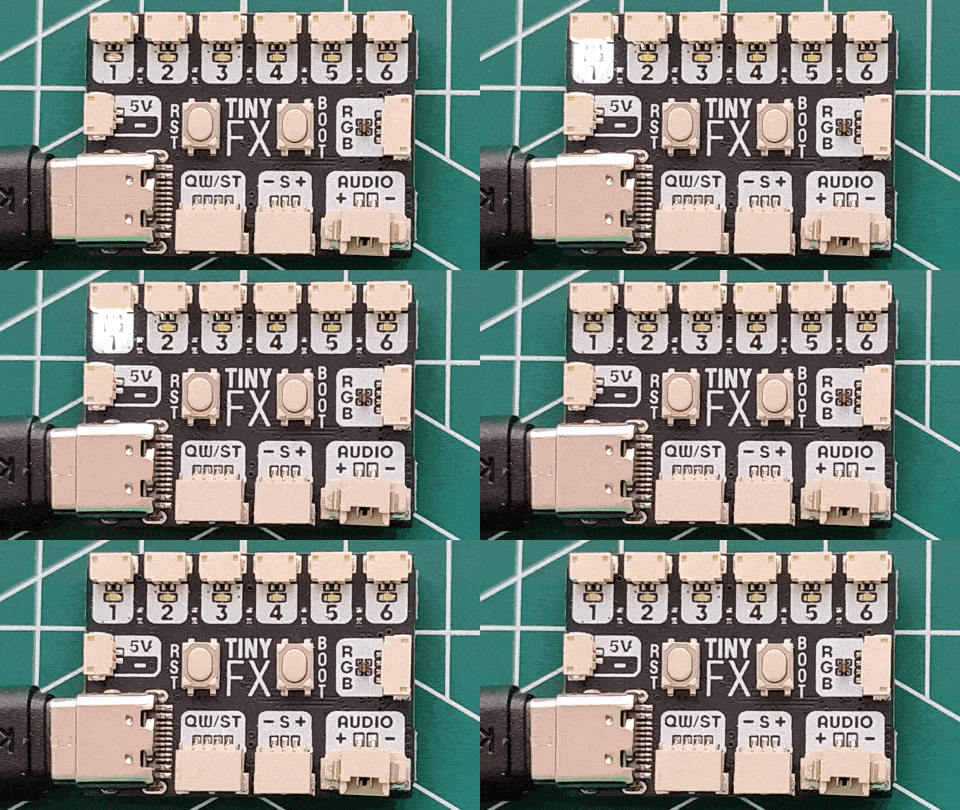
Our Tiny FX and Tiny FX W boards are designed to bring light and sound to your LEGO®-compatible projects, model builds, props, and dioramas. We've packed the mighty RP2040 microcontroller into a tiny package and provided accessories to incorporate light, sound and sensors into your builds without the need to purchase additional boards. Tiny FX is programmable via MicroPython, and you can customise the code to meet your needs.
Tiny FX provides:
- 6 x Digital outputs (for mono LEDs)
- 1 x RGB LED output
- 1 x Sensor input
- 1 x 3W Audio output
- 5V power input for battery pack
- 1 x Qw/ST connector for use with compatible sensors
Tiny FX W provides the same features, but also comes with Wi-Fi and Bluetooth connectivity.
With Tiny FX you can add light effects using single colour or RGB LEDs, sound effects and infrared to any LEGO®-compatible build. We've got a great example of using all of these features in this project.
If you've not got a Tiny FX or Tiny FX W, then grab one of the starter kits as it comes with:
- Tiny FX / Tiny FX W
- Adhesive Backed Mini Speaker 8Ω (1W)
- 6 x LED dots (cool white)
- 5 x RGB LEDs (plus expansion board and cable)
- 3 x AAA battery holder (Batteries not included)
- USB-A to USB-C cable
- Reusable Pirate-brand Loot Box.
The Tiny FX W starter kit also comes with:
- PIR Stick (Passive Infrared sensor to detect movement)
- 3 pin JST-SH cable (for connecting PIR Stick)
This introduction will show you how to get started with Tiny FX and Tiny FX W. We barely scratch the surface of what this board can achieve, but this is the first guide in a short series that introduces Tiny FX / Tiny FX W's features and provides examples and code to illustrate how you can integrate it into your projects. In the series we will be covering how to use the Tiny FX MicroPython module to do more advanced things, but for part one we'll keep things simple.
What You'll Need
- Tiny FX or Tiny FX W starter kits.
- A computer running Microsoft Windows, macOS or Linux.
- Thonny installed on your computer.
What's So Special About Tiny FX?
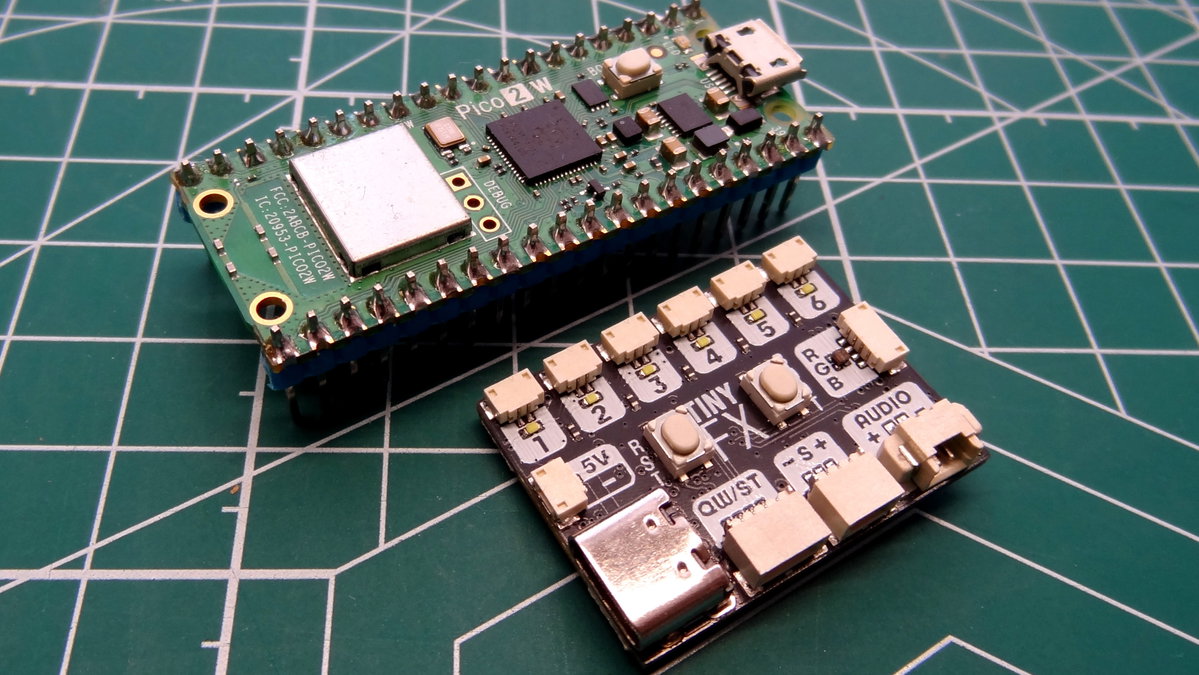 You've probably heard of the Raspberry Pi, a credit card sized computer that launched in 2012 and went on to become a global success. If not, Raspberry Pi made a £35 computer which runs the Linux operating system and has a 40-pin header that can be used with sensors, LEDs, etc. The same company also make a range of low-cost microcontrollers called "Pico" that are not computers, and are instead programmed via your computer to run code you can customise.
The Raspberry Pi Pico family of boards are general purpose microcontrollers (a compact, self-contained computer on a single integrated circuit / chip) that was designed to be used in a plethora of projects. Big and small! It has lots of pins which can be used to connect electronics and components, but it requires a little more effort and knowledge to achieve the best results. Tiny FX and Tiny FX W are essentially Raspberry Pi Picos that have been designed to address the needs of model makers who want to integrate electronics into a build. It provides dedicated ports for LEDs, sound and sensors, while remaining smaller than a Raspberry Pi Pico, enabling it to fit into even the smallest build.
How Do I Use Tiny FX In A Project?
Tiny FX directly runs MicroPython. Python is a great general purpose programming language that is used in many different industries, education, and for home computing.
- NASA: Analyse mission data.
- Industrial Light and Magic (ILM): Automate workflows, custom tool development, rendering automation.
- Netflix: Data engineering, recommendation systems, cloud operations.
- Education: Typically the first typed programming language after learners move from block coding.
- Home Computing: Creating apps, controlling robots, AI.
MicroPython is a version of Python that has been made especially for low-power microcontrollers. On Tiny FX we have created our own version of MicroPython which contains modules (pre-written code, sometimes also called "libraries") to enable anyone to build projects with our boards. Your Tiny FX comes pre-loaded with MicroPython, so you can get making right out of the box. When you first plug in Tiny FX to your computer, it runs a file, main.py which shows off the LED and RGB LED lighting effects.
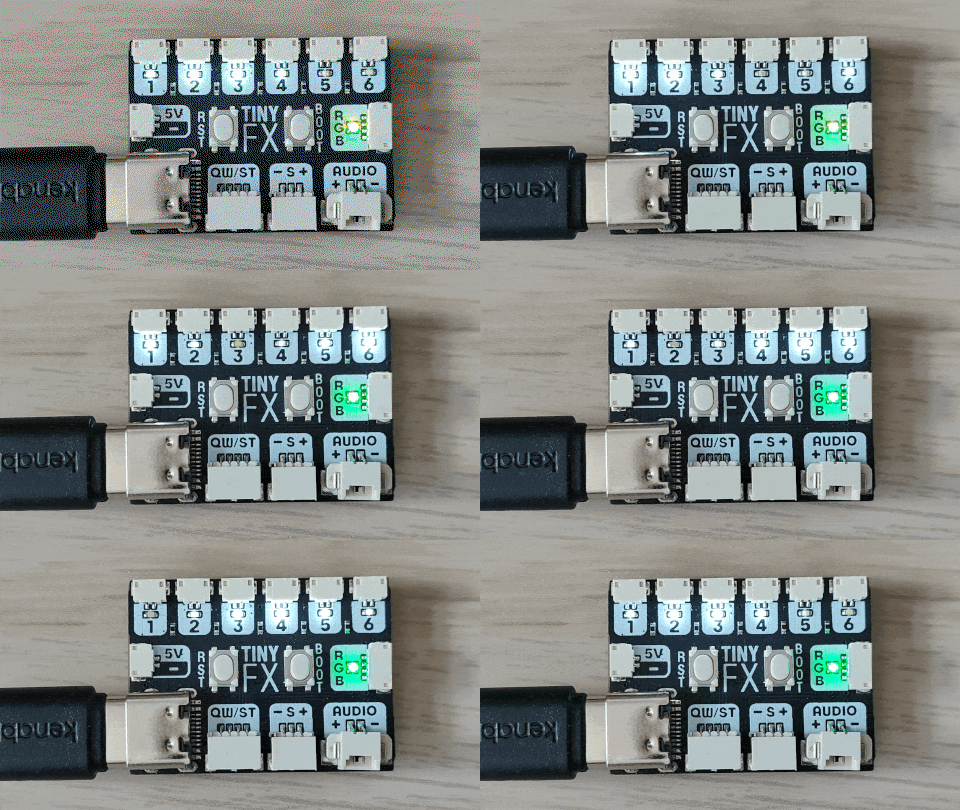
To make your own projects, all you need to do is plug it in to your computer, open a Python editor called Thonny and you'll soon be building projects.
Periodically we release new firmware which provides new features and remove bugs. While not essential, updating the firmware is good practice. You can update the version of MicroPython on Tiny FX by "flashing firmware" to the board. Flashing firmware essentially means writing a new "operating system" to Tiny FX's onboard storage. At the end of this guide there is a section dedicated to doing this.
Connecting To TinyFX
To use Tiny FX's MicroPython firmware, we need to use a tool on our computer that enables us to talk to the board and to write code on to it. Our tool of choice is Thonny, a Python code editor that can talk directly to MicroPython devices, like Tiny FX and many of our other boards.
Thonny's user interface is broken down into these key areas.
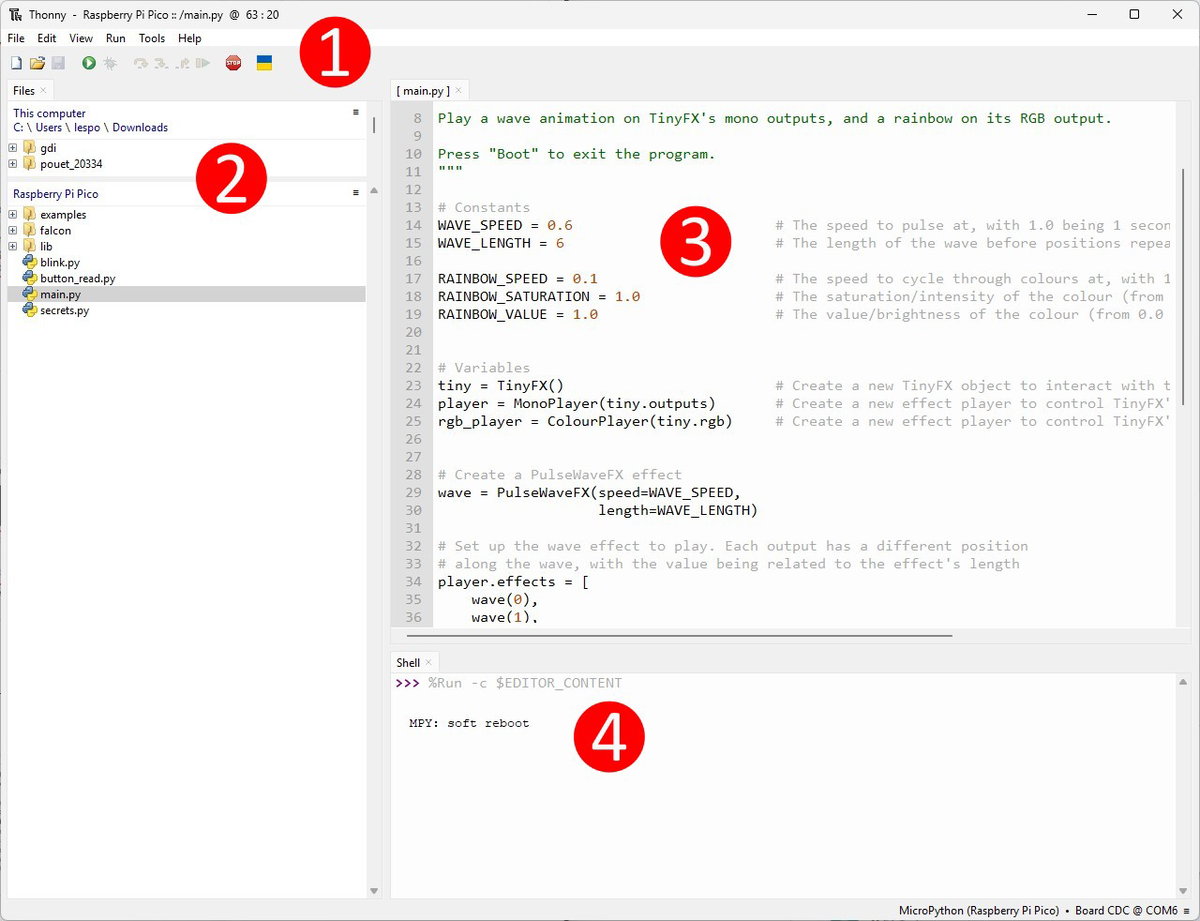
- Menu and Toolbar: Here we can find options to open, save, run and stop MicroPython code.
- Files: We can see files on our computer and on Tiny FX (Raspberry Pi Pico).
- Code Editor: Here is where we write the code (sometimes also called a "script") that makes up our project.
- Shell: The Shell is an interactive environment where you type Python code one line (or block) at a time and see the result immediately, instead of writing a full Python project and running all of the code at once.
Let's get started with our first project.
- Download and install Thonny for your operating system.
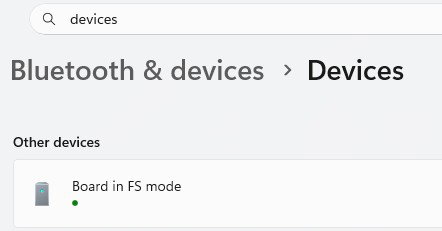
- With Tiny FX connected to your computer, open Thonny. By default, Tiny FX will appear as a device named Board in FS mode ready to talk to Thonny.
Click on
Tools >> Options >> Interpreterto open the options for connecting to external devices. You can also go to the bottom right of the Thonny window, under the Shell, and from the dropdown menu select "Configure Interpreter". Both ways are correct.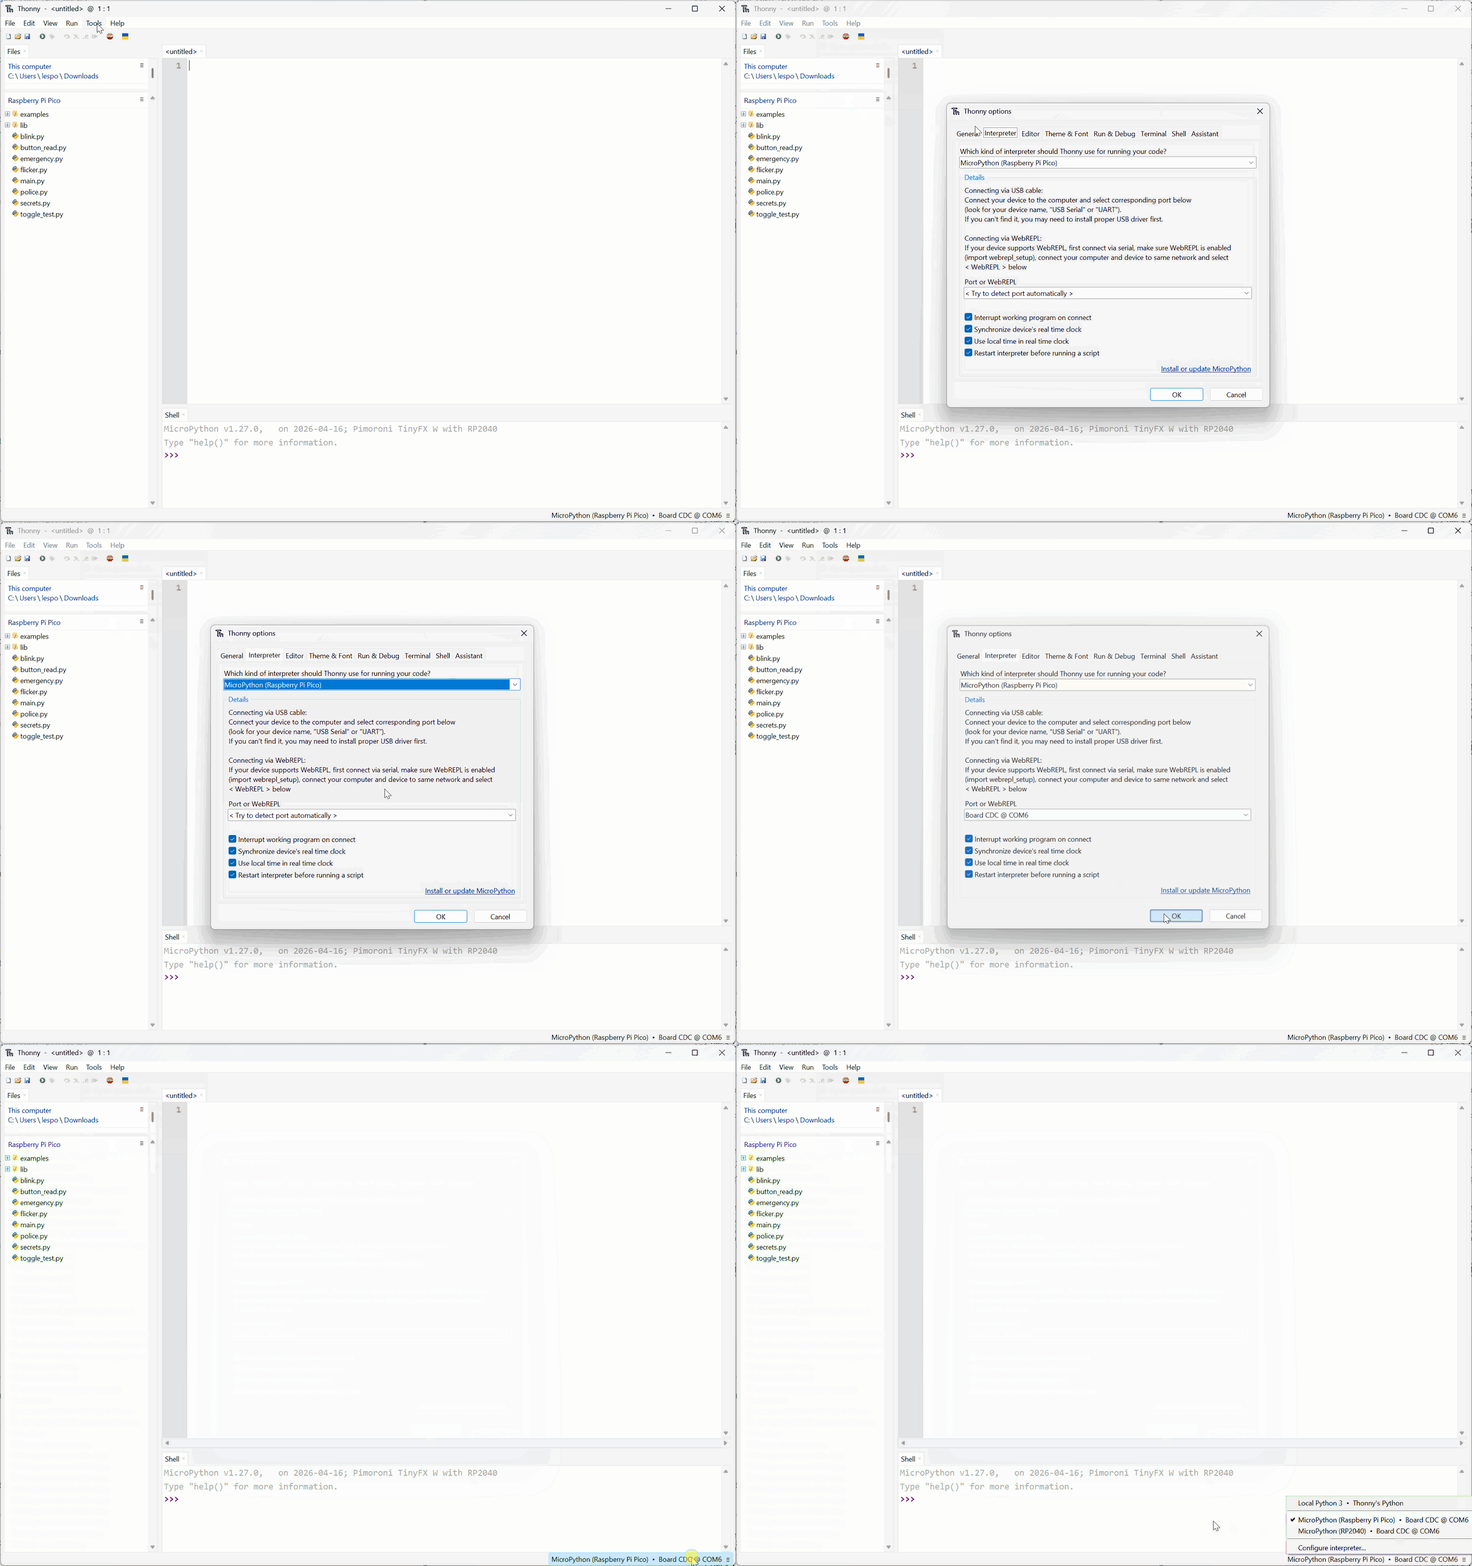
From the Interpreter list, select MicroPython (Raspberry Pi Pico).
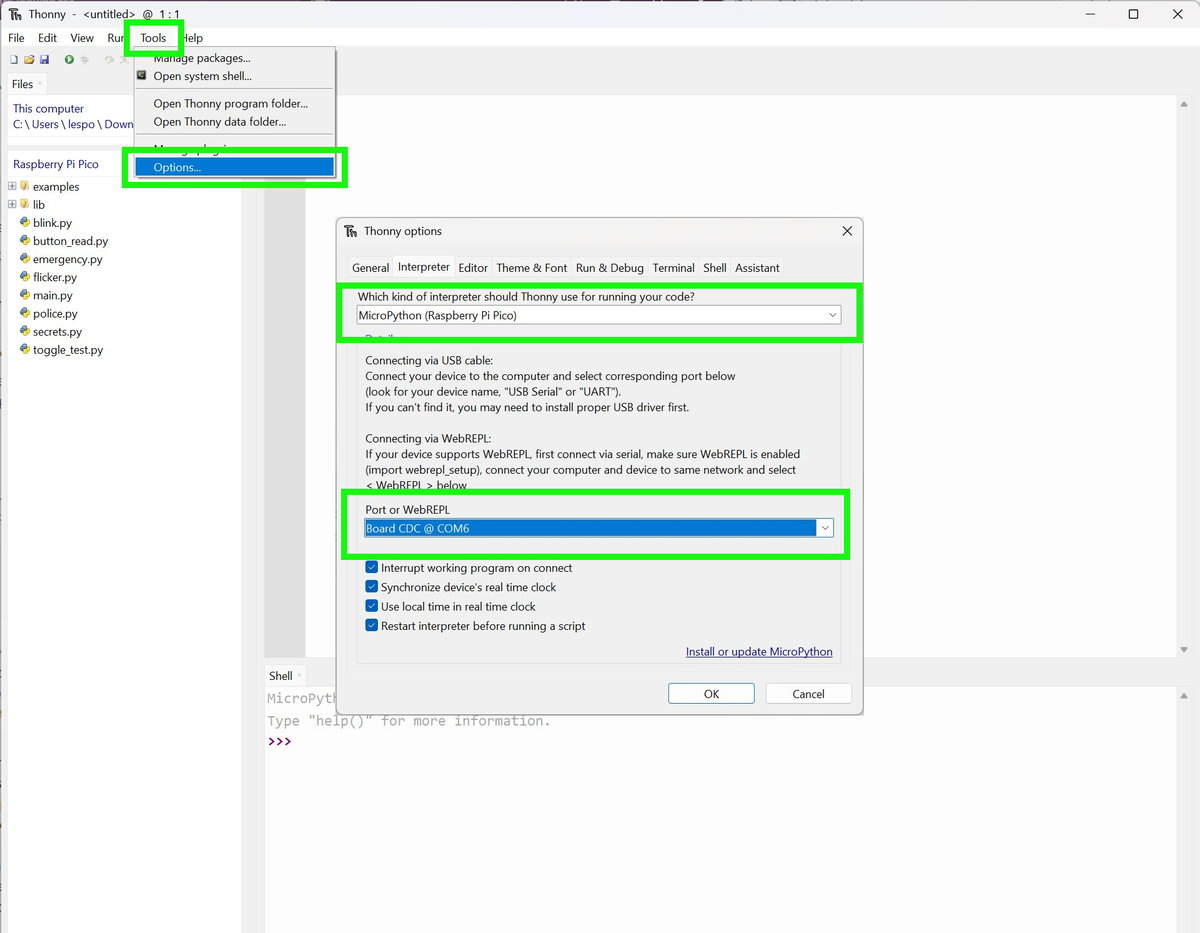
From the Port list, select your Tiny FX board and click OK. Your Tiny FX should appear and be assigned a communications (COM) port. If not, try using auto detect.
Check the Python Shell, which is at the bottom of Thonny, and you should see something like this.
MicroPython v1.27.0,   on 2026-04-16; Pimoroni TinyFX W with RP2040
Type "help()" for more information.
>>>
If you don't see anything, click on the STOP button found in the Thonny toolbar. This will force Tiny FX to reboot and Thonny will try to reconnect. We should now be connected and MicroPython is running on a Tiny FX W. The >>> is where we can type in code if we want to test out an idea or logic.
Learning With Tiny FX's Examples
We've got a plethora of MicroPython examples for Tiny FX and Tiny FX W. They are pre-loaded on your board. To take a look, follow these steps.
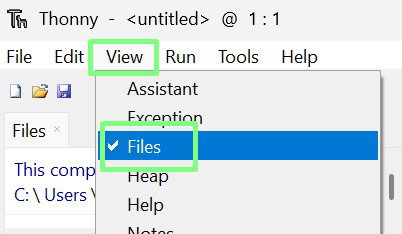
- From the menu, click on View and check that Files is selected. This will show the files on Tiny FX via Thonny's built-in file manager.
- From the lower section of the Files pane, click on
Examples >> Effects >> Monoand double clickpulse_wave.py. The example code will open in the code editor area.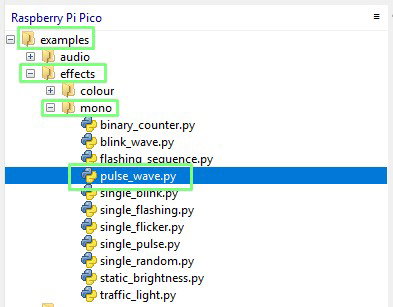
- Click on
RUNto start the example code.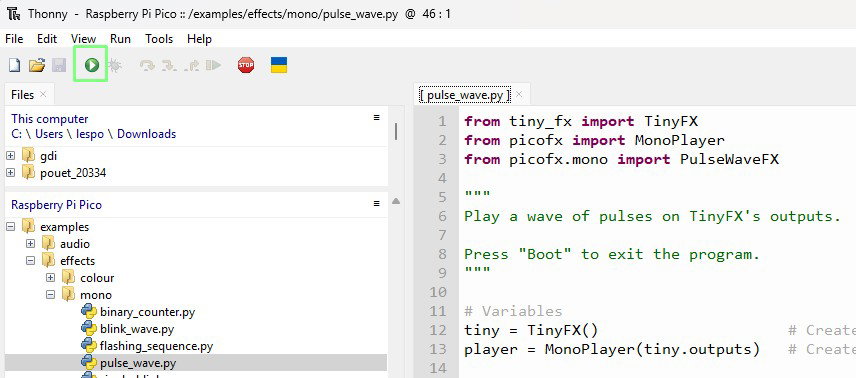
- You should see all six output LEDs pulsing.
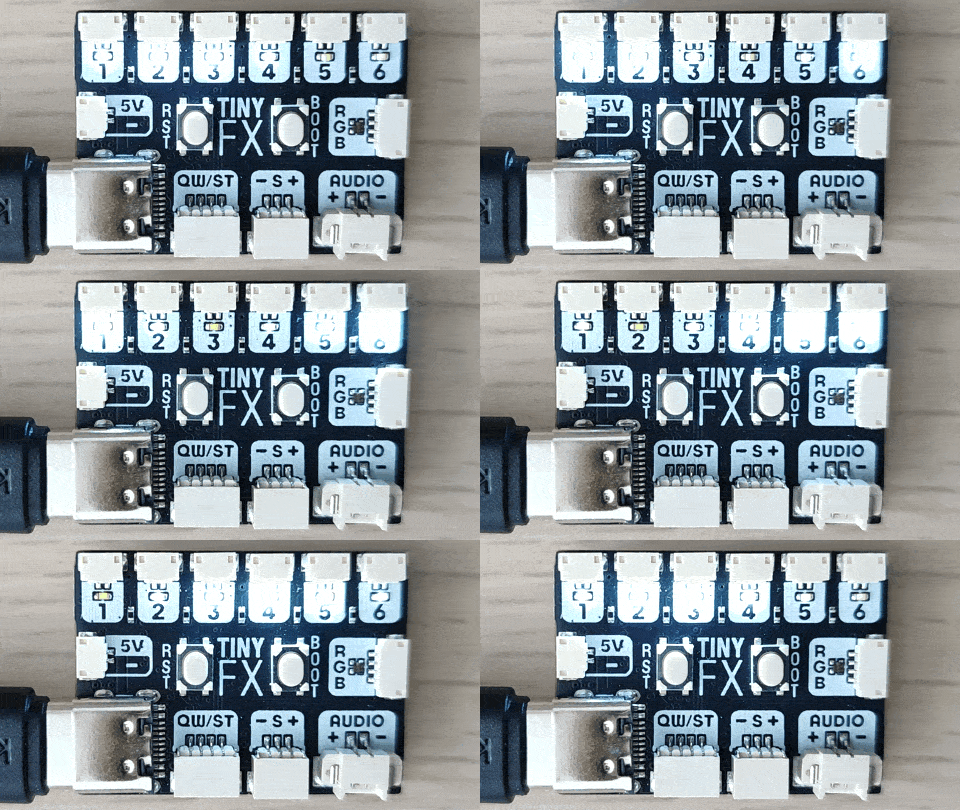
- Click on
STOPto stop the running code example.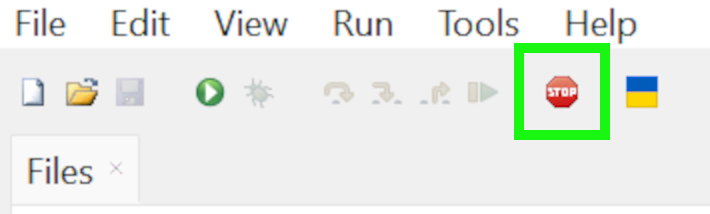
There are many more example pre-loaded onto your Tiny FX, try a few more out before moving on to the next part in this series.
- Mono Effect Examples For Single Colour LEDs
- Static Brightness
- Show a static brightness on one of Tiny FX's outputs.
- Single Blink
- Play a blinking effect on one of Tiny FX's outputs.
- Single Flashing
- Play a flashing effect on one of Tiny FX's outputs.
- Single Flicker
- Play a flickering effect on one of Tiny FX's outputs.
- Single Pulse
- Play a pulsing effect on one of Tiny FX's outputs.
- Single Random
- Play a randomly changing brightness effect on one of Tiny FX's outputs.
- Blink Wave
- Play a wave of blinks on Tiny FX's outputs.
- Flashing Sequence
- Play a flashing sequence across Tiny FX's outputs.
- Pulse Wave
- Play a wave of pulses on Tiny FX's outputs.
- Binary Counter
- Play an incrementing binary counter on Tiny FX's outputs.
- Traffic Light
- Play a traffic light sequence on Tiny FX's outputs.
- Static Brightness
- Colour Effect Examples For RGB LEDs
- Static RGB
- Show a static colour on Tiny FX's RGB output.
- Static HSV
- Show a static colour on Tiny FX's RGB output, using HSV (Hue Saturation, Value) colour model.
- Blink
- Play a blinking sequence effect on Tiny FX's RGB output. Each blink in the sequence can be a different colour.
- Rainbow
- Play a rainbow effect on Tiny FX's RGB output.
- Random
- Play a randomly changing brightness and colour effect on Tiny FX's RGB output.
- Hue Step
- Play a stepped hue effect on Tiny FX's RGB output.
- Static RGB
- Audio Examples
- Race Start
- Plays a simple boop, boop, boop, beeep countdown sound effect when you press Boot on Tiny Fx. Great for counting down to a race start.
- Encounters
- Play an evocative musical melody with accompanying lights on Tiny FX.
- Photon Sword
- Play sounds that react to motion with a TinyFX. Use an MSA311 triple axis accelerometer to trigger sound effects.
- Race Start
Controlling Tiny FX With MicroPython
We've had time to play around with Tiny FX's many examples, so now is the time to write our first program. The goals for this part of the project are:
- Write code to control the LED on port one.
- Confirm that we can send code to Tiny FX W.
- Understand how the code works, line by line.
- Learn how to automatically run code when Tiny FX is powered up.
The code will run each line, from top to bottom. Each line is an instruction to Tiny FX. Some instructions have no output, importing modules for example, but others will control things that we can see. The LED for example. We're also including print() functions that will output text to the Python Shell that we use to debug our code.
Right now, we should have Tiny FX connected to our computer via a good quality USB C cable. Thonny will be open, and we have confirmed that we can see MicroPython running on the board.
- Click on
File >> Newto create a new blank file.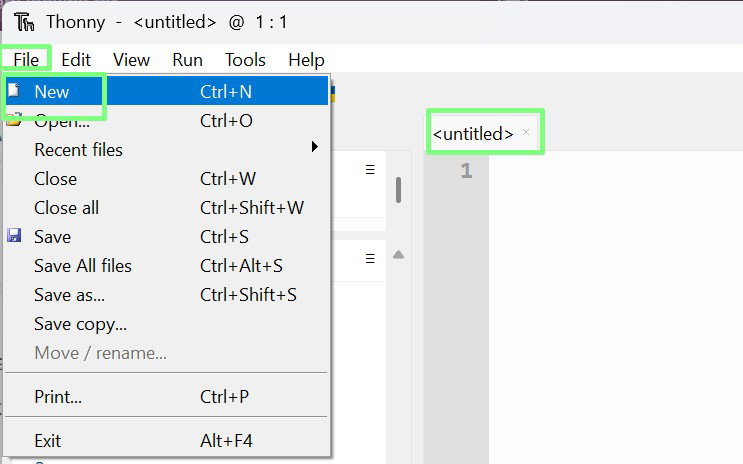
- Import two modules (libraries) of pre-written MicroPython code to enable us to use Tiny FX and to control how long the LED will be on / off for.
from tiny_fx import TinyFX
from time import sleep
- Create a class called
tiny. We will use this to control the Tiny FX hardware via the MicroPython software.
tiny = TinyFX()
- Create a loop that will run indefinitely. This loop will only stop if we stop the code, there is an error, or we turn the power off.
while True:
- Turn on LED one and print a message to the Python Shell The extra
print()is useful for debug (finding issues or errors in the code). If we can see the text, but the LED doesn't light up, then we know there is an issue. Code inside of the loop is indented by four spaces, or one press of the TAB key. MicroPython / Python is whitespace sensitive, which means that we must be strict in using spaces or TAB.
    tiny.one.on()
    print("On")
- Pause the code for one second.
sleep(1)
- Turn off the LED, print "Off" to the Python Shell and wait for another second.
    tiny.one.off()
    print("Off")
    sleep(1)
- Check that your code looks like this.
from tiny_fx import TinyFX
from time import sleep
tiny = TinyFX()

while True:
    tiny.one.on()
    print("On")
    sleep(1)
    tiny.one.off()
    print("Off")
    sleep(1)
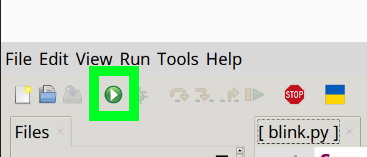
- Click on the green
RUNbutton, found in the toolbar, to run the blink code.
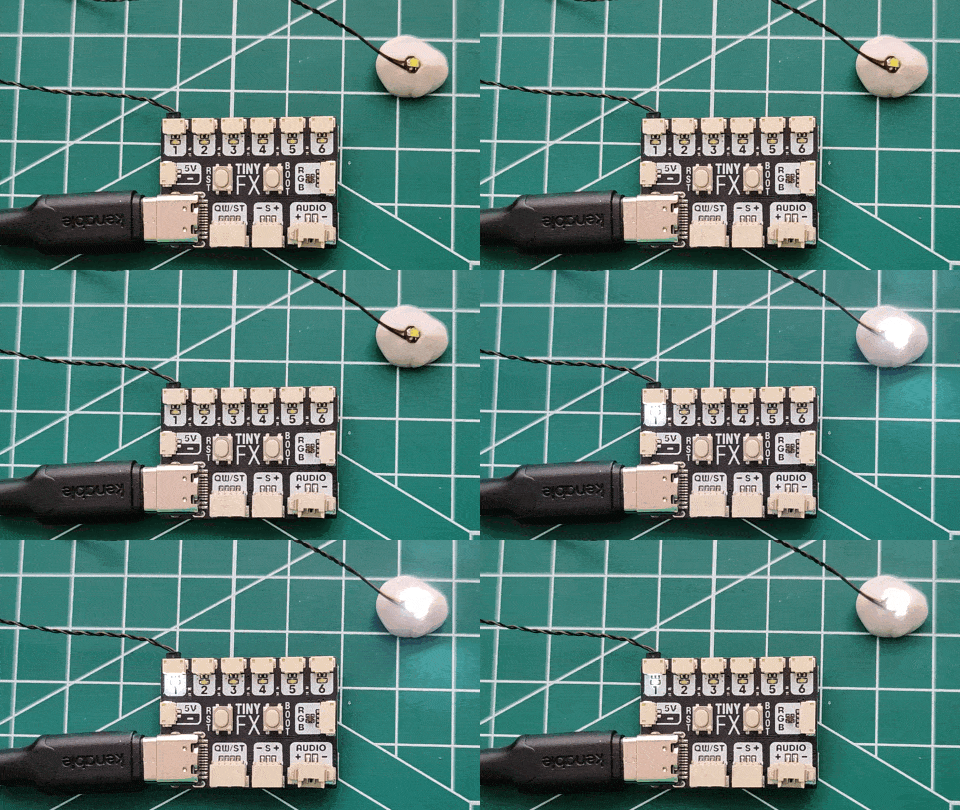
- Check that the LED on port one is flashing on and off with a one second delay. If so, then you have successfully controlled an LED using MicroPython. You can also connect an LED "dot" to port one, that will also blink.
- Save the code to Tiny FX as
main.py. By saving the code asmain.pyTiny FX will automatically run the code when it is powered up. Note that this will overwrite the existingmain.pybut we have a backup of the original here. You'll see other files on the board, these are other example projects, or your own projects. Thonny has a quirk where it will call the boardRaspberry Pi Picobut it really is our Tiny FX board.
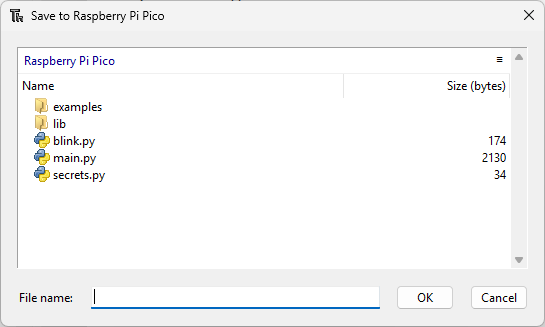
- Unplug the USB C cable from Tiny FX, the board will power off. Now re-insert the cable. In a few seconds, the test code will start and the dot LED will blink. Saving code as
main.pyis a great way to automate your builds as MicroPython runsmain.pywhenever a board is powered on.
Updating Tiny FX
When you first received Tiny FX, MicroPython was pre-installed and in this guide we've been using it to build our first project. But there may be a time in the future when we need to update your Tiny FX. We regularly release updates and these will need to be installed using these steps.
Before any update, always ensure that your project files are backed up to your computer. The easiest way to do so is to click on File >> Save Copy and select a location on your computer, not the Raspberry Pi Pico.
To get the latest firmware installed on your Tiny FX or Tiny FX W, follow these steps.
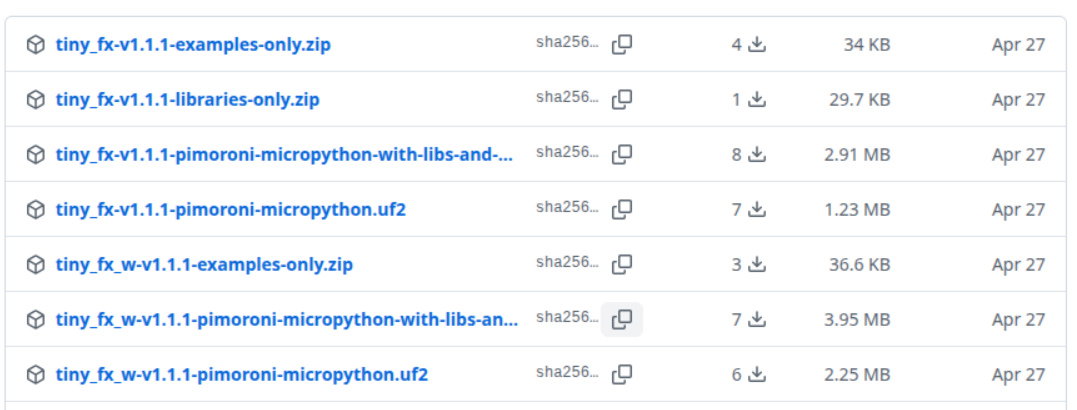
- Download the latest firmware update from our GitHub repository to your computer. The firmware is supplied as a UF2 file and there are versions for both boards, and with pre-installed libraries (modules) and examples.
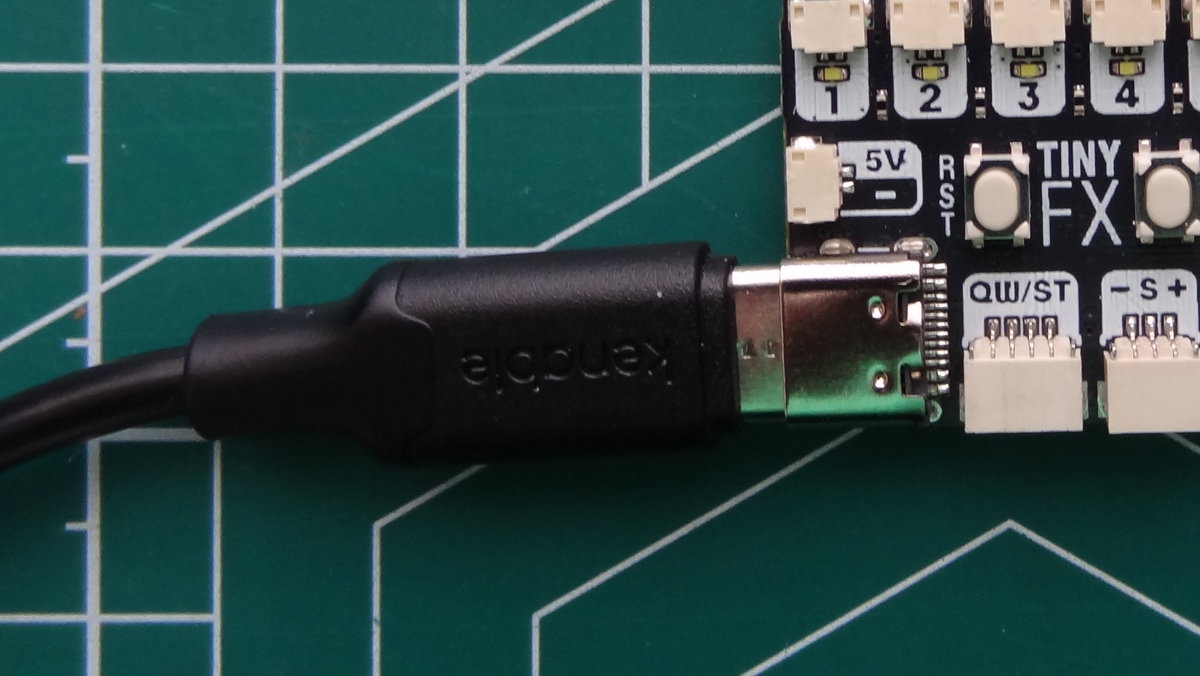
- Insert a good quality USB Type C data cable into Tiny FX and insert the other end into your computer. We include a cable with our starter kits, and we also stock them in our store.
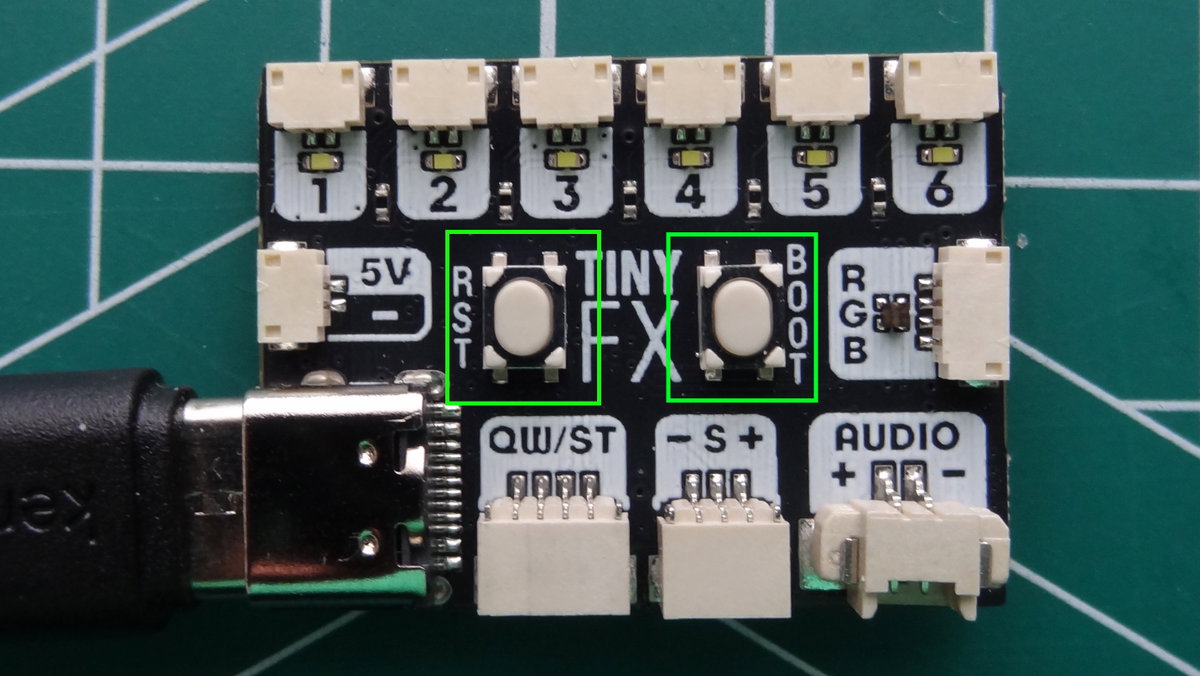
- Press and hold the BOOT button, and quickly tap the RST (Reset) button. This will put Tiny FX into a mode where we can copy the firmware file over.
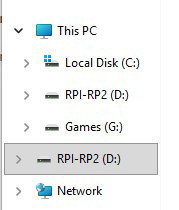
- Open the File Manager and look for a drive called RPI-RP2, this is your Tiny FX board.
- Copy / drag and drop, the downloaded UF2 file to your RPI-RP2 drive and wait for it to complete. Once the update is complete, the drive will disappear and it will reboot, and start running
main.py. We can now use Tiny FX just like we did at the beginning of this guide.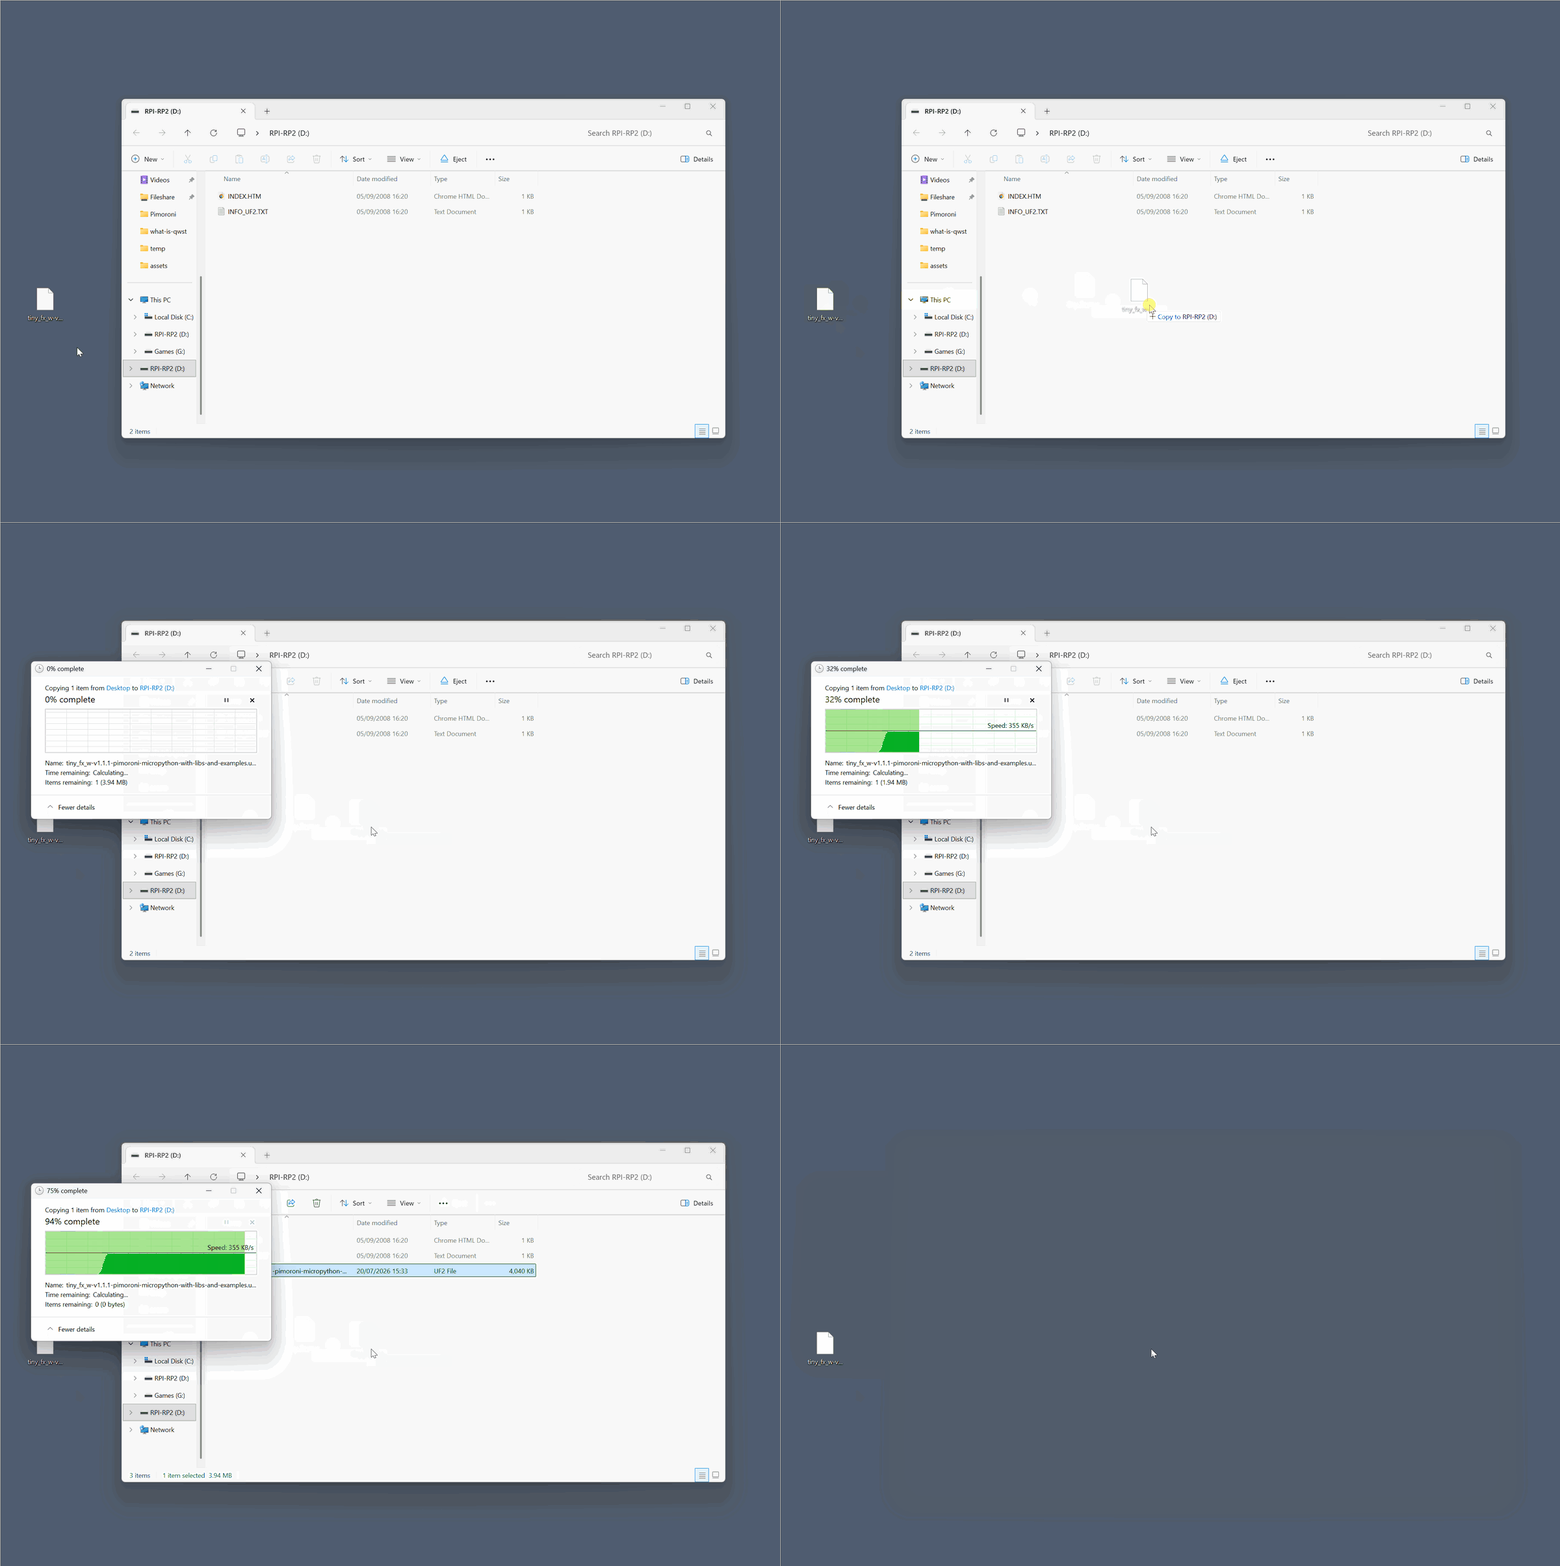
What Have We Learnt?
- How to connect Tiny FX to our computer.
- How to check that MicroPython is installed and running.
- How to control Tiny FX using MicroPython.
- How to automatically run code when Tiny FX is powered up.
- How to update the firmware