 Easy
Easy
Build a Prusa 3D Printer Companion Badgeware App
Learn how to use an API to monitor your 3D printer with Badgeware
Picture the scene. You've just sent a big multi-hour 3D print to your new Prusa Core ONE+ and then you are called in to a meeting for the next hour. Do you excuse yourself from the meeting to nurse the print? Or do you ask a colleague to keep an eye on things?
Neither!
In this project we will use a Tufty 2350 with the Prusa 3D printer API to create "Prusa Companion" our own app to monitor 3D prints while we are away from our desk.
With our Prusa Companion app you can see the print progress, monitor temperatures and see the state of a print directly from a Tufty 2350 that is worn around your neck.
What You'll Need
- A Tufty 2350.
- The latest Badgeware firmware for Tufty 2350.
- A Prusa 3D printer.
- Something to print, and filament to print with.
- Your Prusa 3D printer and Tufty 2350 on the same network.
The Prusa API
Prusa's 3D printers have an API (Application Programming Interface) which we are going to use to pull live printer data and then format it for viewing on Tufty 2350. APIs make working with data much easier than scraping the details from a website. APIs expose the data in a predetermined format that programmers can use in their apps.
The API exposes numerous datapoints.
- The printer's state (Idle, Busy, Ready, Attention, Paused, Stopped, Printing).
- Print time, duration and elapsed time.
- Bed and nozzle temperatures.
- The position of the nozzle across all three axes.
- Printer and flow speeds.
The API pulls data directly from the printer, in this case a Prusa Core One+, via a service running on the printer. Essentially the printer is serving the API details and Tufty 2350 is acting as a client requesting the data.
To use the API, we need access to the printer. That means we need a password. Luckily, this is easy to find on the printer.
How To Find Your Prusa Link Password And Printer IP Address
There are two ways to get your PrusaLink password. Via the printer's user interface, or via PrusaSlicer.
Via The Printer
- From the user interface, navigate to and select Settings. You can use the touchscreen or use the dial. Pressing the dial in will activate the selected icon.
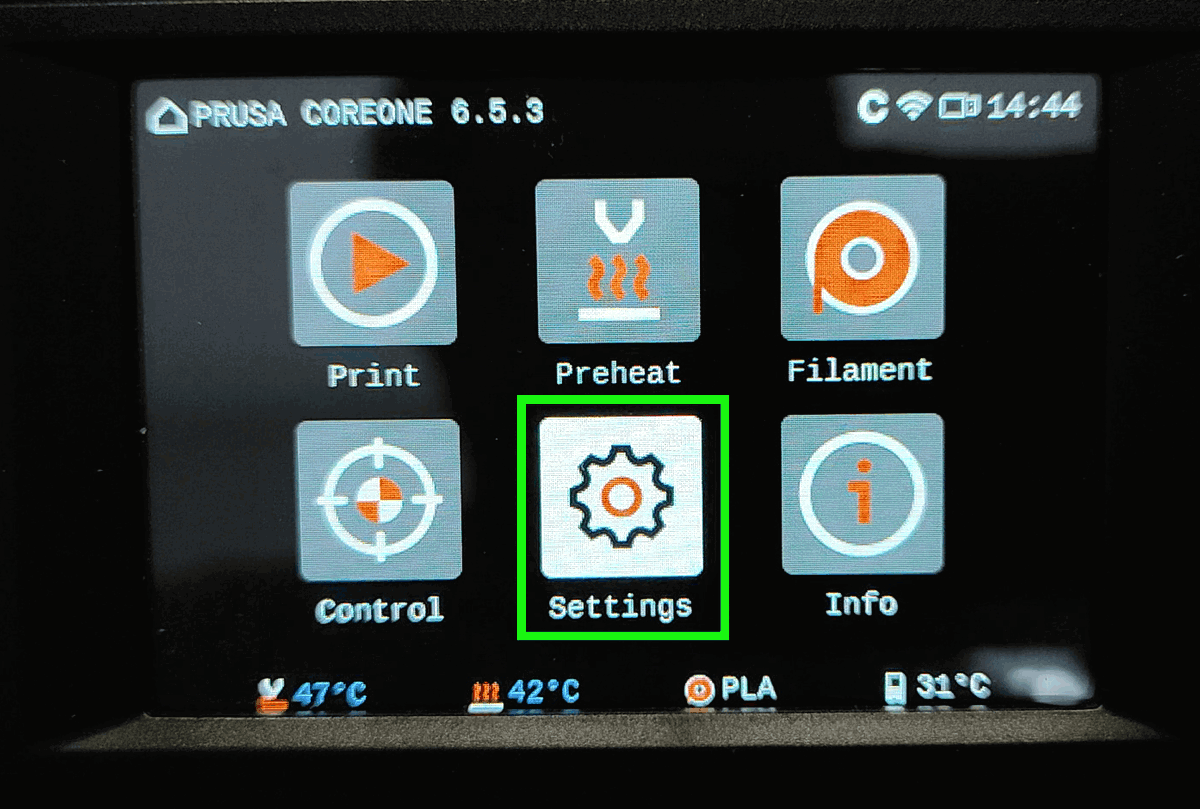
- Scroll down to Network and select.
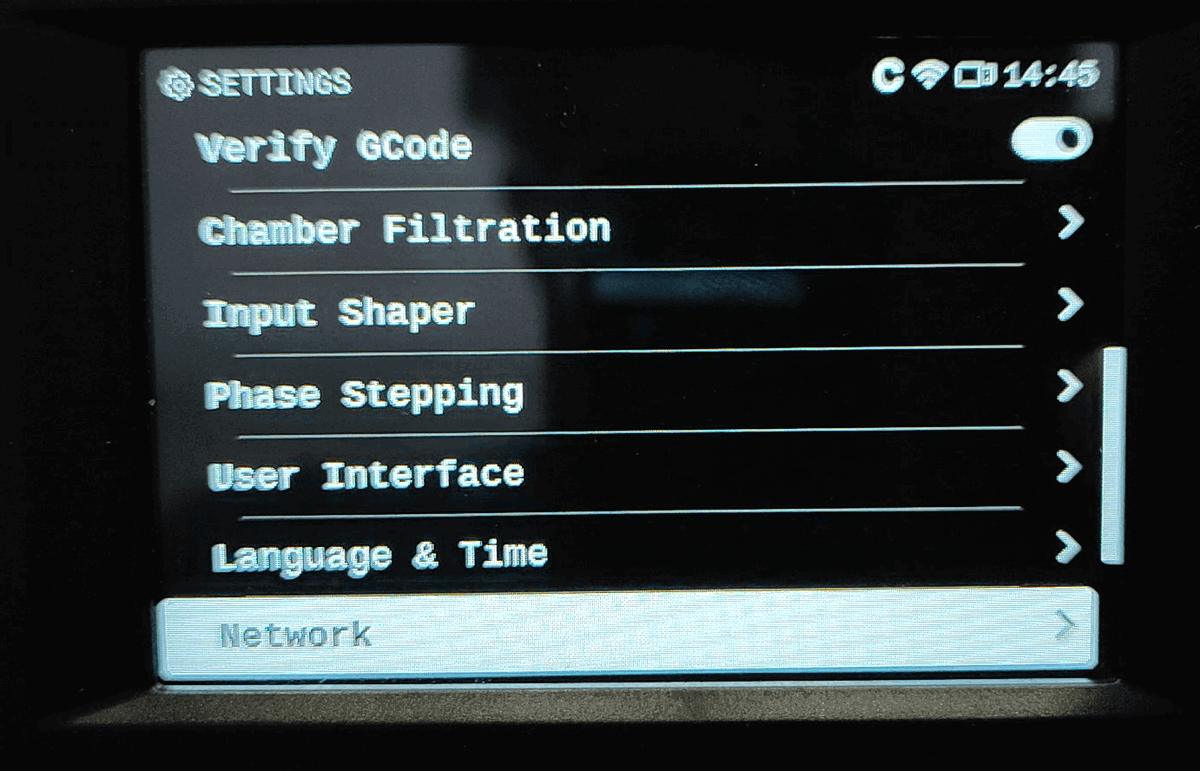
- Scroll down to PrusaLink and select.
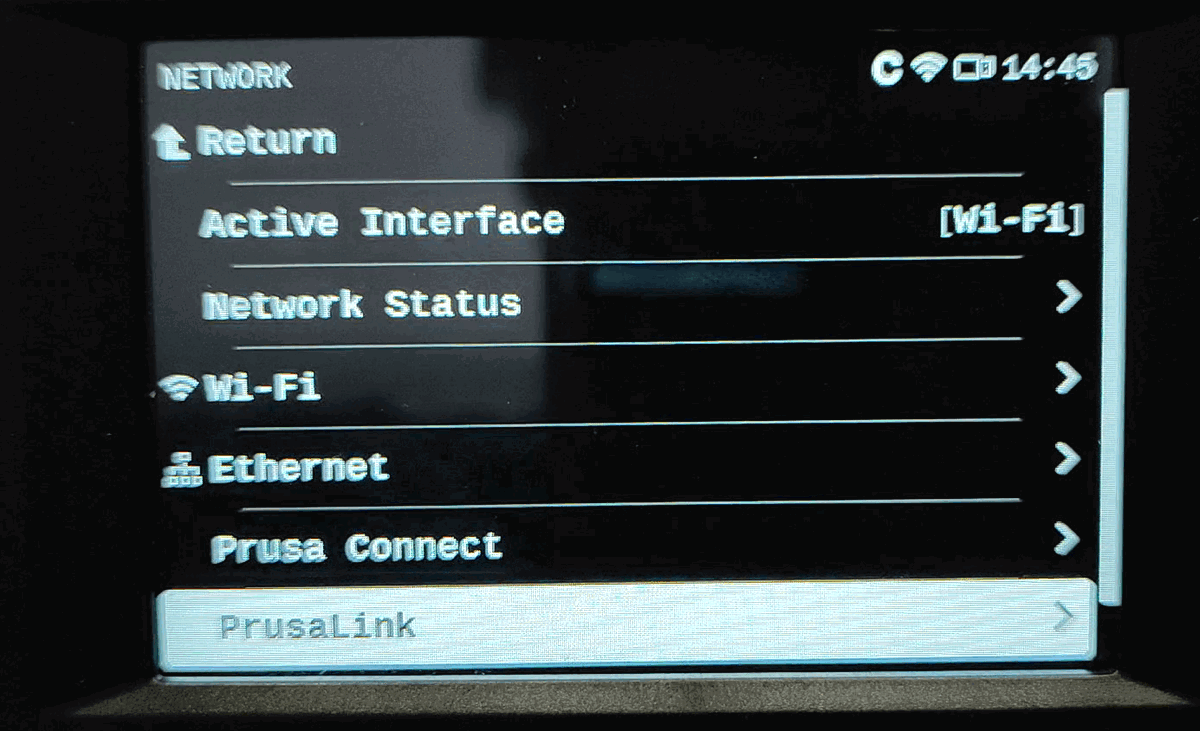
- Scroll down to Password and make a note of the password.
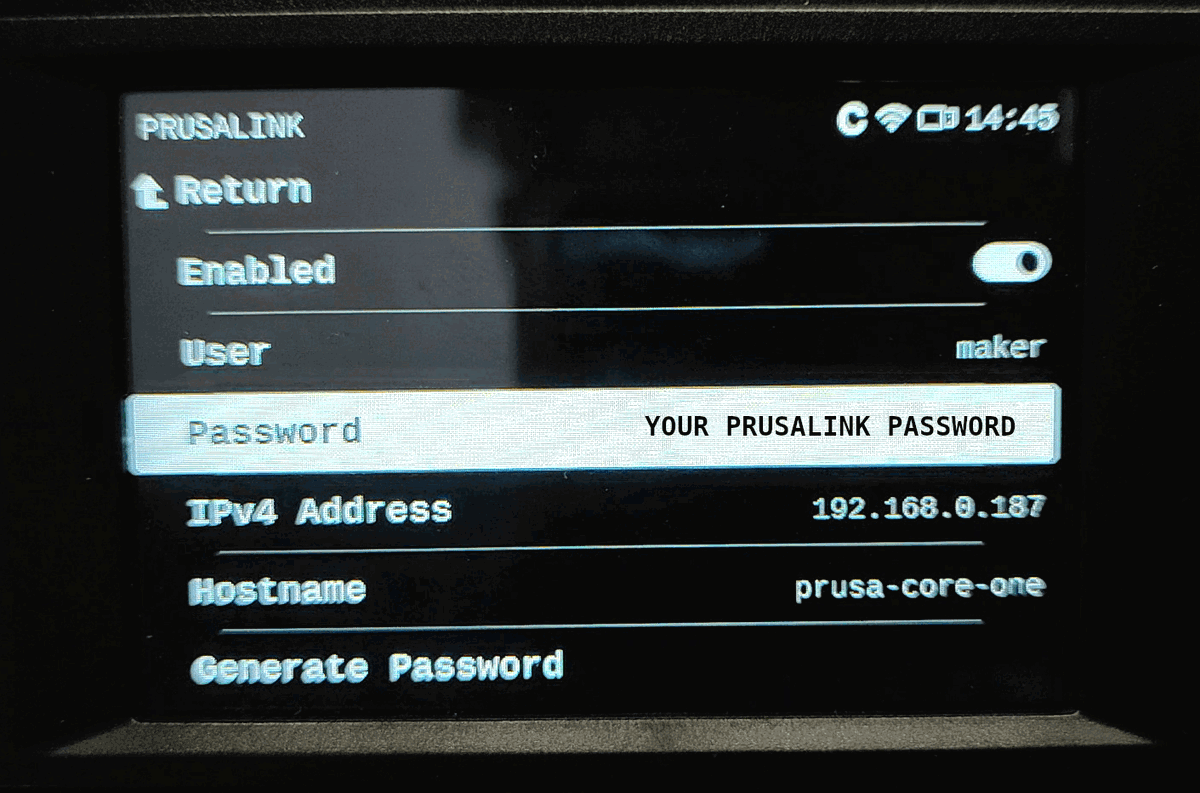
Via PrusaSlicer
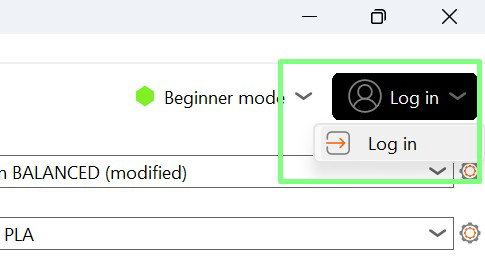
- Open PrusaSlicer and in the top right, click on Login.
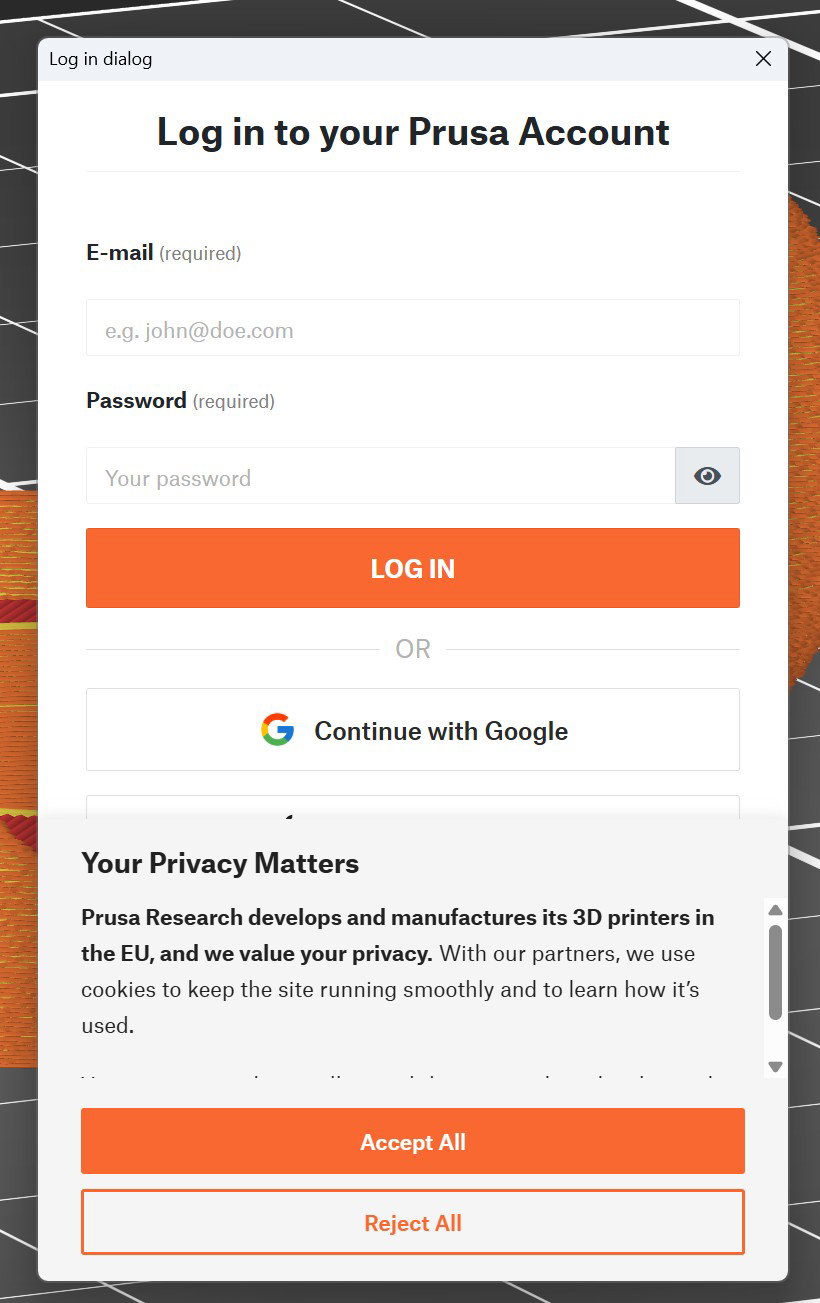
- Login with your Prusa details. If you do not have an account, sign up for one now.
- In PrusaSlicer, click on Prusa Connect and then Settings.
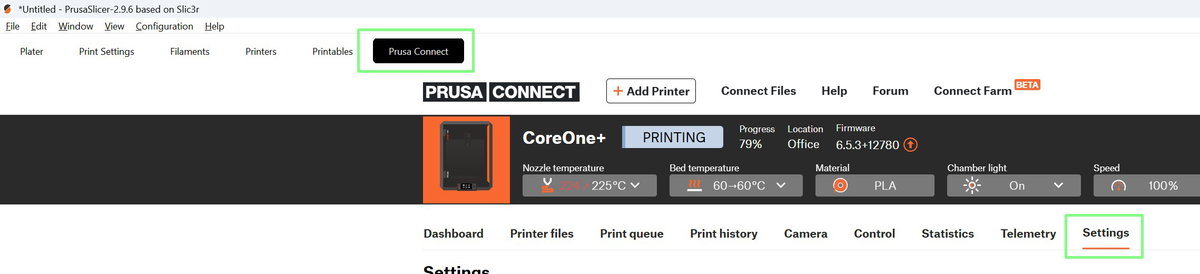
- Look for your PrusaLink API key and click on the orange icon to copy the key. Put this key in a text file for now.

Finding Your 3D Printer's IP Address
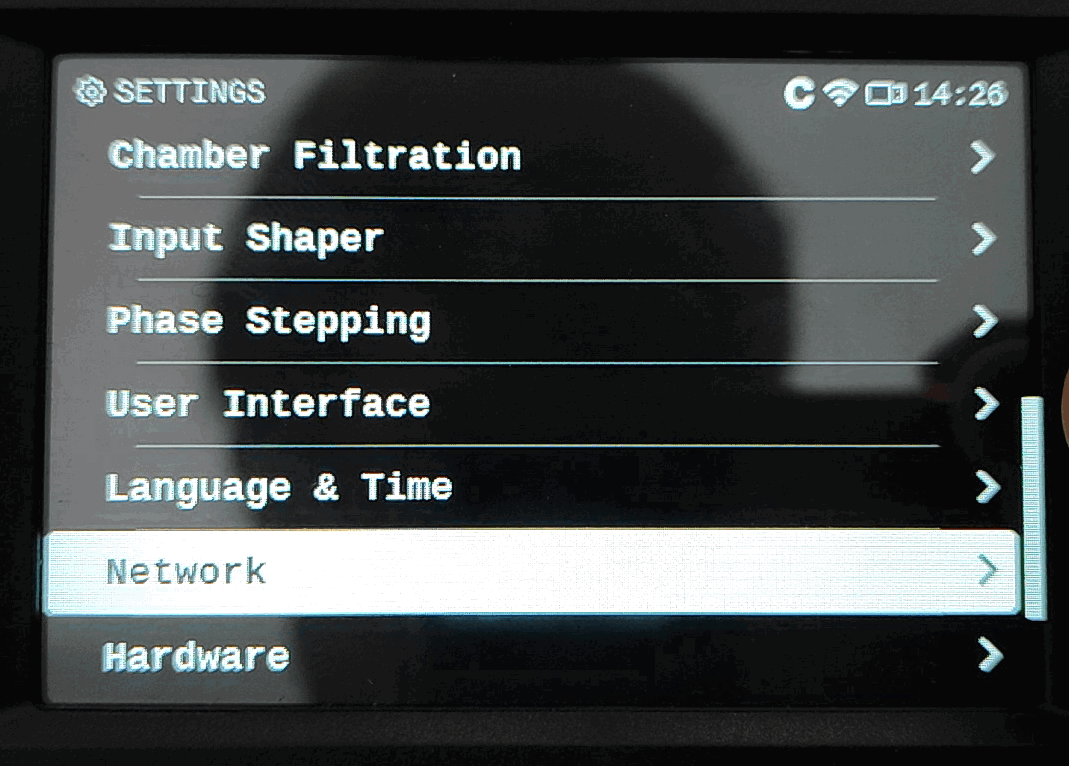
- From the user interface, navigate to and select Settings. You can use the touchscreen or use the dial. Pressing the dial in will activate the selected icon.
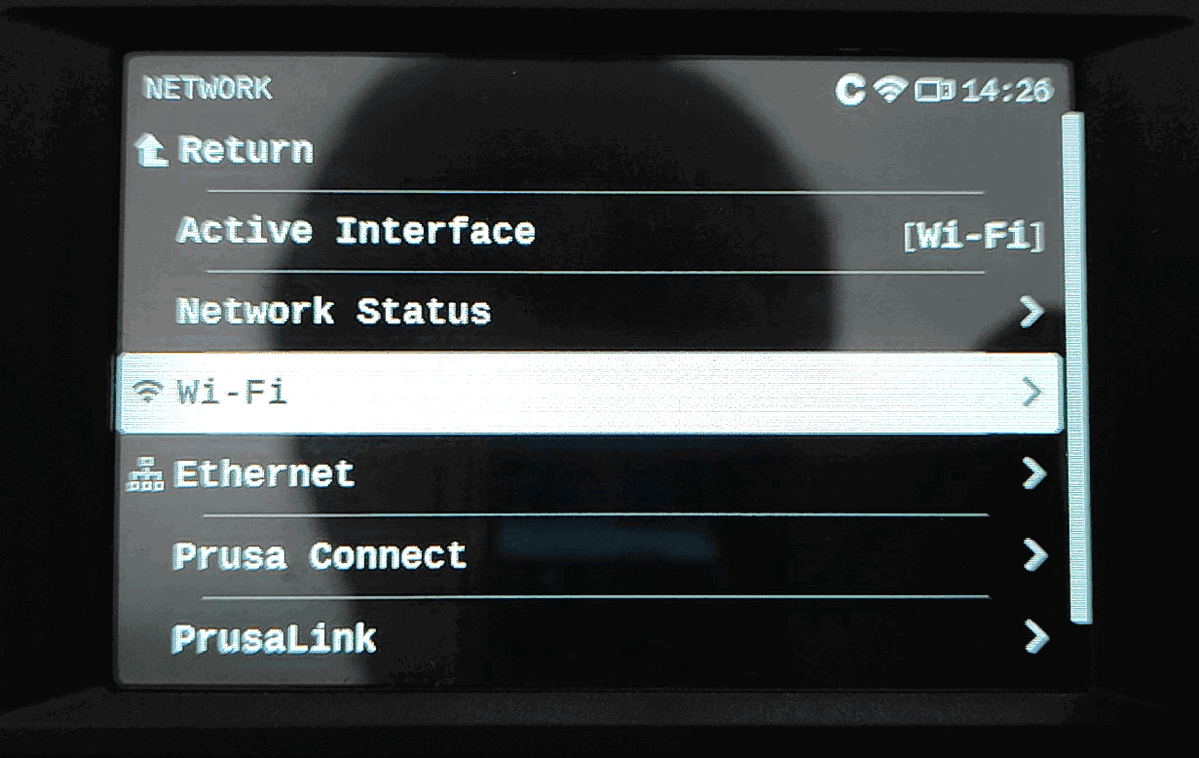
- Scroll down to Network and select.
- Scroll down to WiFi and select.
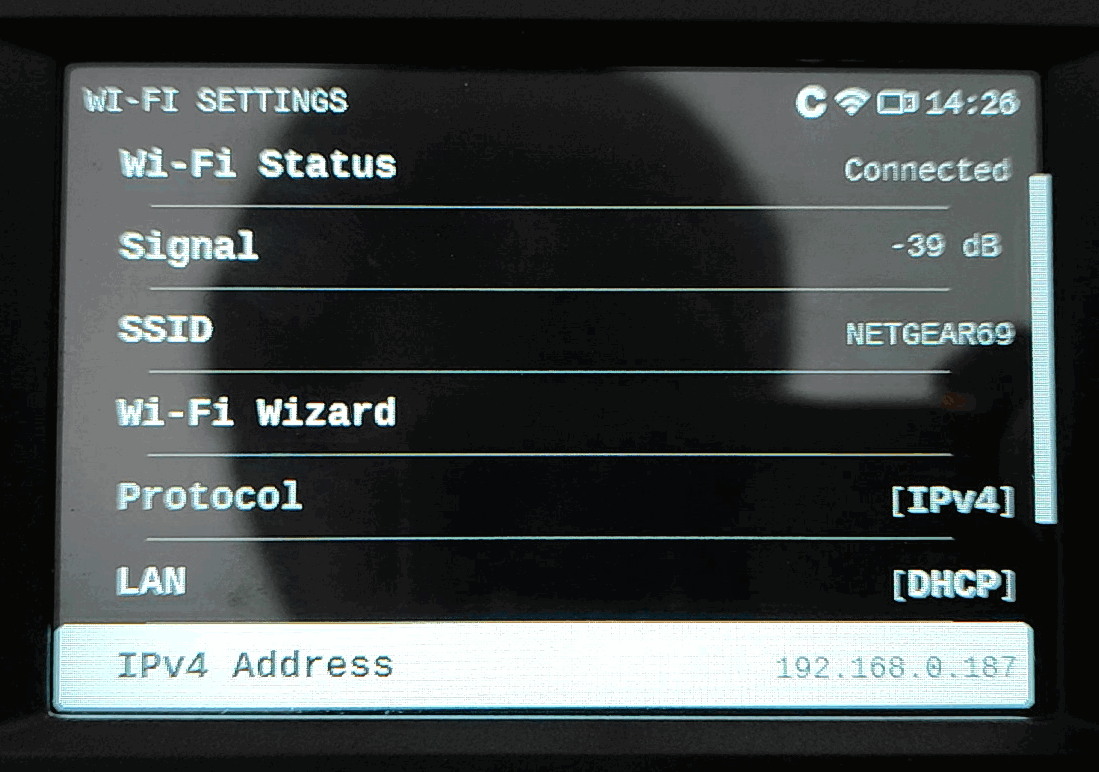
- Scroll down to IPv4 Address and make a note of the IP.
Coding The Project
We'll be using the typical Badgeware workflow to create an app. First we create a folder inside the apps folder, then we add image assets and then write code that will run when the app is started.
Connect Tufty 2350 to your PC and press RESET twice to enter USB drive mode. Your PC will treat Tufty 2350 just like a typical USB flash drive.
Open your operating system's file manager and navigate to a drive called
TUFTY.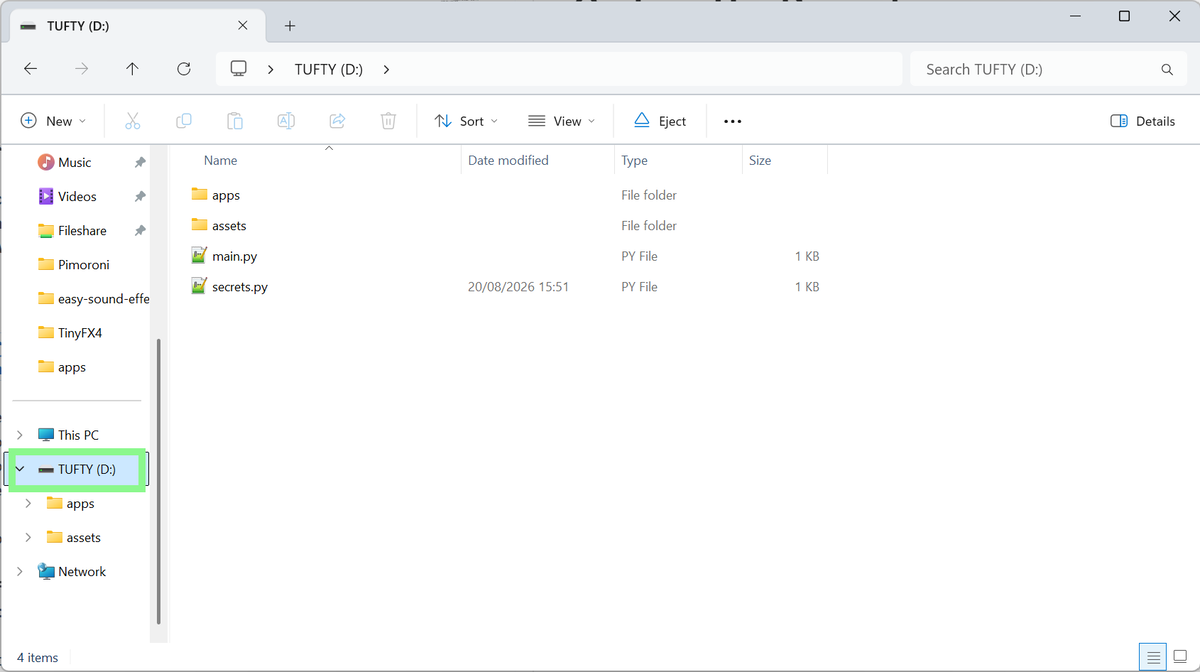
Open
secrets.pyin a text editor and enter your Wi-Fi SSID and password.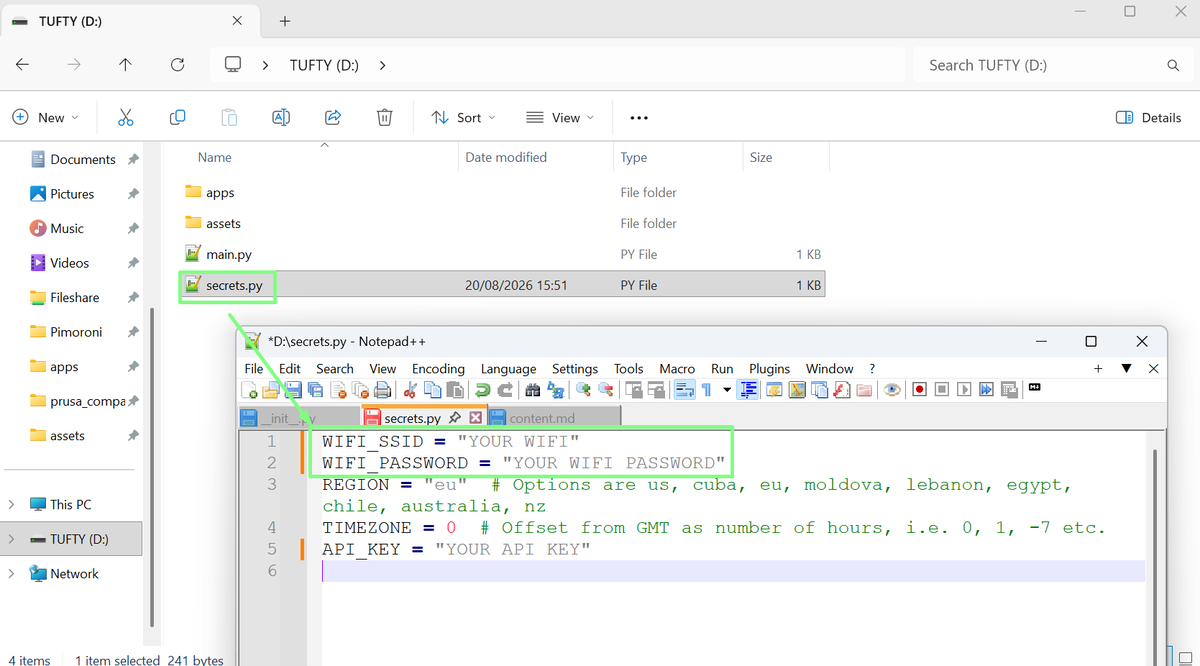
Create a new line at the end of the file and enter your PrusaLink API key then save and close the file.
API_KEY = "YOUR PRUSALINK API KEY HERE"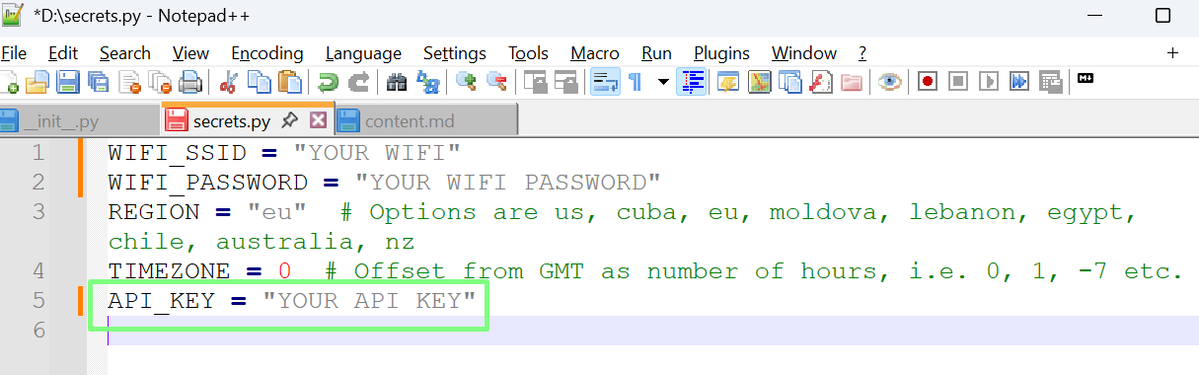
Inside
TUFTYdrive, openappsand create a new folder calledprusa_companionto contain our app.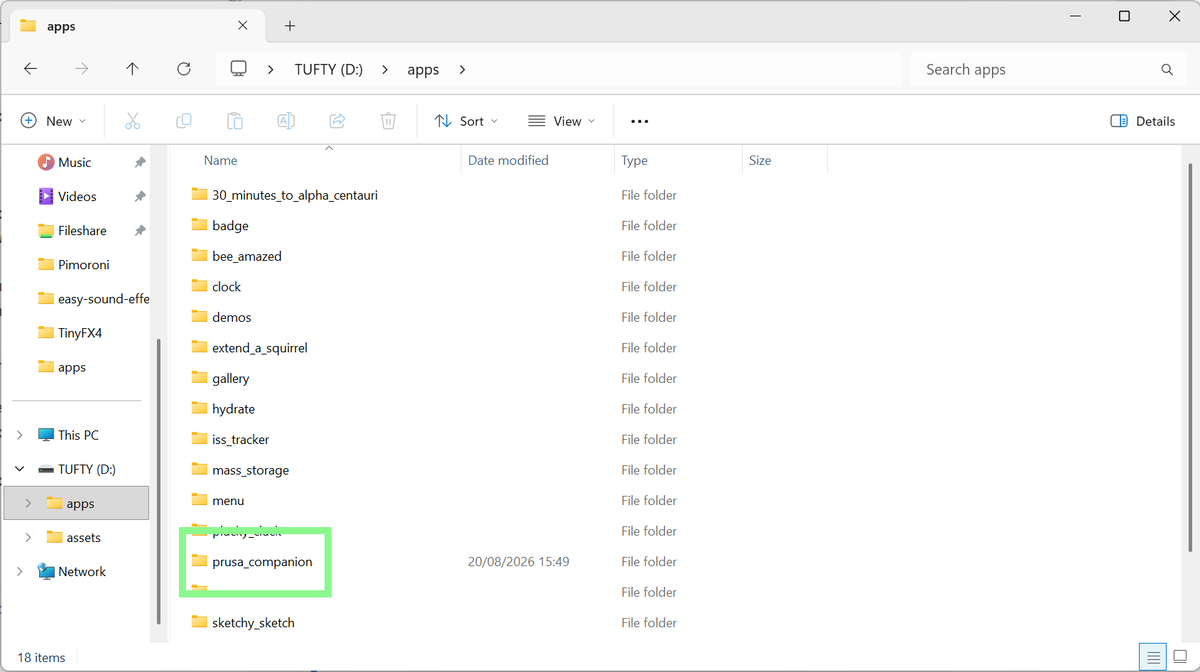
Open the
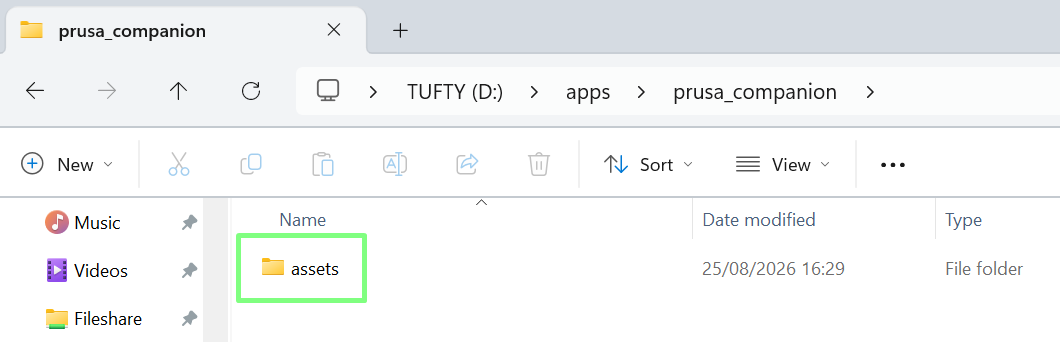
prusa_companionfolder and create a new folder calledassets. In here is where we will store our images. Here are the images for you to download.- atten.png: Attention. Used when the printer has a message for the user.
- busy.png: Printer Busy. Used when the printer is auto-homing or moving the print head / bed.
- finish.png: Print Finished. When the printer has finished a job.
- pause.png: Print Paused. Activated when the user presses pause, or there is a manual task for the user to perform.
- stop.png: Print Stop. When the user presses STOP on a print, or the printer encounters an issue.
Open your preferred text editor (we are using Thonny) and in a new blank file, we start coding the project.
Save the blank file as
__init__.pyinside theprusa_companionfolder.Import a series of modules (pre-written libraries of Python code that provide extra functionality) for the project.
- wifi: Badgeware specific helper function to use Tufty 2350's onboard Wi-Fi chip to connect to a network and the Internet.
- secrets: Where our Wi-Fi SSID, password, and PrusaLink API key are stored.
- time: Controls the pace at which the code runs.
- datetime: Provides advanced means to manipulate data and time data, in this case
timedeltawill convert seconds to hours and minutes. - fetch: Badgeware specific helper function that we use to download data from the PrusaLink API.
import wifi
import secrets
import time
from datetime import timedelta
import fetch
Set Tufty to use a high resolution screen mode. This will use the full 320 x 240 screen resolution.


badge.mode(HIRES | VSYNC)
- Ensure that the Wi-Fi is disconnected. This is strictly an optional step, but we found it prudent to ensure that any lingering Wi-Fi connections were dropped, and fresh connections made before moving onward.
wifi.disconnect()
- Using a
while notloop, check that we are not connected to Wi-Fi. In essence this loop will try to connect to Wi-Fi. Each time it isn't connected, it will blink Tufty's case lights to show that it is doing something.
while not wifi.connect():       # keep calling connect() until we're online
    badge.caselights(1)
    time.sleep(0.1)
    badge.caselights(0)
    time.sleep(0.1)
- Print the connection details to the Python Shell, and then keep the case lights permanently on. The print to the Python Shell is a debug step used to confirm Tufty's IP address. The case lights staying on is there to visually identify that we have a Wi-Fi connection.
print("Connected! IP address:", wifi.ip())
badge.caselights(1)
- Create a constant called
PRINTER_IPand use it to store the IP address of your printer. A constant is a value that does not change. It is set once and then used, unlike a variable which can be changed throughout the project.
PRINTER_IP = "YOUR IP ADDRESS HERE"
- Using a variable
statusfetch the details from the API using the IP address and your API key. This line will repeat every second, giving us the latest data from the APi.
status = fetch.url(
    f"http://{PRINTER_IP}/api/v1/status",
    every=1,
    headers={"X-Api-Key": secrets.API_KEY},
)
- Create three constants to store the RGB colour values for orange, white and black. The orange is taken from the Prusa branding guidelines, and is specifically the orange used in Prusa branded products.
ORANGE = color.rgb(252, 109, 9)
WHITE = color.rgb(255, 255, 255)
BLACK = color.rgb(0, 0, 0)
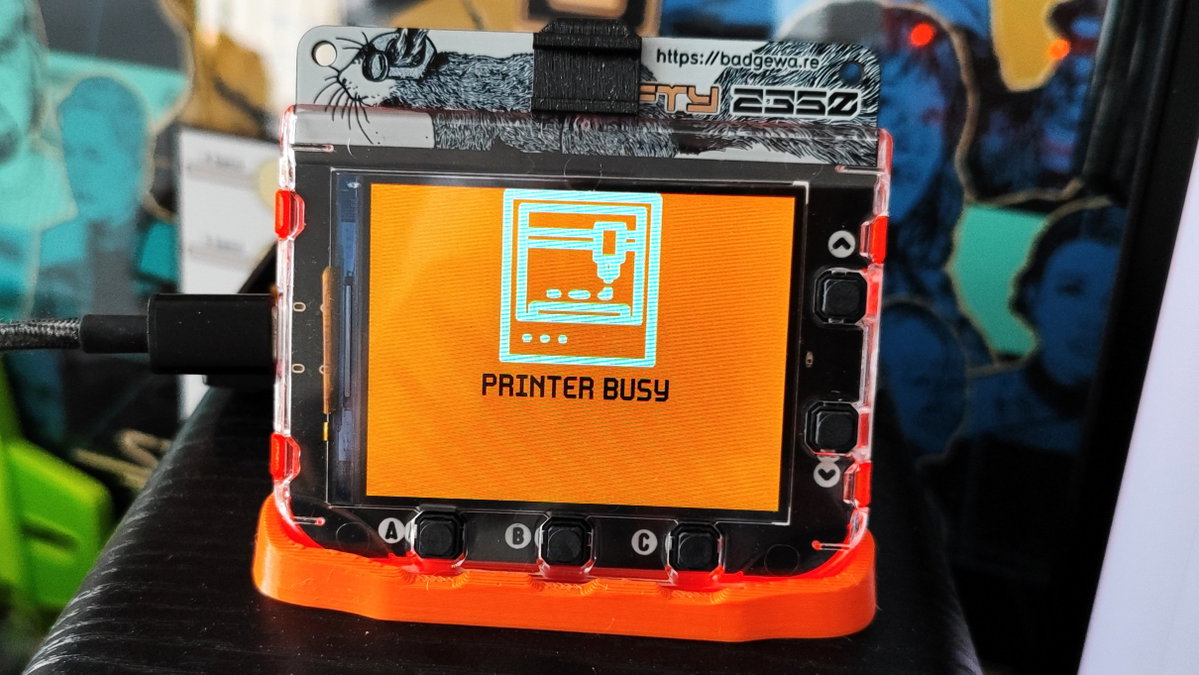
- For each state, we need to load a configuration that stores the image asset, where it is placed on the screen, status text, and the colour of the pen used to write the text. All of this configuration information is stored in a Python dictionary called
STATE_SCREENSand we pull values from the dictionary by referring the the value of each state (the key in Python dictionary terms).
STATE_SCREENS = {
    "FINISHED": {
        "asset": "/assets/finish.png",
        "rect": (0, 0, 320, 158),
        "msg": "Print Finished",
        "pen": WHITE,
        "alpha": 127,
    },
    "ATTENTION": {
        "asset": "assets/atten.png",
        "rect": (85, 0, 150, 131),
        "msg": "ATTENTION: CHECK PRINTER!!",
        "pen": BLACK,
    },
    "STOPPED": {
        "asset": "assets/stop.png",
        "rect": (85, 0, 150, 131),
        "msg": "PRINT STOPPED",
        "pen": BLACK,
    },
    "PAUSED": {
        "asset": "assets/pause.png",
        "rect": (85, 0, 150, 131),
        "msg": "PRINT PAUSED",
        "pen": BLACK,
    },
    "BUSY": {
        "asset": "assets/busy.png",
        "rect": (85, 0, 150, 131),
        "msg": "PRINTER BUSY",
        "pen": BLACK,
    },
}
 18. Create a function called
 draw_bar which will draw a progress bar across the screen. The function takes a value between 0 and 100 as an argument. The progress bar is displayed at the bottom of the screen, under any other text. Essentially the function takes the value and does the math to create a filled, white rectangle that shows the progress. It also shows the percentage value.
def draw_bar(value):
    bar_width = screen.width - 20
    bar_height = 20
    bar_x = (screen.width // 2) - (bar_width // 2)
    bar_y = (screen.height // 1.5) - (bar_height // 1.5)
    border = 2
    screen.pen = color.black
    screen.rectangle(0, 0, screen.width, screen.height)
    screen.pen = color.white
    screen.rectangle(bar_x, bar_y, bar_width, bar_height)
    screen.pen = color.black
    screen.rectangle(bar_x + border, bar_y + border,
                bar_width - border * 2, bar_height - border * 2)
    fill_width = int((bar_width - border * 2) * (value / 100))
if fill_width > 0:
    screen.pen = color.rgb(252, 109, 9)
    screen.rectangle(bar_x + border, bar_y + border,
                fill_width, bar_height - border * 2)
screen.pen = color.white
screen.text("Print progress: {}%".format(value), bar_x, bar_y - 30)
- Create a function,
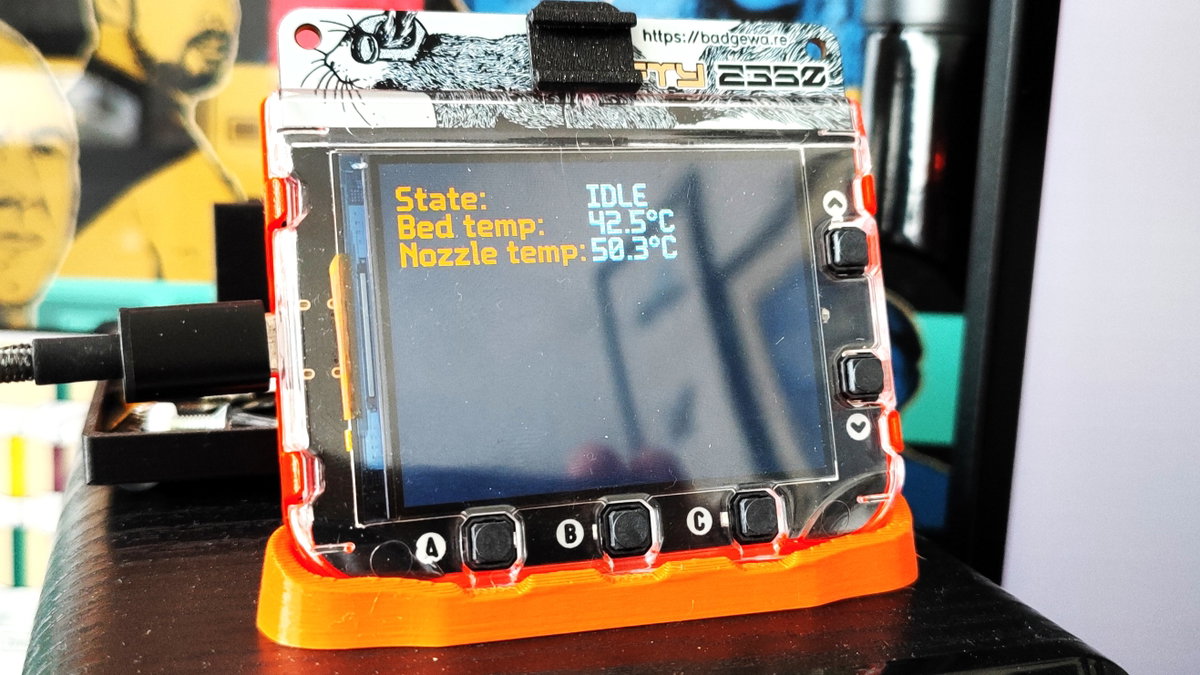
draw_idle_screenwhich takes three arguments (printer_state, temp_bed and temp_nozzle) and displays them on the screen. Setting the pen colour to orange, we write the start of three lines for printer state, print bed temperature and nozzle temperature. Then, we change the pen colour to white and print the values taken from the API.
def draw_idle_screen(printer_state, temp_bed, temp_nozzle):
    screen.pen = ORANGE
    screen.text("State:", 10, 10)
    screen.text("Bed temp:", 10, 30)
    screen.text("Nozzle temp:", 10, 50)
    screen.pen = WHITE
    screen.text(printer_state, 150, 10)
    screen.text(f"{temp_bed}°C", 150, 30)
    screen.text(f"{temp_nozzle}°C", 150, 50)
- The next function handles writing the print progress data to the screen, along with calling the
draw_barfunction to draw the progress bar. We still write the text in orange for the headers, and white for the API data. The key difference here is that the data includes the remaining print time in seconds, and usingtimedeltawe convert that into hours and minutes. You will also spot theif not isinstanceloop. This handles any non-integer data which can sometimes appear in the place of the APIstime_remainingdata. It is a rare occurrence, so this is more a belt and braces approach.
def draw_printing_screen(printer_state, temp_bed, temp_nozzle, job):
    progress = job.get('progress', 0)
    draw_bar(progress)
    remain = job.get('time_remaining')
    if not isinstance(remain, int):
        remain = 0
    remain = timedelta(seconds=remain)
    screen.pen = ORANGE
    screen.text("State:", 10, 10)
    screen.text("Bed temp:", 10, 30)
    screen.text("Nozzle temp:", 10, 50)
    screen.text("Time remaining:", 10, 70)
    screen.pen = WHITE
    screen.text(printer_state, 200, 10)
    screen.text(f"{temp_bed}°C", 200, 30)
    screen.text(f"{temp_nozzle}°C", 200, 50)
    screen.text(f"{remain}", 200, 70)
- Create a function,
draw_status_screento draw the status screen for when a print is finished, paused, stopped or the printer is busy. All of these status start with an orange background, and from there we load the appropriate image. The image for theFINISHEDprint state use transparency (alpha) to make the flags slightly transparent. We then place the image in the centre of the screen, with the appropriate text below it.
def draw_status_screen(cfg):
    screen.pen = ORANGE
    screen.clear()
    sprite = image.load(cfg["asset"])
    has_alpha = "alpha" in cfg
    if has_alpha:
        screen.alpha = cfg["alpha"]
    screen.blit(sprite, rect(*cfg["rect"]))
    if has_alpha:
        screen.alpha = 255
    screen.pen = cfg["pen"]
    w, h = screen.measure_text(cfg["msg"])
    x = (screen.width - w) // 2
    y = (screen.height - h) // 2 if has_alpha else (screen.height + h) // 2
    screen.text(cfg["msg"], x, y)
- The
printerfunction is where the printer's current state is pulled from the API. We get the general state (Printing, Stopped, Paused, Busy, Attention) then the temperature of the print bed and the nozzle.
def printer(data):
- Using a
trystatement, set the font tofont.ignore. This is a large font, that clearly displays on the screen. Atrystatement attempts to run the code within it. It an be linked with error handling and in this case it is used with afinallyto ensure that the code cleanly runs.
    try:
        screen.font = font.ignore
- Add a
printfunction to print the contents of the returned APIdata. This is a debug step, so it can be skipped, but during development and testing it is handy to see what the API is sending.
print(data)
- Create three variables for the
printer_state, the temperature of the print bedtemp_bedand the nozzle temperaturetemp_nozzle. These three variables pull information directly from the returned APIdatausing key reference to selectively slice out the exact information that it requires.
    printer_state = data['printer']['state']
    temp_bed = data['printer']['temp_bed']
    temp_nozzle = data['printer']['temp_nozzle']
- Set the pen colour to black and then clear the screen. By setting the pen colour to black causes the screen to clear to black.
        screen.pen = BLACK
        badge.clear()
- Using
ifand else ifelifconditional tests, check the printer state and then call the appropriate function to draw the details to the screen. If theprinter_stateis eitherIDLEorREADY, then thedraw_idle_screenfunction will shows the current printer state, bed and nozzle temperatures. If the state isPRINTINGthendraw_printing_screenis used to print that information plus the job progress. The final condition captures any other states, drawing the appropriate status screen based on the state (STOPPED,BUSY,PAUSED).
    if printer_state in ("IDLE", "READY"):
        draw_idle_screen(printer_state, temp_bed, temp_nozzle)
    elif printer_state == "PRINTING":
        draw_printing_screen(printer_state, temp_bed, temp_nozzle, data.get('job', {}))
    elif printer_state in STATE_SCREENS:
        draw_status_screen(STATE_SCREENS[printer_state])
    badge.update()
- Add a
finallythat has the sole job of just allowing the code to proceed. This could be used to reset the status of Tufty 2350 when the code exits. But it isn't essential.
    finally:
        pass
- Using a
while Trueloop and anifconditional test on the printer'sstatus, call theprinter()function with the argument for the JSON API. Then pause for one second.
while True:
    if status:
        printer(status.json())
    time.sleep(1)
- Save the code to
__init__.pyinside Tufty 2350'sprusa_companionfolder.
Testing The Code
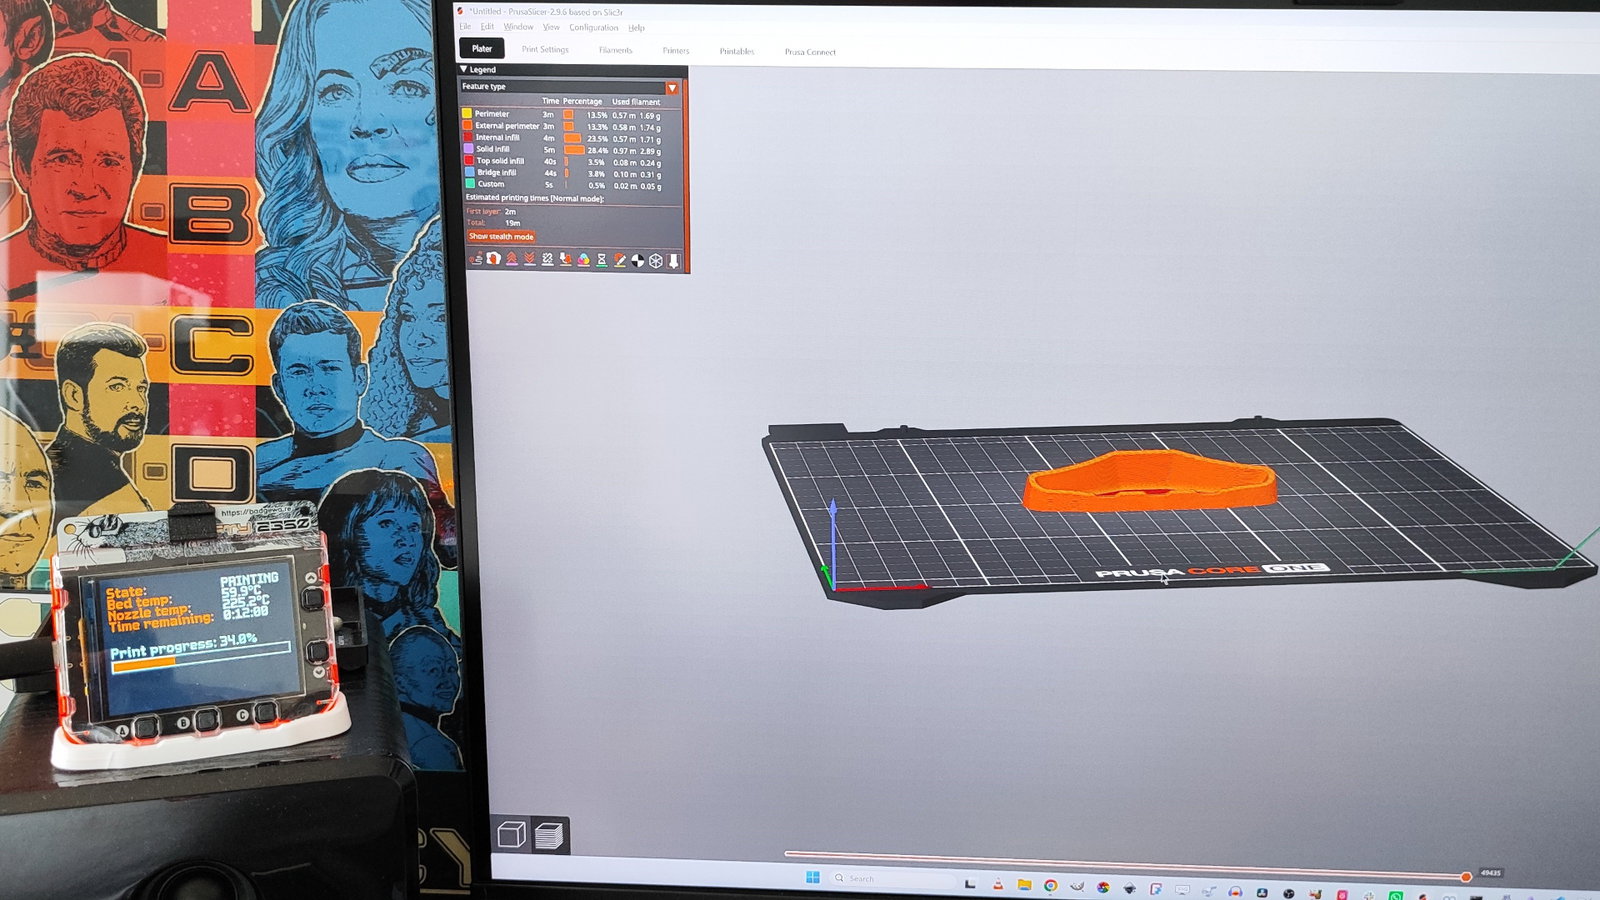
To test the code, we need a Prusa 3D printer, and something to print. We're printing one of our Badgeware stands in an orange PLA filament (not Prusa orange, sadly).
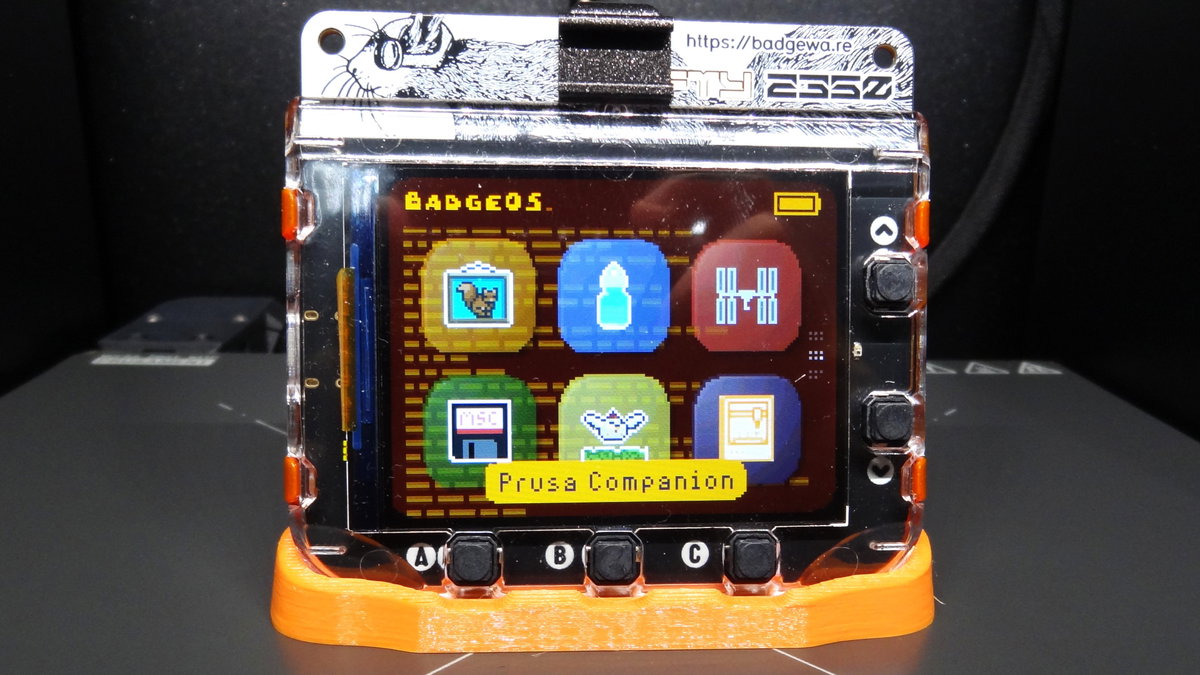
- On Tufty 2350, start the Prusa Companion app. The app will connect to your Wi-Fi and then show the idle screen. We can see the current printer status, bed and nozzle temperatures.
- Using PrusaSlicer, send the print to your Prusa 3D printer so that it is ready to print. PrusaSlicer will ask you to confirm that the print area is clear of debris, clean and everything is ready to print.
- The Printing status screen will appear as the 3D printer goes through a series of steps before printing.
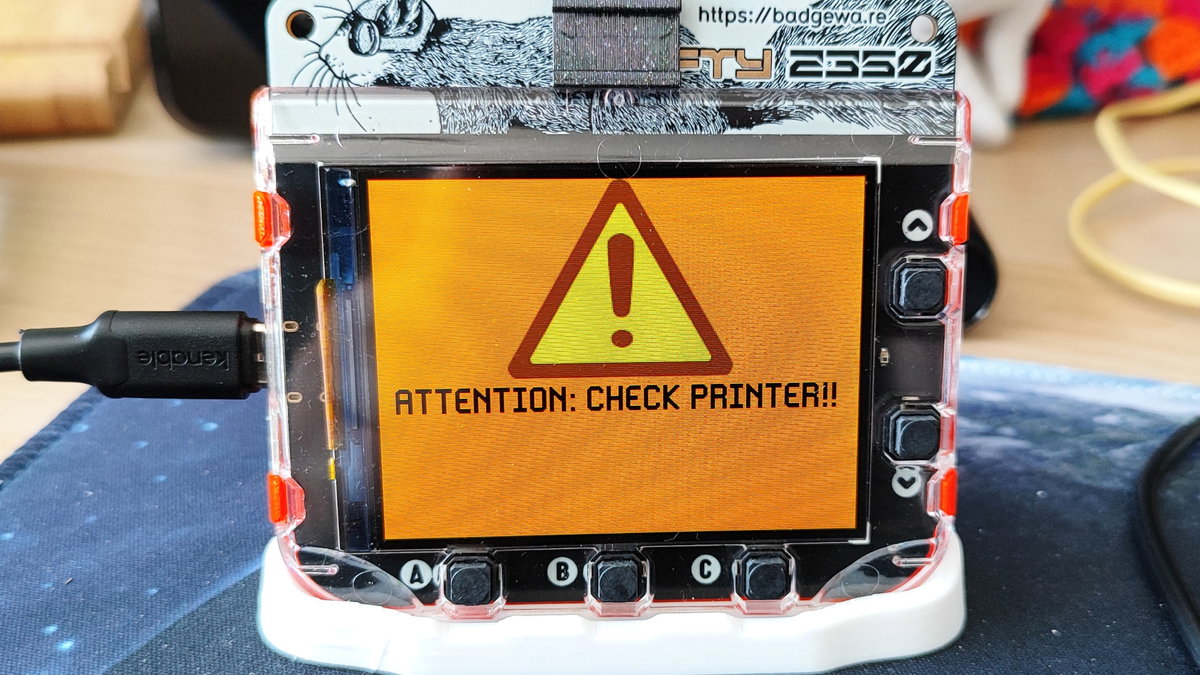
- You may see an `Attention`` screen advising of a firmware upgrade. This will trigger Tufty 2350 to direct the user to the printer.
- The printer will heat up the print bed, and we can see the temperature climb on Tufty 2350.
- The nozzle will heat up and this is visible in the app.
- The
Printingscreen will appear and show the progress of the print. The progress bar will update as the print continues.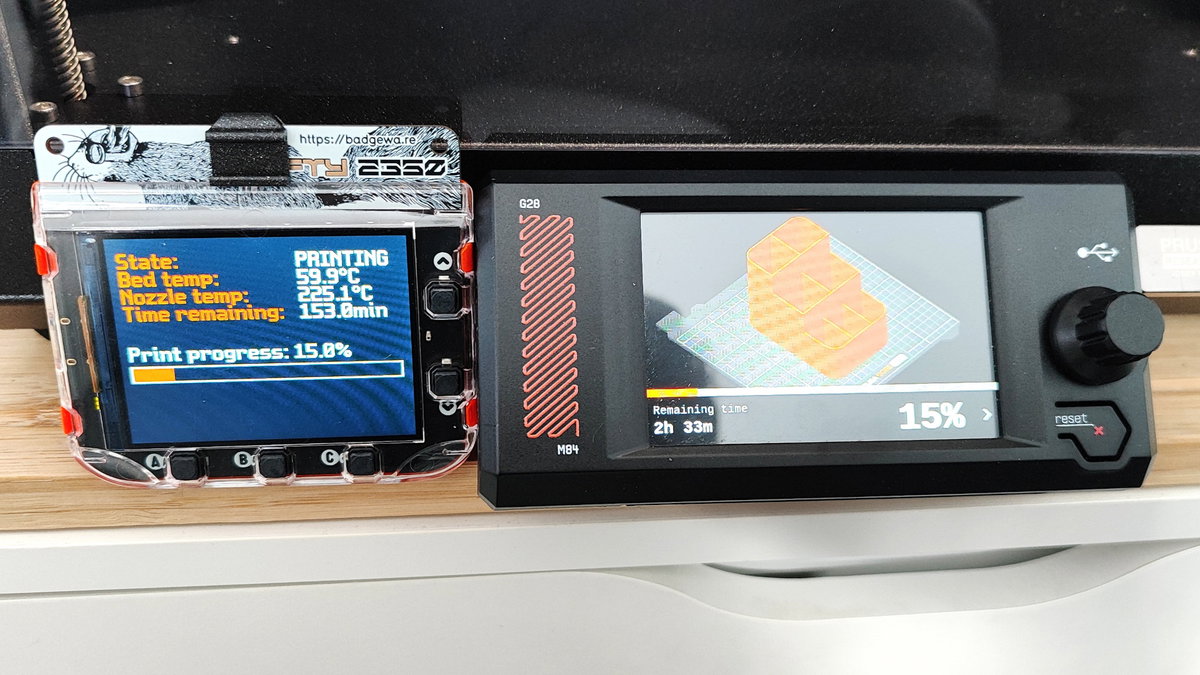
- You may see an `Attention`` screen advising of a firmware upgrade. This will trigger Tufty 2350 to direct the user to the printer.
- When the print is finished, the
Finishedscreen will appear. To exit this screen we need to press the dial in, and then pressHOME.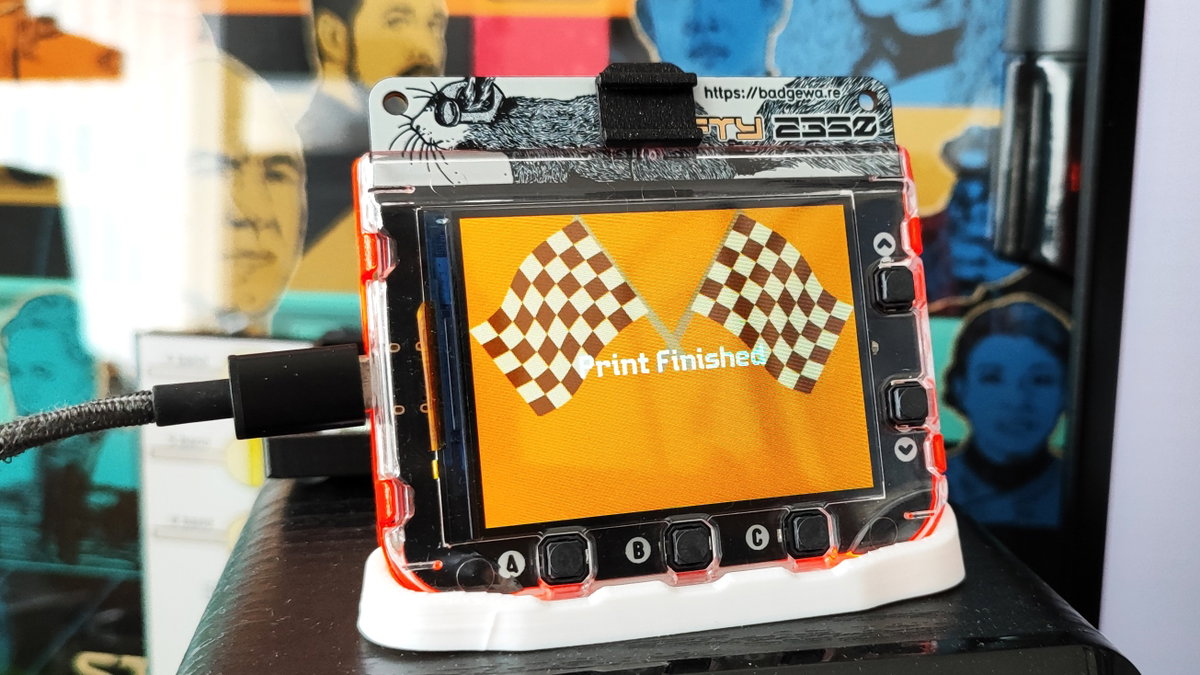
- The Prusa Companion app will now revert to the idle status display.
Complete Code Listing
import wifi
import secrets
import time
from datetime import timedelta
import fetch

badge.mode(HIRES | VSYNC)

wifi.disconnect()
while not wifi.connect():
    badge.caselights(1)
    time.sleep(0.1)
    badge.caselights(0)
    time.sleep(0.1)

print("Connected! IP address:", wifi.ip())
badge.caselights(1)

PRINTER_IP = "192.168.0.187"
status = fetch.url(
    f"http://{PRINTER_IP}/api/v1/status",
    every=1,
    headers={"X-Api-Key": secrets.API_KEY},
)

ORANGE = color.rgb(252, 109, 9)
WHITE = color.rgb(255, 255, 255)
BLACK = color.rgb(0, 0, 0)

STATE_SCREENS = {
    "FINISHED": {
        "asset": "/assets/finish.png",
        "rect": (0, 0, 320, 158),
        "msg": "Print Finished",
        "pen": WHITE,
        "alpha": 127,
    },
    "ATTENTION": {
        "asset": "assets/atten.png",
        "rect": (85, 0, 150, 131),
        "msg": "ATTENTION: CHECK PRINTER!!",
        "pen": BLACK,
    },
    "STOPPED": {
        "asset": "assets/stop.png",
        "rect": (85, 0, 150, 131),
        "msg": "PRINT STOPPED",
        "pen": BLACK,
    },
    "PAUSED": {
        "asset": "assets/pause.png",
        "rect": (85, 0, 150, 131),
        "msg": "PRINT PAUSED",
        "pen": BLACK,
    },
    "BUSY": {
        "asset": "assets/busy.png",
        "rect": (85, 0, 150, 131),
        "msg": "PRINTER BUSY",
        "pen": BLACK,
    },
}


def draw_bar(value):
    bar_width = screen.width - 20
    bar_height = 20
    bar_x = (screen.width // 2) - (bar_width // 2)
    bar_y = (screen.height // 1.5) - (bar_height // 1.5)
    border = 2
    # value is 0-100
    screen.pen = color.black
    screen.rectangle(0, 0, screen.width, screen.height)
    screen.pen = color.white
    screen.rectangle(bar_x, bar_y, bar_width, bar_height)
    screen.pen = color.black
    screen.rectangle(bar_x + border, bar_y + border,
                      bar_width - border * 2, bar_height - border * 2)
    fill_width = int((bar_width - border * 2) * (value / 100))
    if fill_width > 0:
        screen.pen = color.rgb(252, 109, 9)
        screen.rectangle(bar_x + border, bar_y + border,
                          fill_width, bar_height - border * 2)
    screen.pen = color.white
    screen.text("Print progress: {}%".format(value), bar_x, bar_y - 30)


def draw_idle_screen(printer_state, temp_bed, temp_nozzle):
    screen.pen = ORANGE
    screen.text("State:", 10, 10)
    screen.text("Bed temp:", 10, 30)
    screen.text("Nozzle temp:", 10, 50)
    screen.pen = WHITE
    screen.text(printer_state, 150, 10)
    screen.text(f"{temp_bed}°C", 150, 30)
    screen.text(f"{temp_nozzle}°C", 150, 50)


def draw_printing_screen(printer_state, temp_bed, temp_nozzle, job):
    progress = job.get('progress', 0)
    draw_bar(progress)
    remain = job.get('time_remaining')
    if not isinstance(remain, int):
        remain = 0
    remain = timedelta(seconds=remain)
    screen.pen = ORANGE
    screen.text("State:", 10, 10)
    screen.text("Bed temp:", 10, 30)
    screen.text("Nozzle temp:", 10, 50)
    screen.text("Time remaining:", 10, 70)
    screen.pen = WHITE
    screen.text(printer_state, 200, 10)
    screen.text(f"{temp_bed}°C", 200, 30)
    screen.text(f"{temp_nozzle}°C", 200, 50)
    screen.text(f"{remain}", 200, 70)


def draw_status_screen(cfg):
    screen.pen = ORANGE
    screen.clear()
    sprite = image.load(cfg["asset"])
    has_alpha = "alpha" in cfg
    if has_alpha:
        screen.alpha = cfg["alpha"]
    screen.blit(sprite, rect(*cfg["rect"]))
    if has_alpha:
        screen.alpha = 255
    screen.pen = cfg["pen"]
    w, h = screen.measure_text(cfg["msg"])
    x = (screen.width - w) // 2
    y = (screen.height - h) // 2 if has_alpha else (screen.height + h) // 2
    screen.text(cfg["msg"], x, y)


def printer(data):
    try:
        screen.font = font.ignore
        print(data)
        printer_state = data['printer']['state']
        temp_bed = data['printer']['temp_bed']
        temp_nozzle = data['printer']['temp_nozzle']

        screen.pen = BLACK
        badge.clear()

        if printer_state in ("IDLE", "READY"):
            draw_idle_screen(printer_state, temp_bed, temp_nozzle)
        elif printer_state == "PRINTING":
            draw_printing_screen(printer_state, temp_bed, temp_nozzle, data.get('job', {}))
        elif printer_state in STATE_SCREENS:
            draw_status_screen(STATE_SCREENS[printer_state])
        badge.update()
    finally:
        pass

while True:
    if status:
        printer(status.json())
    time.sleep(1)