Building the noise:bit Noise Maker Kit
This tutorial will show you how to put your noise:bit Kit (also known as the noise:maker Kit) together.
With this kit you'll be able to complete a number of projects that we've written (on the included cards) for the noise:bit, including a simple piano, how to make odd noises, and a pass the lion game!
It should take about 30 mins to an hour, including sewing, to assemble the kit.
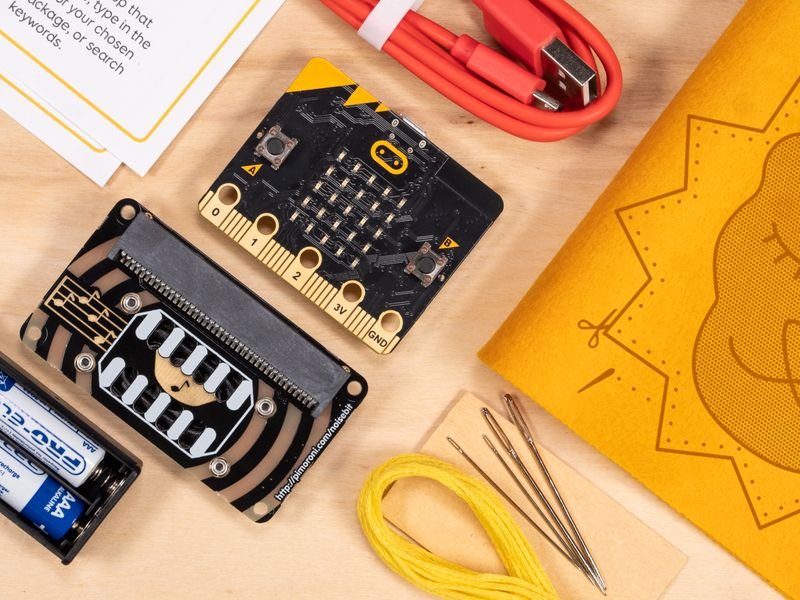
We've included simplified instructions with the kit, on the first of the printed cards, and sewing instructions on cards 7-8.
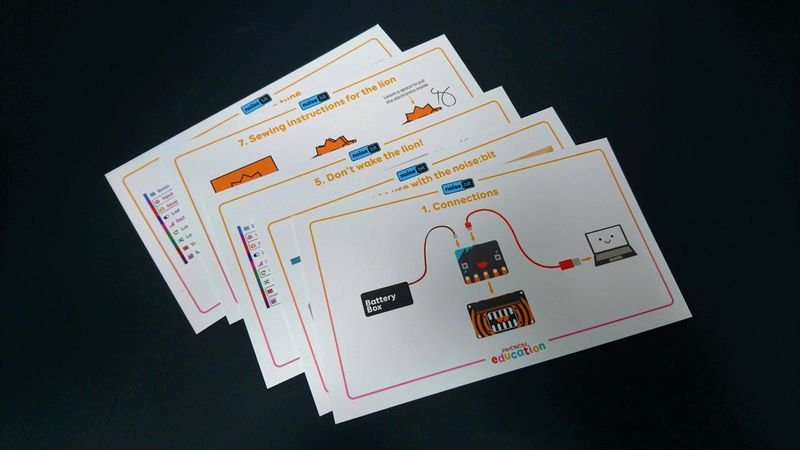
Connecting the electronic pieces
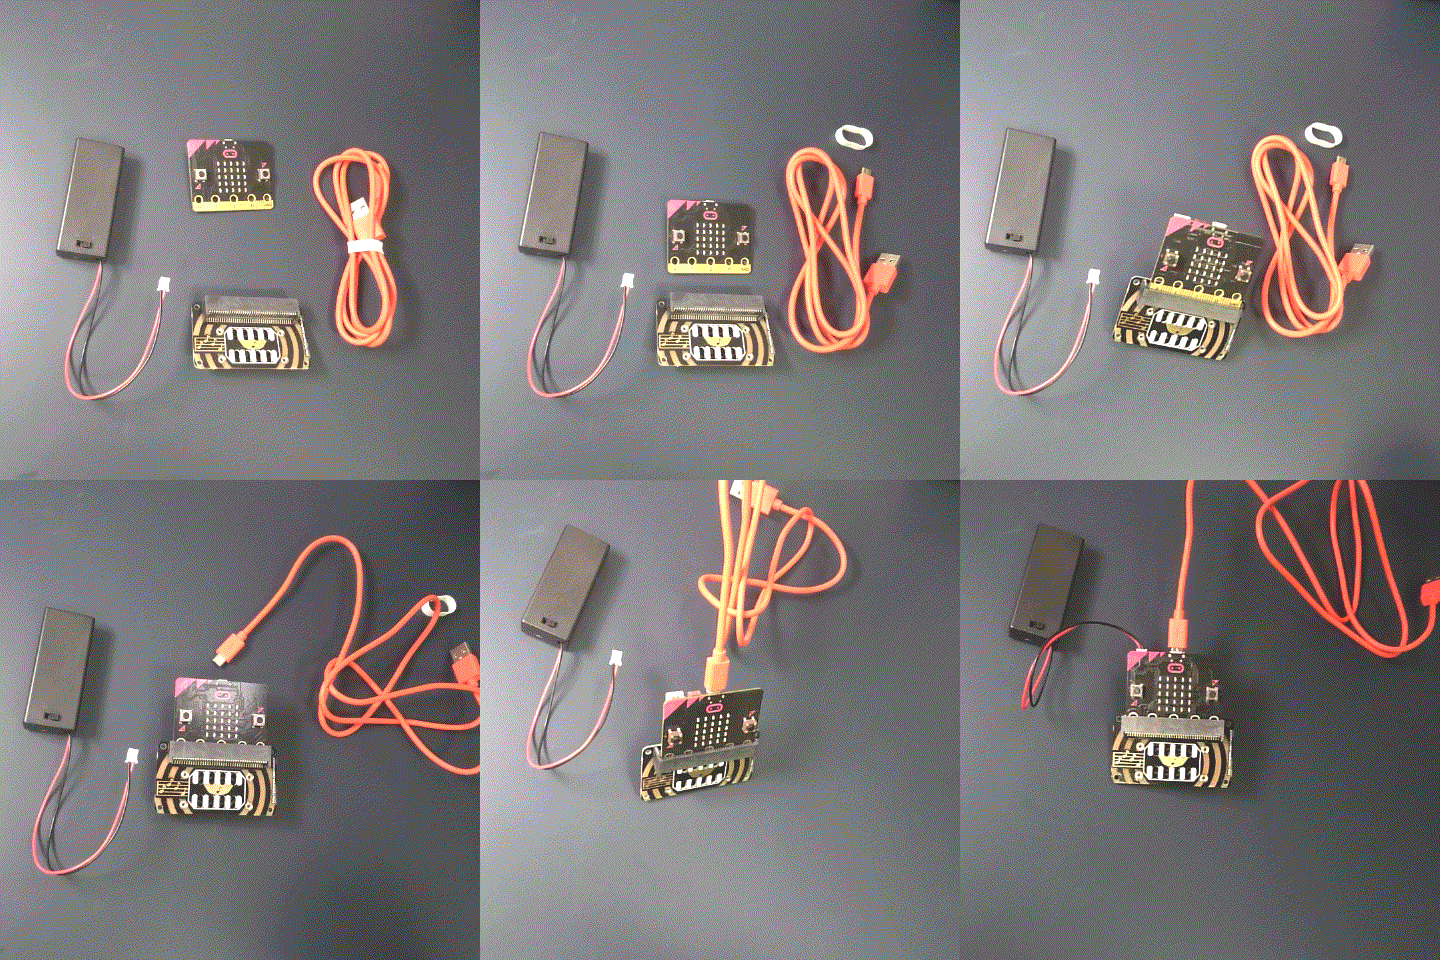
First, push the micro:bit into the slot in the black plastic of the noise:bit. If you look down it, you will see that there is one big slot that runs from side to side, and another that is blocked off by more plastic. You need to use the big slot. The LEDs and buttons on the micro:bit should be facing you, and the gold "mouth" on the noise:bit should be facing you.
To connect the microbit to the computer, use the silver connector on the top edge of the micro:bit and push the small end of the USB cable in. There is a curved and a straight side to help you get it the right way round. Plug the other end of the USB cable into your computer, and the micro:bit will show up as a USB drive.
If you want to run the micro:bit using batteries, connect the battery pack using the white connector on the top edge of the micro:bit. Turn the battery pack off using the switch on the battery box and/or disconnect it if you're using a computer to power the micro:bit.
Coding the micro:bit
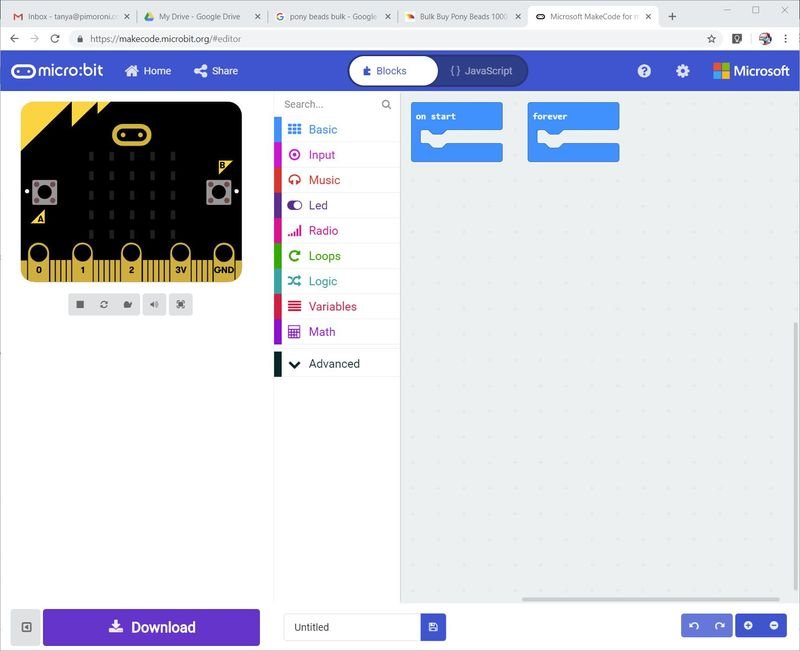
Card 2 has a brief overview of the block system used to code the micro:bit and, if you haven't used the system before, there are a lot of walk-through tutorials online. Just go to the MakeCode website and try them!
Sewing the lion
There are some instructions on cards 7-8, but if you want to do a fancy stitch like we used in the photos, here are some extra instructions.
First, place the front and back pieces together. The lion's face should be looking at you, and if you want to hide the back stitch guides, turn that piece to face you too.
Match up the spikes of the mane, and choose where the gap is going to be. You need to leave three "V's" open in order to fit the micro:bit and battery pack in comfortably. Check this before you start sewing!
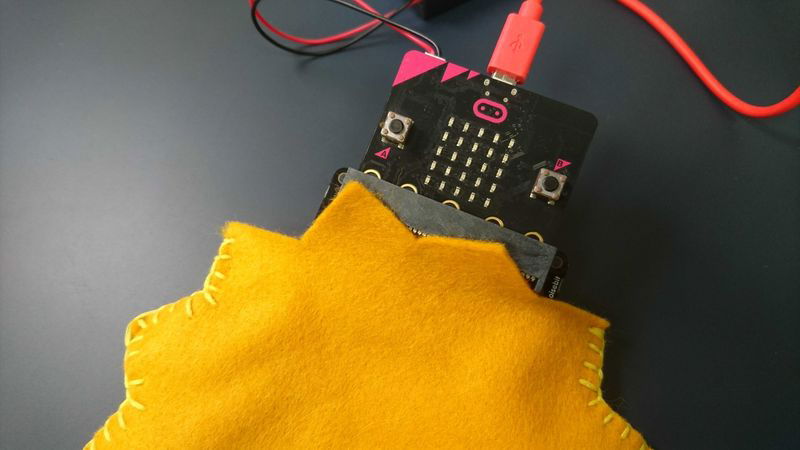
You can do a running stitch (in, out, in, out, all the way around) or you can do blanket stitch like in the photo above. Here are some instructions for blanket stitch.
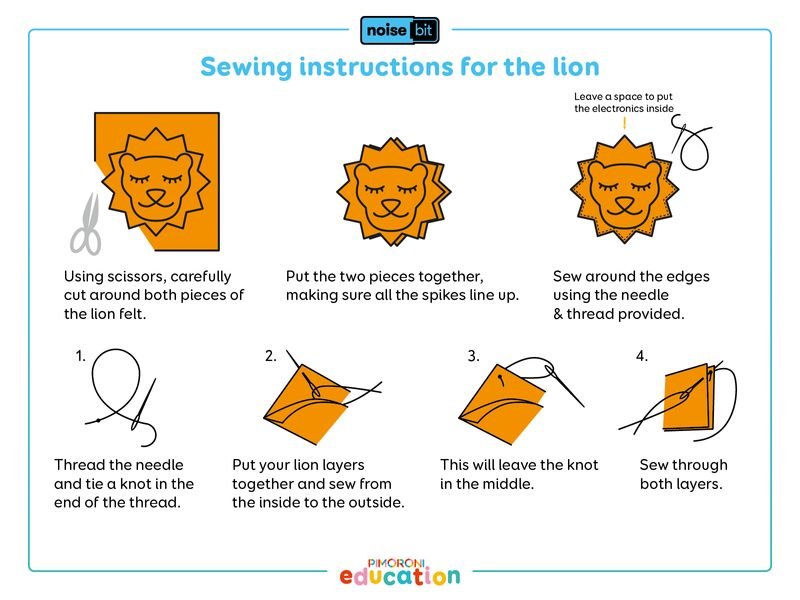
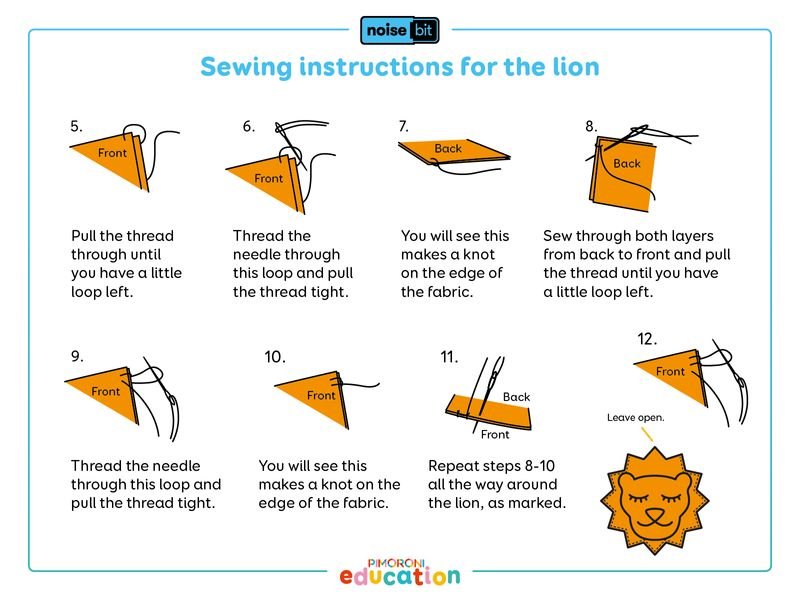
There are lots of videos on the internet on all kinds of stitches, pick one you like the look of!
Our top three:
- running stitch
- blanket stitch
- overcast or whip stitch
Now you've made your lion kit, have a go at some of the projects on the cards that came with it!
Search above to find more great tutorials and guides.