 Easy
Easy
Get the Latest News with Presto
Build a Presto newsreader that displays live RSS headlines, summaries, and scannable QR codes linking to each full story.
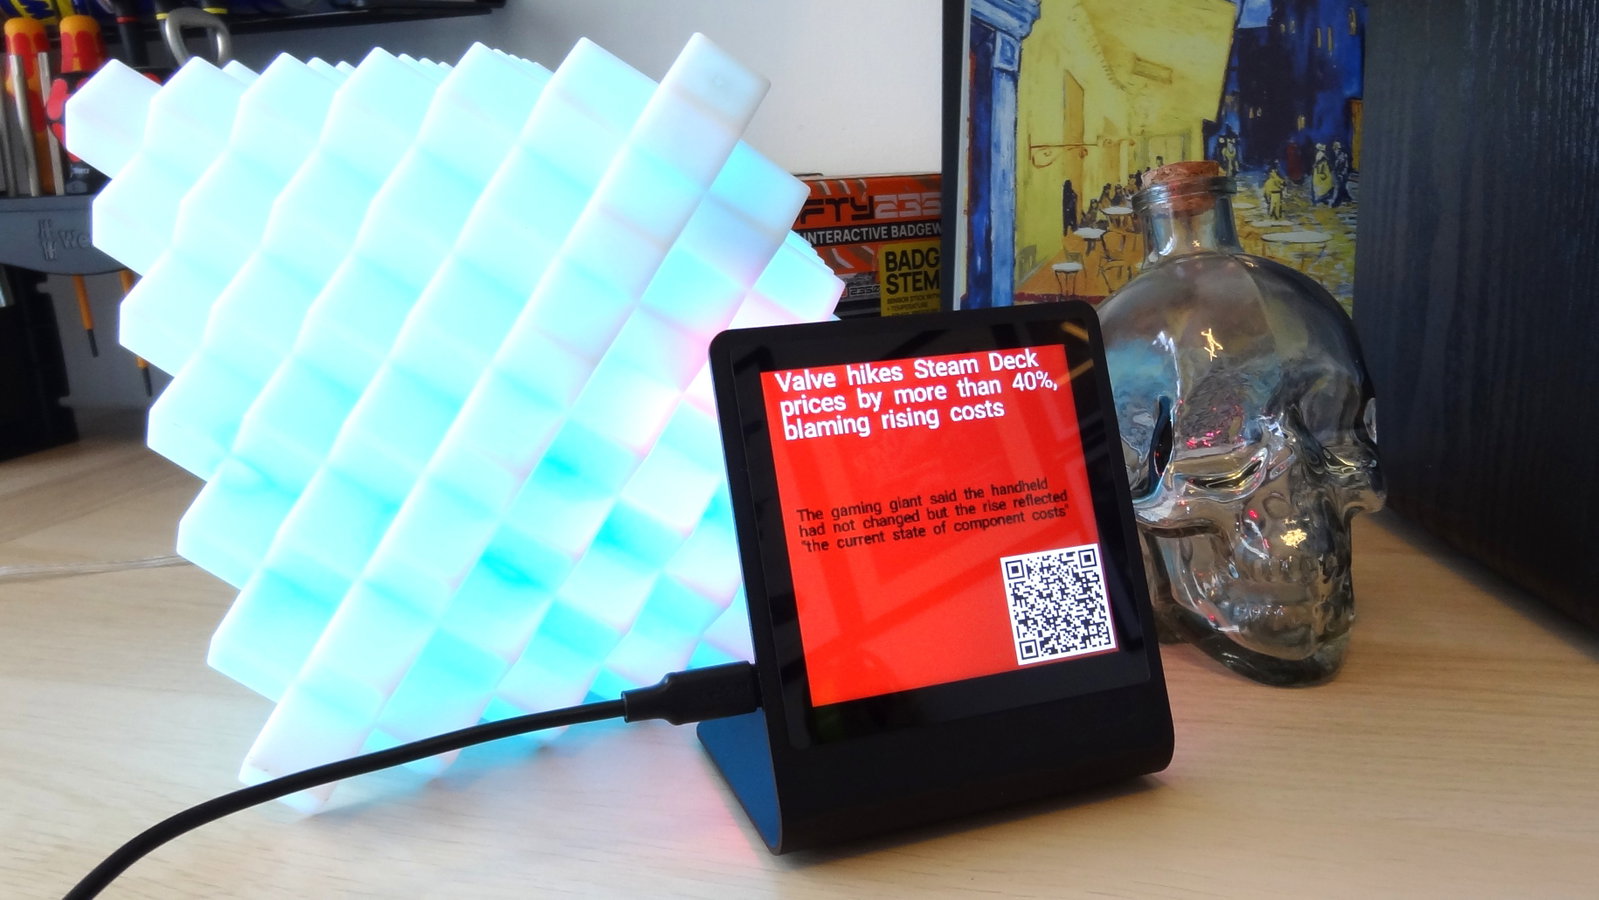
Bring the latest news direct to your desk, shelf or kitchen with this Presto powered news app. Using a little MicroPython code and access to an RSS feed, we will pull live headlines from a news source and display them on Presto's 4-inch touchscreen.
The project is essentially an RSS feed reader for your desktop. RSS (Really Simple Syndication) is a means for a website / news outlet to publish updates in a standard format that applications (such as RSS feed readers) can read without users needing to manually visit a site. The RSS feed is based on XML and at its simplest, it looks something like this.
<entry>
    <id>https://shop.pimoroni.com/products/15388206170491</id>
    <published>2026-05-27T15:16:59+01:00</published>
    <updated>2026-05-27T15:16:59+01:00</updated>
    <link rel="alternate" type="text/html" href="https://shop.pimoroni.com/products/flat-usb-c-to-usb-c-extension-cable"/>
    <title>Flat USB-C to USB-C Extension Cable</title>
    <s:type>Cable</s:type>
    <s:vendor>Generic</s:vendor>
    <description>Quality flat USB-C plug to socket extension cables with metal connectors. Available in 0.2m and 0.5m lengths. These flat, flexible USB-C cables support fast data transfer and are speedy enough to use as display cables. They also work great with our growing range of USB-C RP2040/RP2350 based microcontrollers!</description>
</entry>
We'll be using an external service to convert RSS to JSON (JavaScript Object Notation), which follows a similar structure to Python's dictionary object. While we can slice information from an RSS feed directly on the RP2350 of the Presto, this service is simpler and cleaner for a quick project. It provides us with a simple API (Application Programming Interface) that we can use to get the information directly from the feed with little or no friction as it follows the same principle as a dictionary. If you like the idea of using an API, we've got another API project, live London Underground status, based around our Badgeware board, Badger 2350. That project could also be converted for use on Presto.
What you'll need
- Pimoroni Presto
- A USB-C cable - either this USB-A one or this one works nicely if your computer has a USB-C port.
- A computer running Windows, macOS or Linux with Thonny installed
Coding the project
We'll be using Thonny for this project, and we therefore assume that you already know how to use this application.
Using a good quality USB-C data cable, connect Presto to your computer.
Open Thonny and click on Stop to force Thonny to reset the connection to Presto. Thonny should auto-detect your device. If not, got to Tools >> Options >> Interpreter and select Raspberry Pi Pico and for Port set it to Auto. Then, retry.
In Thonny, open secrets.py in a text editor and configure the SSID and password to match your network.
Create a new blank file (File >> New) and create two lines of comments that set the app icon, app name and a short description of the app. These two lines are there to setup the app in the launcher. We need to do a little more work on this later in the project.
# NAME News Feed
# DESC The latest news, direct to your Presto
Import a series of modules.
- requests: To send HTTP requests over a network.
- presto: This module handles interacting with the board.
- picovector: Used to draw onto Presto's screen.
- time: Control the pace / pause the code.
- qrcode: To generate QR (Quick Response) code images.
import requests
from presto import Presto
from picovector import PicoVector, ANTIALIAS_BEST
from time import sleep
import qrcode
Create an instance of the Presto class. This gives us access to all of the hardware that Presto has to offer.
presto = Presto()Using the instance, set the LEDS to ambient lighting. This will use the current screen colours to splash light behind Presto similar to some televisions.
presto.auto_ambient_leds(True)Create an object called display to make working with presto.display a little easier.
display = presto.displayCreate an instance for Picovector to use Presto's display and then set the screen to use the highest quality output, then set the line height to 80. This is enough to make compact and legible sentences.
vector = PicoVector(presto.display)
vector.set_antialiasing(ANTIALIAS_BEST)
vector.set_font_line_height(80)
Get the width and height of the display and save to corresponding variables.
WIDTH, HEIGHT = display.get_bounds()Setup the colour used in the app.
WHITE = display.create_pen(255, 255, 255)
BLACK = display.create_pen(0, 0, 0)
RED = display.create_pen(184, 0, 36)
Create a function to measure the QR code. This is used to ensure that the QR code isn't too big on the screen.
def measure_qr_code(size, code):
    w, h = code.get_size()
    module_size = int(size / w)
    return module_size * w, module_size
Create a function to draw a QR code onto the screen. The function takes four arguments: the X and Y offset used to position to QR code in the bottom right of the screen, the size of the QR code and finally the URL. Using a mixture of white and black rectangles, the QR code is created on the display. The white rectangle is three pixels larger than the QR code, to keep the image clear for scanning.
def draw_qr_code(ox, oy, size, code):
    qr_size, module_size = measure_qr_code(size, code)
    padding = 3
    display.set_pen(WHITE)
    display.rectangle(ox - padding, oy - padding, qr_size + padding * 2, qr_size + padding * 2)
    display.set_pen(BLACK)
    for x in range(qr_size // module_size):
        for y in range(qr_size // module_size):
            if code.get_module(x, y):
                display.rectangle(ox + x * module_size, oy + y * module_size, module_size, module_size)
Connect Presto to the network. This uses the details stored in the secrets.py file, which we completed in step 3.
wifi = presto.connect()Create a while True loop to run the main body of code and create an object feed to store the downloaded RSS data in an object using an online service. We've added two feeds here. The first is BBC News' top ten stories, the second are the BBC Technology stories. The latter is generally a more positive feed than the general news stream.
while True:
    #feed = requests.get("https://api.rss2json.com/v1/api.json?rss_url=https%3A%2F%2Ffeeds.bbci.co.uk%2Fnews%2Frss.xml")
    feed = requests.get("https://api.rss2json.com/v1/api.json?rss_url=https%3A%2F%2Ffeeds.bbci.co.uk%2Fnews%2Ftechnology%2Frss.xml")
Using a for loop set to iterate 10 times, set the font to Roboto-Medium-With-Material-Symbols.af and the font size to 22pt. This is for the headlines.
    for story in range(10):
        vector.set_font("Roboto-Medium-With-Material-Symbols.af", 22)
Using an object, item, convert and store the returned data in a JSON (Python dictionary) format, specifically the news story. You can also optionally print the title (headline) and the link (URL) to the Python Shell for debug purposes.
        item = feed.json()['items'][story]
        print(item['title'])  # Debug
        print(item['link'])   # Debug
Create an instance to produce a QR code using the URL stored in link.
        code = qrcode.QRCode()
        code.set_text(item['link'])
Clear Presto's display to a red background colour. This gives the app a more "news" look and feel.
        display.set_pen(RED)
        display.clear()
Set the text colour to white and then write the headline to the screen using the title from the returned feed. The 10 and 15 refer to the X and Y position on Presto's screen. We are 10 pixels in and 15 pixels down from the top left of the screen. The max_width option is there to stop the text going off screen.
        display.set_pen(WHITE)
        vector.text(item['title'], 10, 15, max_width=220)
Set the text colour to black, change the font to 14pt (smaller) and then write the content to the display. at lower position than the headline. This is the strapline / extra information on the story to hook the reader into wanting to know more.
        display.set_pen(BLACK)
        vector.set_font("Roboto-Medium-With-Material-Symbols.af", 14)
        vector.text(item['content'], 10, 110, max_width=220)
Using the pre-written function, draw the QR code in the bottom right of the screen. Set the size and position of the QR code using the variables.
        qr_size = 85
        offset_x = 160
        offset_y = 160
        draw_qr_code(offset_x, offset_y, qr_size, code)
Finally, update the screen to write the headline, strap and QR code to the display and then pause for 30 seconds to enable the user to read the text and scan the QR code.
        presto.update()
        sleep(30)
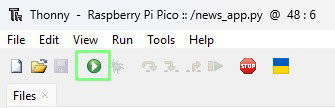
Save the code as news_app.py to the root (/) of Presto and click on the green play / run button to start the code. The app should connect to your Wi-Fi and after a few seconds the first story should appear. Then, every 30 seconds, the story will update. Scan the QR code with your smartphone and it will take you directly to the story.
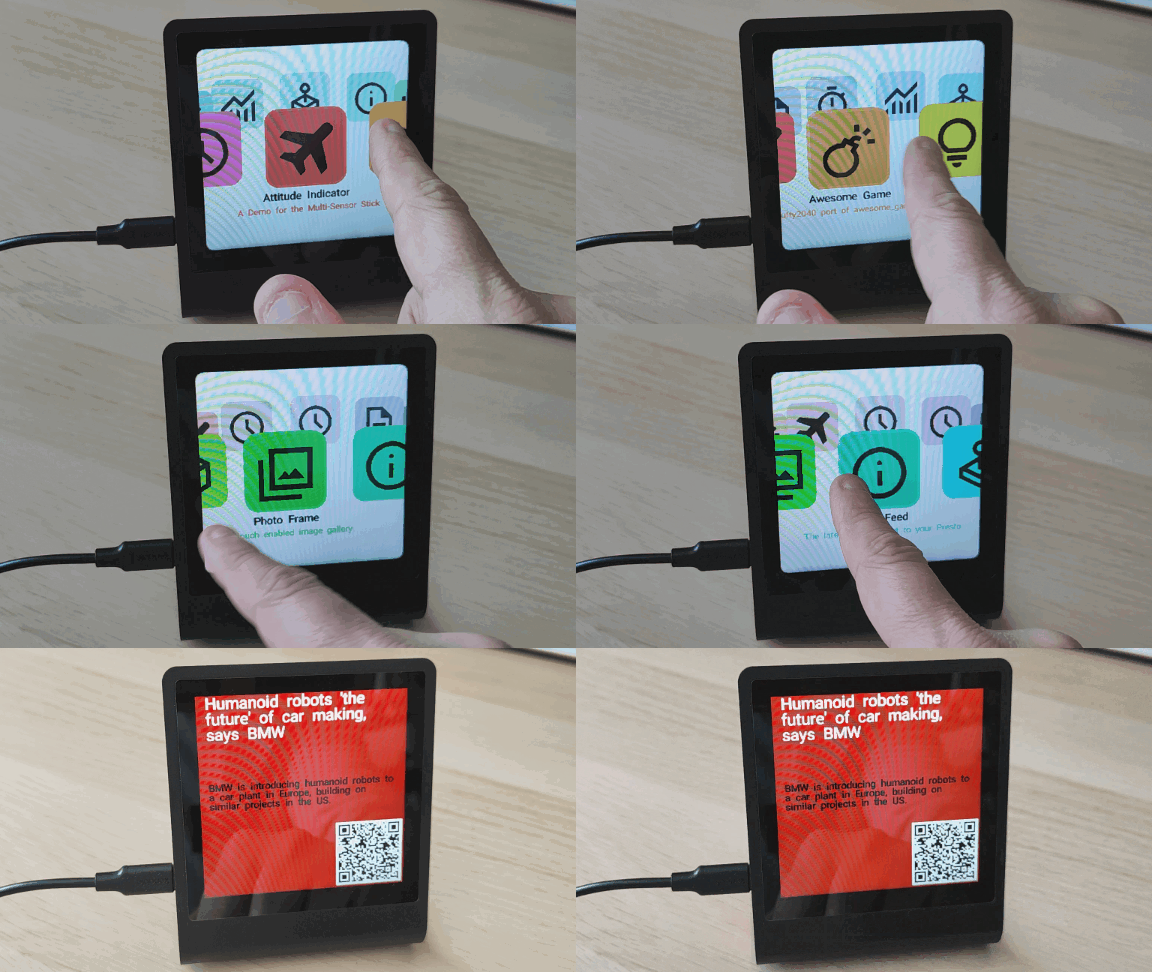
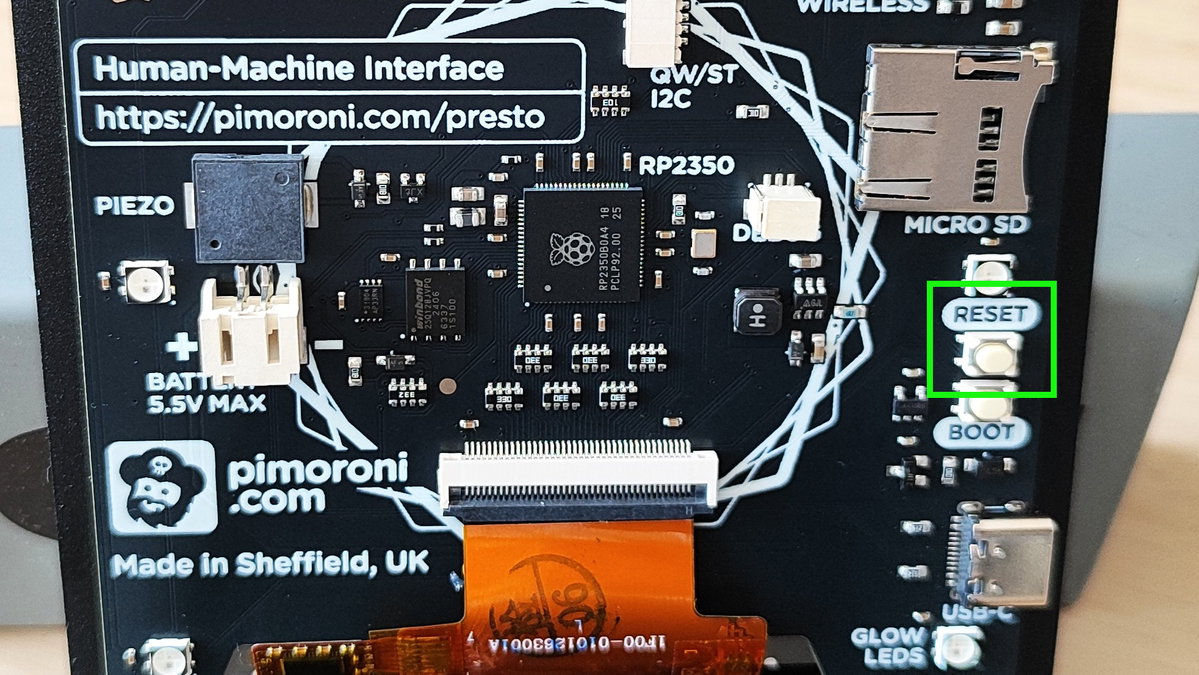
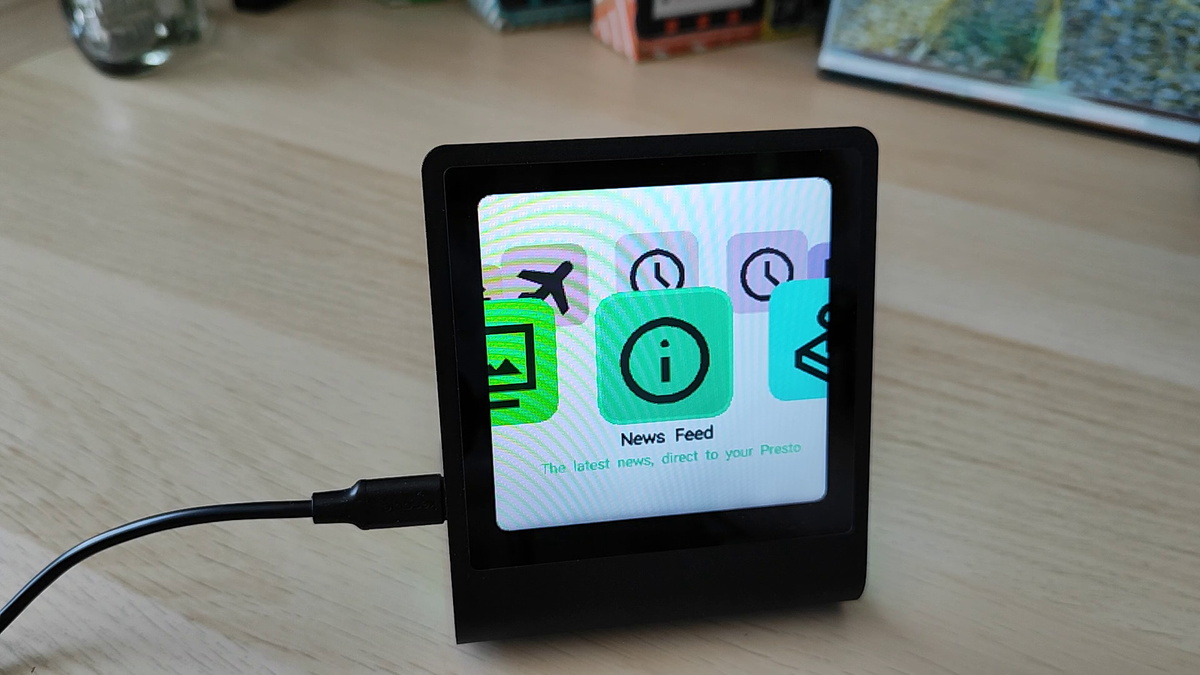
On the back of Presto, press Reset and swipe through the apps in the Presto launcher to the News Feed app and touch the screen to start. By doing this, we are testing that the app can be launched without the need for a computer, proving that it can passively display the news when put on a shelf / desk.
Adding News App to the launcher
By default, any .py file in the root of Presto's filesystem will appear in the launcher, but you will have noticed that there is no icon for the app. We need to give the app an icon, and you will remember that we included two lines of configuration in the code.
# NAME News Feed
# DESC The latest news, direct to your Presto
The icon is called "news" and in order to use it we need to open main.py on Presto and tweak the config.
In Thonny, press Stop to stop any running code and gain control of Presto.
On Presto, open main.py.
Scroll down to icons = { and after description, enter the following text.
"news": "\ue88e",The dictionary object "icons" should now look like this.
icons = {
 "travel": "\ue6ca",
 "bomb": "\uf568",
 "lightbulb": "\ue0f0",
 "deployed-code": "\uf720",
 "photo-library": "\ue413",
 "joystick": "\uf5ee",
 "monitoring": "\uf190",
 "timer": "\ue425",
 "description": "\ue873",
 "news": "\ue88e",
 "schedule": "\ue8b5"
}
Save main.py
Open news_app.py and at the very top, make a new line and enter this text and then click Save. This will link the app to the entry in main.py.
# ICON news
- Check that the top three lines look like this before moving onwards.
# ICON news
# NAME News Feed
# DESC The latest news, direct to your Presto
- Reset Presto and swipe to and then open the News Feed app. The News Feed app should now have an "information" icon that fits in with the launcher aesthetic.
What does the text in icons actually mean?
Icons is a dictionary, a storage object that has a key and a value. The key is the name of the app icon, and the value is stored after the : In this case it refers to a "code point" a unique numerical identification number. The icons are stored on the device in the 'Roboto-Medium-With-Material-Symbols.af' vector font file. Here is a table showing all of the available icons and their code points.
| Name | Code point | Icon |
|---|---|---|
| badge | ea67 |  |
| bomb | f568 |  |
| book_2 | f53e |  |
| casino | eb40 |  |
| check_box | e834 |  |
| cloud | e2bd |  |
| construction | ea3c |  |
| deployed_code | f720 |  |
| description | e873 |  |
| format_list_bulleted | e241 |  |
| help | e887 |  |
| image | e3f4 |  |
| info | e88e |  |
| joystick | f5ee |  |
| lightbulb | e0f0 |  |
| monitoring | f190 |  |
| photo_library | e413 |  |
| playing_cards | f5dc |  |
| rainy | f176 |  |
| schedule | e8b5 |  |
| school | e80c |  |
| science | ea4b |  |
| sunny | e81a |  |
| thunderstorm | ebdb |  |
| timer | e425 |  |
| travel | e6ca |  |
| water_full | f6d6 |  |
| weather_snowy | e2cd |  |
| wifi | e63e |  |
Complete Code Listing
# ICON news
# NAME News Feed
# DESC The latest news, direct to your Presto
import requests
from presto import Presto
from picovector import PicoVector, ANTIALIAS_BEST
from time import sleep
import qrcode

presto = Presto()
presto.auto_ambient_leds(True)
display = presto.display

vector = PicoVector(presto.display)
vector.set_antialiasing(ANTIALIAS_BEST)
vector.set_font_line_height(80)

WIDTH, HEIGHT = display.get_bounds()

# Setup the colours for the display
WHITE = display.create_pen(255, 255, 255)
BLACK = display.create_pen(0, 0, 0)
RED = display.create_pen(184, 0, 36)


def measure_qr_code(size, code):
    w, h = code.get_size()
    module_size = int(size / w)
    return module_size * w, module_size


def draw_qr_code(ox, oy, size, code):
    qr_size, module_size = measure_qr_code(size, code)
    padding = 3
    # Draw white background 3px larger than QR code on each side
    display.set_pen(WHITE)
    display.rectangle(ox - padding, oy - padding, qr_size + padding * 2, qr_size + padding * 2)
    display.set_pen(BLACK)
    for x in range(qr_size // module_size):
        for y in range(qr_size // module_size):
            if code.get_module(x, y):
                display.rectangle(ox + x * module_size, oy + y * module_size, module_size, module_size)

wifi = presto.connect()

while True:
    #feed = requests.get("https://api.rss2json.com/v1/api.json?rss_url=https%3A%2F%2Ffeeds.bbci.co.uk%2Fnews%2Frss.xml")
    feed = requests.get("https://api.rss2json.com/v1/api.json?rss_url=https%3A%2F%2Ffeeds.bbci.co.uk%2Fnews%2Ftechnology%2Frss.xml")

    for story in range(10):
        vector.set_font("Roboto-Medium-With-Material-Symbols.af", 22)

        item = feed.json()['items'][story]
        print(item['title'])  # Debug
        print(item['link'])   # Debug

        # Build QR code
        code = qrcode.QRCode()
        code.set_text(item['link'])

        # Clear display with red background
        display.set_pen(RED)
        display.clear()

        # Draw headline
        display.set_pen(WHITE)
        vector.text(item['title'], 10, 15, max_width=220)

        # Draw strapline
        display.set_pen(BLACK)
        vector.set_font("Roboto-Medium-With-Material-Symbols.af", 14)
        vector.text(item['content'], 10, 110, max_width=220)

        # Draw QR code in bottom-right corner
        qr_size = 85
        offset_x = 160
        offset_y = 160
        draw_qr_code(offset_x, offset_y, qr_size, code)

        presto.update()
        sleep(30)
What have we learnt?
- How to connect Presto to Wi-Fi.
- How to use an API with Presto.
- How to write text onto Presto's screen.
- How to draw vector images to Presto's screen.
- How to control pen, text and screen colours.
- How to generate a QR code containing a URL.
The news feed that you display is entirely your choice. You may favour serious news topics, business, politics, or just want a light-hearted stream of good stories direct to your Presto. Go to your favourite websites and look for RSS or the RSS logo.